How to Replace Armrest Base 1960-66 Pontiac Bonneville
Created on: 2011-10-05
How to repair, install, fix, change or replace a broken armrest base. This video applies to many 60's GM vehicles.
-
step 1 :Removing the Armrest
- Tilt the rear seat up
- Pull the seat forward and out
- Remove the three Phillips head screws from the armrest
- Pull off the armrest
- Remove the two Phillips screws from the bottom of the armrest
- Pull the ashtrays out of the armrest
- Pull the pad off the armrest
-
step 2 :Installing the Armrest
- Put the pad into the armrest
- Insert the two Phillips screws into the bottom of the armrest
- Put the armrest into place
- Insert the three Phillips screws into the armrest
- Put the ashtray into the armrest
- Put the rear seat into place
Brought to you by 1AAuto.com, your source for quality replacement parts and the best service on the Internet.
In this video, we're going to show you rear armrest base replacement. You can get a nice set of new chrome armrest bases from 1AAuto.com. We'll show you how to install them here. It is a pretty easy operation, especially on this four-door car. If your vehicle is a two-door, you probably will have to remove the rear seat, although you can probably usually get a shorter screwdriver up in there, but I'll show you all that anyways. These armrest bases fit many different early '60s to mid '60s GMs, whether it is a Pontiac, Chevy, Buick, Olds, and even some Cadillacs.
Okay, on these four-doors, this is pretty easy. You can see, right underneath, there's a Phillips screw there, a Phillips screw there, and one in the front right there. If your vehicle is a two-door, probably your rear seat is going to get in the way. On a two-door, you'll want to remove the rear seat. You do that by reaching in and pulling back. Once you pull back, you can pull the seat forward to the front. You pull the other side back and up, and you can pull the seat right out. I'm not going to pull it out on this vehicle though.
That front screw should look like that. There are two larger screws, Phillips head, and they look like that. Your pads are held in by a couple of Phillips screws. They should look like that, a little pan head style. Then your ashtrays, if you're going to swap them over, just pull right out of the armrest base. Then there's my pad off.
Here's my old armrest base and a nice new one from 1A Auto. It will go on there. It's going to be a nice finishing touch. It won't have all that faded scratchiness. Let's put our pad on here. Put one screw down in there and drop the other. Take and put my armrest piece back in place where it was, and put my screw through. Here I'm actually looking right through the hole where the ashtray is and you can see where that screw goes in and move the base around a little bit to get it to go in correctly. That's on there. Now let's finish it off with a nice new ashtray. If anybody gets into your old Pontiac or Chevy or Olds, Buick, they'll think they're sitting in a new car.
We hope this video helps you out. Brought to you by www.1AAuto.com, your source for quality replacement parts and the best service on the Internet. Please feel free to call us toll-free, 888-844-3393. We're the company that's here for you on the Internet and in person.
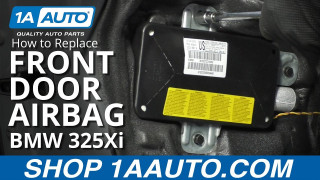
How to Replace Front Door Air Bag 1997-2006 BMW 325Xi
Watch this video to learn how you can replace the front door air bag on your 97-06 BMW 325 Xi and similar 3 Series models.
