How to Replace an EGR Valve 2001-05 Honda Civic
Created on: 2016-05-20
Check out this video from 1A Auto showing you how to replace the EGR valve on your 01-05 Honda Civic.
-
step 1 :Removing the Exhaust Gas Recirculation (EGR) Valve
- Disconnect the EGR wiring harness
- Remove the 12mm bolts from the EGR valve
-
step 2 :Installing the EGR Valve
- Clean any debris with a rag
- Use a razor blade or gasket scraper to remove any remaining material
- Vacuum up any residue
- Insert the EGR valve into place
- Tighten the 12mm bolts to the EGR valve
- Reconnect the wiring harness
Tools needed
-
Razor Blade / Gasket Scraper
12mm Socket
Rubber Vacuum Hose
Ratchet
Cloth Rags
Brought to you by 1AAuto.com, your source for quality replacement parts and the best service on the Internet.
Hi, I'm Mike from 1A Auto. I hope this how-to video helps you out, and next time you need parts for your vehicle, think of 1AAuto.com. Thanks!
In this video, we're going to show you how to replace an old, worn out or clogged EGR valve with a new one from 1AAuto.com. We'll be working on this 2003 Honda Civic. It will work the same for 2001 to 2005. You'll need a new EGR valve from 1AAuto.com, 12mm socket, ratchet extension, rag, razor blade, and a vacuum.
Locate your EGR valve on the passenger side of the engine. It's secured with two 12mm nuts on either side of the solenoid. Disconnect the electrical connector on the top of the solenoid. We're using a 1/4" drive socket, 12mm with an extension for a little bit more access.
If your bolts are really stuck, you could get in there with a universal joint and a 3/8" drive if you need a little more torque, but this managed to break them loose for us. Your exhaust gas recirculation valve has these ports on the bottom. One for the intake, and one for the exhaust.
When combustion temperatures inside the engine cylinders get too high, it can cause the production of harmful emission gases such as knocks. It can cause pre-ignition, which is when your air/fuel mixture sets off sooner than it's designed to. Pre-ignition can cause engine damage.
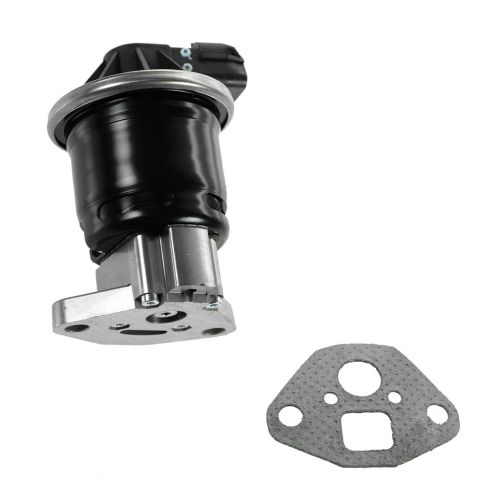
Your EGR allows a small amount of exhaust gases into the intake track to lower your combustion temperatures, keep the engine running smoothly, safely, and lower on emissions. Here, we have our old part, and here, we have our new part from 1AAuto.com.
As you can see, we have the exact same mounting location, the same five pin connectors, and the same exhaust and intake ports on the bottom of the valve. Our new part from 1A also comes with a new gasket. If your check engine light's on, and your engine has EGR related exhaust codes, a new EGR valve from 1AAuto is going to bolt right in, direct fit, and fix you up right.
If you have a bunch of debris built up behind your EGR valve, go ahead and get in there with a rag. Wipe some of that up. Be sure not to let anything spill into the opening of your EGR ports.
Use a razor blade or gasket scraper to remove the remaining material from the surface. To keep anything from falling into the ports, I'm going to put a vacuum cleaner close by. Lay your new EGR gasket into place. It's easiest to put the rear bolt in. Guide it in with the socket and ratchet. Get the bolt started. Using a 12mm socket, line up the other bolt. Bring the bolts down tight.
Reinstall your connector and you're good to go.
Thanks for tuning in. We hope this video helped you out. Next time you need parts for your car, please visit 1AAuto.com. Also check out our other helpful how-to and diagnosis videos.
Shop Products

How to Replace EGR Vacuum Modulator 1992-2001 Toyota Camry
Check out this video to learn how to replace the EGR valve vacuum modulator. 1A Auto shows you how to do it yourself!

