How to Replace Alternator 1999-2004 Volvo V70
Created on: 2019-07-05
Check out this video showing you how to replace the alternator on your 99-04 Volvo V70. 1A Auto helps you out with step by step instructions!
-
step 1 :Removing the Alternator
- Open the trunk floor lid, and remove the storage tray
- Remove the two 13 mm nuts securing the battery hold down
- Remove the battery hold down
- Remove the plastic battery cover
- Loosen the negative battery terminal with a 10 mm socket
- Disconnect the negative battery cable
- Open the hood
- Loosen the 7 mm upper radiator hose clamp
- Disconnect the upper radiator hose, allow it to drain, and move it aside
- Rotate the serpentine belt tensioner with a T55 socket and wrench
- Remove the serpentine belt from the power steering pulley and alternator pulley
- Remove the three 12 mm power steering pump bolts
- Move the power steering pump aside
- Remove the 12 mm top alternator mounting bolt
- Remove the two 12 mm lower alternator mounting bolts
- Loosen the two lower AC compressor bolts
- Tilt the alternator forward to remove it
- Disconnect the alternator electrical connector
- Remove the 13 mm nut securing the battery cable to the alternator
- Remove the battery cable from the alternator
-
step 2 :Installing the Alternator
- Set the alternator in place
- Reconnect the alternator electrical connector
- Reconnect the battery cable to the alternator
- Secure the battery cable with the 13 mm nut
- Install the top 12 mm alternator mounting bolt
- Install the two lower 12 mm alternator mounting bolts
- Reposition the power steering pump
- Reinstall the three 12 mm power steering pump bolts
- Twist the serpentine belt tensioner with the T55 socket and ratchet
- Reposition the serpentine belt and release the tensioner
- Reconnect the upper radiator hose
- Tighten the 7 mm radiator hose clamp
- Top off the coolant reservoir
- Reconnect the battery negative cable
- Replace the battery plastic cover
- Replace the battery hold down and secure it with the two 13 mm nuts
- Replace the trunk storage tray
- Close the trunk floor lid
- Run the vehicle until the radiator fan turns on and reaches operating temperature.
- Verify proper coolant level
Tools needed
-
12mm Socket
13mm Socket
Socket Extensions
7mm Socket
10mm Socket
Ratchet
T55 Torx Socket
Hi, I'm Mike from 1A Auto. We've been selling auto parts for over 30 years.
Hey, everyone. Sue here from 1A Auto. Today on our '03 Volvo V70 I'm going to show you how to replace the alternator. If you need that part or any other part for your car, click on the link below and head on over to 1AAuto.com.
First thing you're going to need to do is disconnect the battery, which is located in the trunk. Take out this little drawer you got. The battery is located right here. You're going to use a 13-millimeter socket and disconnect the, remove the top protector here. All this is is a hold down. It has a hook on this side and a slider that slides into a plastic way. Now we have a protector cover case. Lift that up. Then we have our battery. Negative and positive, and we're going to disconnect the negative. It's a 10-millimeter socket or wrench. Just back off on it enough. Just grab and wiggle that terminal off. Make sure it stays clear.
We're going to open the hood. The hood latch location is on the driver's side, the left leg kick panel. You reach in, and you feel a handle. See it. Just give it a pull. Open the hood. Latch is located in the center. I'm going to disconnect the upper radiator hose to the radiator, so that I can move that aside for a better access to the alternator. I have previously taken the head lamp out for another video, but we're just going to leave it out for a visual for you at home to see the alternator and the removal of it. You do not have to remove the head lamp to take the alternator out.
This is a seven-millimeter socket on this hose clamp from the European style hose clamp. I have a catch bucket underneath, so there is going to be some coolant coming out from disconnecting the top hose. I don't really need to drain the whole system. I just want to get the hose up and out of the way. With a T-55, I'm going to bring it down, put it in the actual tensioner, the adjuster right there. I'm going to pull down on it, so that I can move the actual serp belt. Pull it off the power steering pump and then let that bring your wrench up. We can actually leave the belt right there, if we wanted to. Now we can take it off the alternator.
Next, with a 12-millimeter socket I'm going to reach in through the pulley and dismount the power steering pump bracket. There are some nice little round cutout holes in the pulley, so that you can actually get onto the mount. There's three bolts, they're all 12-millimeter socket. The one on the bottom is going to be the hardest one to see. There we go. Once I've loosened those all out, I'll take my ratchet out of the way. Now I can just use the straight socket to get each bolt out.
We just have the last mounting bolt on the bottom that I'm taking out by hand. There we go. That's the last bolt. Now I can move the pump and just get it up out of the way. Pull the reservoir up, however you got to get it up out of there. Now you've got a clear shot at your alternator. You can see everything. I'm going to disconnect the top mounting bolt first. That's a 12-millimeter socket. It's pretty easy to get to. I'll just break that free. See, that's the top bolt.
The two lower alternator bolts are actually the two upper mounting bolts for the alternator. That's one of the lowers. There is the other lower bolt, both the same length. Always check that. Now I'm going to loosen up the lower two bolts on the AC compressor. Hopefully, I don't have to take them completely out, but we'll see. 12-millimeter socket, and I'm going to loosen up the two lower AC compressor bolts. Hopefully, I don't have to take them all the way out. I'm just trying to get enough movement, so that I can do that.
Just by loosening the lower mounting bolts on that AC compressor I'm now capable of moving this alternator completely out, giving myself enough room to disconnect the single prong wire back here and the battery cable. I'm going to do the battery cable first. 13-millimeter socket. I'm going to just connect the cable to the back of the alternator. There's no tab to pull out that wire. You just want to grab a good grip on it and pull it right out. Now we can pull the alternator right out and out of the way.
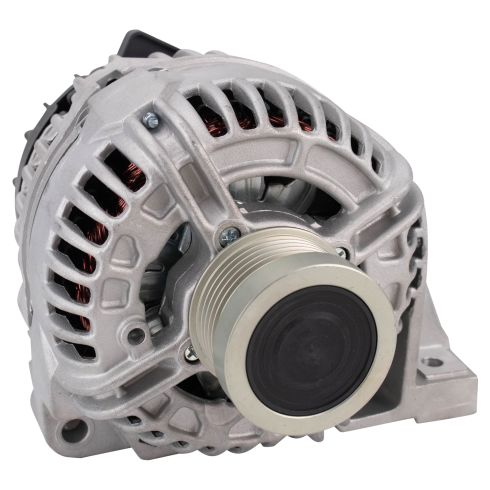
Here we have our new alternator from 1A Auto. Here's the one we took out. It has been changed. It is an aftermarket, so it has some numbers on it, you can see. The pulley is the same size as the one from 1A Auto. It's got the same amount of venting fins. You could see the regulator mounting on the back. This is where the positive wire connects. The one from 1A Auto gives a nut with an actual locking washer on it instead of the crush washer style. Regulator is there, mounting surface is the same. If you need this part or any other part for your car, click on the link below and head on over to 1AAuto.com.
Now I'm going to install my new alternator. I'm going to connect my single-wire connector, put it on that tab, and push it right in. I did a visual and made sure there was no burnt out connector. Now there's a nice cutout in the backing of the alternator for where this power wire sits. The positive wire sits flush right in there. The new nut that comes with our alternator has got a locking nut already part of locking washer, already part of the nut. Place that right on. Tighten it right down. That's a 13-millimeter socket. Now snug that right up, not too much. Perfect.
Now I can line up my mounting bolts. I'm going to put the bottom ears down behind the actual AC compressor, and that lines right up. Bring it right in. I'm going to put the top mounting bolt on first because I want that to help line up the lower bolt. This whole alternator, this whole bracket right here, it's for the alternator and the AC. It lines right up. Thread that bolt in. You might have to lift it up. You'll feel the threads, yeah. I caught them, that's great. Now I can put the two lower bolts in. They're going to go through the AC compressor back right through the bracket of the alternator and into aluminum housing. Same for this one. I have to lift this up. There we go. Make sure you start everything by hand especially if you're going to use air.
We're ready to go. 12-millimeter socket, let's tighten it up. I'm going to do everything by hand first. Get that bolt right down to the bottom and out. Okay, that's bottomed out. You want to bottom out the bottom ones prior to tightening anything. Now I'm ready to tighten all my bolts back up. I'm going to start from the bottom of the AC compressor, those two mounting bolts. I'm just going to bottom them out and then turn it on a quarter turn. Top mount of the AC, which is the lowest mount for the alternator and the front-mounting bolt. They sure did make it easy by everything being a 12-millimeter socket.
On the pulley for the power steering pump, it has those cutouts. That's how we took it out, so I'm going to line up my top bolt first, make it a little bit easier on myself. I'm not going to tighten it. I'm just going to snug it up and then put the other two in. Now we're going to tighten up all three mounting bolts for that power steering pump, 12-millimeter socket. Snug them. Bottom them out. Snug it. All right, let's put the belt on.
Now I've routed my belt in the correct routing, put my T-55 back into the tensioner. I'm going to pull down on that tensioner and hope that the belt doesn't come off of anything. I can try to guide it up and around the power steering pulley first, maybe get some slack out of it, so I can ratchet some more. Now I've got to reroute everything on the pulleys, and miraculously, use the tool at the same time. Let's see if I can get it to go around the power steering now. I did it. Okay. I just want to reset it on the tensioner. It's not right in the center. There we go. Now with a flashlight make sure it's on all the pulleys. Give it a good visual down there. Make sure it's in the groove, not off by one tooth. Everything looks great. Now I'm going to reconnect my top radiator hose. That was a seven-millimeter socket.
All right. Now after disconnecting the upper hose and some coolant loss, I'm going to just top it off. Don't forget to run it, bring it to full temp. Let the fans come on and confirm that the coolant is at the proper level. Now after I've put the alternator in I took my multi-meter, and I just hooked it up to my battery to make sure that I was putting out proper voltage. I'm within spec. Now we're ready to drive it. We're ready to install the negative back on our battery. I'm just going to place it down on the post. Make sure it's all the way down. 10-millimeter, we'll tighten that up again. Let's put the safety cover on.
Now we can put the pull down bracket on. You can see this cutout. There's supposed to be a bolt here and there wasn't when I took this apart. If you had this vehicle with this bolt, that has to come off. We'll obviously take this hold down bracket off, but we do have the two mounting nuts for this side. We'll put that down. Take my 13-millimeter socket, and we'll tighten that up. Okay. Put the shelf back. This has the little lock tabs. Line the key ways up internal.
Thanks for watching. Visit us at 1AAuto.com for quality auto parts, fast and free shipping, and the best customer service in the industry.
Shop Products
Volvo C70 S60 S70 V70 Alternator TRQ ALA94455
Part Details:
- Yes
- 12 VDC
- Serpentine
- 120 A
- 6
- Yes
- 37 mm
- Clockwise (Right)
- No
- Internal
- Yes
- No
- 82 mm
- BOSCH
- 3.23 in
- 1.46 in

How to Replace Alternator 2005-10 Chevy Silverado
Watch this video from 1A Auto to learn how to replace the alternator in your 05-10 Chevy Silverado.
