How to Replace Alternator 2006-10 4-6L V8 Ford Explorer
Created on: 2017-05-03
How to repair, install, fix, change or replace a broken or bad alternator on 06 Ford Explorer.
-
step 1 :Disconnecting the Battery
- Loosen the negative battery cable clamp with a 13mm socket and ratchet
- Disconnect the negative battery cable
- Set the negative battery cable aside
-
step 2 :Removing the Air Intake
- Loosen the air intake hose clamp with a flat blade screwdriver
- Disconnect the breather lines from the air intake
- Loosen the throttle body hose clamp with a flat blade screwdriver
- Pull the intake hose up and off
-
step 3 :Removing the Serpentine Belt
- Familiarize yourself with the belt routing diagram
- Connect a 1/4" drive ratchet to the serpentine belt tensioner
- Turn the tensioner clockwise with the ratchet
- Pull the belt off one of the pulleys
- Carefully release the tensioner
- Remove the ratchet from the tensioner
- Remove the serpentine belt from under the A/C compressor pulley
- Pull the belt over the tensioner
- Remove the belt from the crankshaft and water pump pullleys
- Remove the belt from the grooved idler pulley and the power steering pump pulley
- Pull the belt out of the engine bay
-
step 4 :Removing the Throttle Body
- Disconnect the throttle position sensor electrical connector
- Disconnect the throttle stepper motor electrical connector
- Remove the four 8mm bolts from the throttle body
- Pull the throttle body off the intake manifold
-
step 5 :Removing the Alternator
- Pry the wiring harness retainers off the alternator with a trim tool or flat blade screwdriver
- Remove the two 8mm bolts from the alternator bracket
- Remove the two 10mm bolts from the alternator bracket
- Remove the bracket from the alternator
- Remove the two 13mm nuts from the bottom of the alternator
- Pull the alternator forward
- Disconnect the alternator electrical connector
- Remove the 10mm nut from the alternator power stud
- Pull the power terminal off the alternator
- Lift the alternator out of the engine bay
-
step 6 :Installing the Alternator
- Lower the alternator into the engine bay
- Connect the alternator electrical connector
- Connect the power terminal to the power stud
- Fasten the 10mm nut onto the power stud
- Line up the alternator on its studs
- Line up the bracket on the alternator
- Insert the two 8mm bolts into the bracket
- Start the two 10mm bolts into the bracket
- Fasten the two 13mm nuts onto the alternator studs
- Tighten the two 10mm bolts
-
step 7 :Installing the Throttle Body
- Press the throttle body gasket into its channel
- Line up the throttle body on the air intake
- Insert the four 8mm bolts for the air intake
- Torque the four 8mm bolts to 89 inch-pounds
- Connect the throttle position sensor electrical connector
- Connect the throttle stepper motor electrical connector
-
step 8 :Installing the Serpentine Belt
- Loop the belt around the crankshaft pulley
- Bring the belt between the tensioner and A/C compressor pulleys
- Bring the belt over the water pump pulley
- Bring the belt under the grooved idler pulley and the power steering pump pulley
- Connect a 1/4" drive ratchet to the serpentine belt tensioner
- Turn the tensioner clockwise with the ratchet
- Bring the belt over the alternator pulley and under the smooth idler pulley
- Carefully release the tensioner
- Remove the ratchet from the tensioner
- Check that the belt is routed properly
-
step 9 :Installing the Air Intake
- Line up the air intake hose
- Connect the breather lines to the intake hose
- Tighten the two hose clamps with a flat blade screwdriver
-
step 10 :Connecting the Battery
- Connect the negative battery cable to the terminal
- Tighten the negative battery cable clamp with a 13mm socket and ratchet
Tools needed
-
Socket Extensions
Flat Blade Screwdriver
Torque Wrench
1/2 Inch Ratchet
Trim Tool Set
Hi, I'm Mike from 1A Auto. We've been selling auto parts for over 30 years. We're dedicated to delivering quality auto parts, expert customer service, fast and free shipping, all backed by our 100% satisfaction guarantee. Visit us at 1AAuto.com, your trusted source for quality auto parts.
In this video, we're going to be working with our 2006 Ford Explorer 4.6L V8. We're going to show you how to remove and replace your vehicle's alternator. If you like this video, please click subscribe. We have a ton more information on this and many other vehicles. If you need parts for your car, you can follow the link down the description over to 1AAuto.com. Here are the items you'll need for this repair.
Using a 13mm socket and ratchet, loosen the clamp on the ground side of the battery and remove it. You want to isolate it off to the side somewhere where there's no risk of it getting back onto the battery while you work.
Loosen the clamp on the air box side of the intake duct with a flat blade screwdriver. You'll then want to disconnect the breather lines. There's a little green tab here that you just pull back and pop them off. You'll then need to undo the clamp on the throttle body. You'll then want to remove the intake duct.
For some jobs like your alternator or idler pulleys, it may not be necessary to remove the belt fully. However, if the pulley has been dragging from a bad bearing or a weak alternator, it's probably damaged your belt a bit too and it's not a bad idea to replace it while you're in here.
Using a 1/2" drive ratchet, place it into the square drive of the serpentine belt tensioner and rotate the tensioner clockwise to release pressure and remove the belt from one of the pulleys. It's usually easiest to do this from a smooth pulley. Then carefully release tension and remove your ratchet. Remove the serpentine belt from under the A/C compressor and then pull the loop up and through over your tensioner. You'll then want to get it out from under the crack where it loops over the water pump. You've already unhooked it from the idler pulley on this side so loop it out from the grooved idler pulley and the power steering pump and remove your belt.
Disconnect the throttle position sensor. To do this you'll need to remove the red lock tab on the connector. Then push down to release the plug. On the opposite side, we'll remove the connector to the stepper motor that operates the throttle. Remove the four 8mm bolts securing the throttle body to the intake manifold. When the bolts are out, remove the throttle body from the vehicle.
Pop off the harness retainers going along this brace over the alternator. You can use a trim tool or flat blade screw driver to do this. We'll then remove the two 8mm bolts with an 8mm socket, ratchet, and extension. We'll then remove the two 10mm bolts. We'll then remove the entire stiffening bracket from the vehicle. Then remove the two 13mm nuts at the bottom of the alternator with a 13mm socket and ratchet. We'll then pull the alternator forward and rotate it until we can access the connectors on the back. We'll then unplug the black connector at the top and undo the 10mm nut and the power stud. Remove the power terminal and remove the alternator from the vehicle.
Reinstall your alternator. Reconnect the connector as well as the power stud and the 10mm nut. Rotate the alternator back down onto its studs. Reinstall the stiffener bracket as well as the two 8mm and two 10mm bolts. We'll tighten the 8mm bolts but we're only going to leave the two 10s in and tight for now. Reinstall the two 13mm nuts at the bottom of the alternator. We'll tighten those down as well with a 13mm socket and ratchet. You can now tighten the two 10mm bolts.
Reinstall the throttle body and the four 8 mm bolts. Torque these bolts to 89 inch-pounds. Make sure the clip is in the throttle position sensor connector. Plug it in and push the tab back down to engage it, and reconnect the stepper motor on the throttle body.
Now reinstalling the serpentine belt on this is going to be pretty difficult to show. You want to start with a loop and send it down and around the crank pulley. Now you're going to take the passenger side of the belt and bring it down between the tensioner and the A/C compressor at the bottom of the motor. With the right side of the belt, you're going to go up and over the water pump pulley all the way to the button of the motor on the driver side, where you'll go under the grooved idler pulley, as well as under the power steering pump pulley. Install your 1/2" drive into the tensioner and rotate it clockwise to release the belt tension. It's usually easiest to get over the alternator, then move your hand to the other side of the engine and go under the smooth idler pulley on the driver side, and then just use a light or your hand to check the belt path and make sure that everything went over and under all the pulleys currently and that it isn't hung up anywhere.
Reinstall the intake duct and pop on the two breather connections, then tighten it down with a flat blade screwdriver.
Reconnect the negative battery terminal and tighten it down with a 13mm socket and ratchet.
Thanks for watching. Visit us at 1AAuto.com for quality auto parts, fast and free shipping, and the best customer service in the industry.
Shop Products
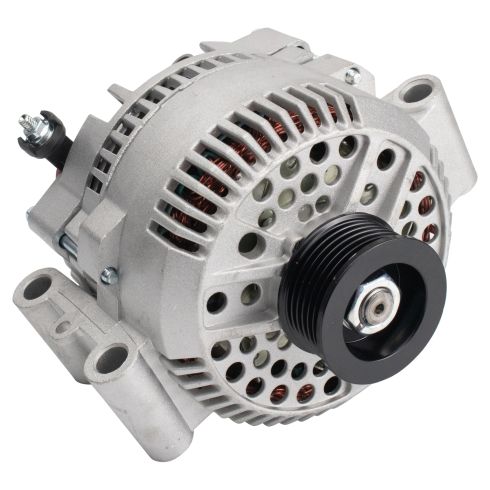
Ford Mazda Mercury Alternator TRQ ALA94465
Part Details:
- Yes
- 115 A
- 12 VDC
- Serpentine
- 6
- 60 mm
- Clockwise (Right)
- No
- No
- Internal
- Yes
- No
- 39.6 mm
- DELCO
- 1.57 in
- 2.36 in

How to Replace Alternator 2011-17 Toyota Camry
How to repair, install, fix, change or replace a broken or bad alternator on 11, 12, 13, 14, 15, 16, 17 Toyota Camry
