How to Replace Air Filter 2006-13 BMW 325Ci E46
Created on: 2018-07-23
How to repair, install, fix, change or replace a dirty, dusty or clogged air filter on 06 BMW 325 ci E46
-
step 1 :Removing the Air Filter
- Pry up the center piece on the clips on the intake with side cutters
- Lift the clips up and out of the air intake duct
- Press the tabs and slide the intake piece out
- Unclasp the five clips from around the airbox
- Lift the airbox cover
- Remove the air filter
-
step 2 :Installing the Air Filter
- Insert the air filter into place
- Place the airbox cover on
- Clasp the clips on
- Connect the air intake tube on
- Press the clips on to the intake tube
Hi, I’m Mike from 1A Auto. We’ve been selling auto parts for over 30 years!
What's up guys? One of the things you're going to want to do to properly maintain your vehicle is change your air filter. I'm going to show you how to do it on this 2006 BMW 325ci. Air filter box is right here, this location. Before we take this box out, I want to take this part out. This is where the air goes into the intake, into the box. There's some clips right here. You can use a straight blade screwdriver. Sometimes it's a little difficult, so I'm going to use some side cutters. Gently pry up on this center piece, and then this clip will pull out.
There's a push pin type clip. Pull those out. Then this one also, right here, there's three of those in total. With this loose like this I'm going to take a straight blade screwdriver. There's a little retainer right here. Push that down. You should be able to slide this piece out. That will get that out of your way. There's going to be five clips that go around this air box, all around. This one actually is missing one right here. What I'm going to do is grab underneath this clip, lift up, and then pull the metal retainer away. I'm going to do that on the other ones as well. This one right here, just pull up and then move that out of your way. Pull up here and move that out of your way. Then I can lift up on this box. The air filter is right here. You pull that out.
You're going to want to check your air filter regularly. This one actually looks pretty clean. You can fold the pleats back and you can see a little bit of debris in there but, overall, this one's actually in really good shape. You're going to want to replace this regularly so that you get better performance, better fuel economy. Proper way to maintain your vehicle.
Next we're going to take and we're going to slide this back in just like that. You're going to want to push it all the way down. Slide the box on. Make sure it's on securely then we can start pushing the clips on. This metal part of the clip is going to go in there first and then we're going to push down on that latch. We're going to do the same for the other five. This one in the back's a little bit tricky to get to. This one over here. Push it on, press it down. Then yours would probably have one here as well. Then we're going to slide this intake tube back into the air box. Just like that and it will clip right in. Then we'll take these push retainers and push it back down. Push this one back down and the same with this one.
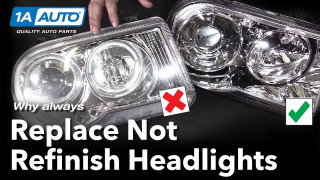
Why you Should Replace Not Restore Headlights
See why replacing your cloudy headlights with new ones is always better than refinishing them Why should you replace your headlights and not clean or refinish them? Three reasons: It's a simple fix, it increases visibility, and it enhances the overall look of your vehicle. Headlights are made from a polycarbonate plastic that can be damaged by UV rays from the sun or suffer pitting caused by road debris light salt and rocks. If you look closely at an old set of headlights, you'll see that the lens is full of micro-cracks. This is called crazing. This crazing, along with pinning, will turn your headlights from crystal clear to hazy yellow and it cuts the output in half, making it very difficult to see at night. It also makes your car look old and dated. With parts from 1AAuto.com and our how-to videos, you can make your vehicle look new and stay safe on the road. To get new headlights for your vehicle, visit 1AAuto.com and visit our YouTube page for do-it-yourself and how-to videos.
