How to Replace Air Bag 2005-11 Honda Civic
Created on: 2018-01-16
How to replace an air bag on 2008 Honda Civic.
-
step 1 :Removing the Air Bag
- Disconnect the negative battery terminal with a 10mm wrench
- Wait 3 minutes
- Pry out the trap door at the bottom of the steering wheel
- Lower the connector
- Disconnect the connector
- Disconnect the horn connector
- Remove the three T30 Torx bolts from the bottom the steering wheel
- Pull the air bag out
-
step 2 :Installing the Air Bag
- Connect the horn connector
- Connect the air bag connector
- Clip the air bag in
- Tighten the three T30 Torx bolts
- Press on the trap door
- Connect the negative battery terminal with a 10mm wrench
Tools needed
-
Socket Extensions
Flat Blade Screwdriver
T30 Bit
10mm Wrench
Ratchet
Needle nose pliers
Hi, I’m Mike from 1A Auto. We’ve been selling auto parts for over 30 years!
Using a 10-millimeter wrench to disconnect the negative battery terminal, and wait three minutes.
You need to remove this little door on the bottom of the steering wheel. Use a flat-bladed screwdriver to pop it open and pull it out. The yellow connector in here, pull that out of there. The black lock on it, that's here, let's slide that up to unlock it. At the same time, you pull it apart.
Now the air bag is disconnected, and I need to unbolt it. There's a T30 Torx inside this hole. It's a bolt. There's one on each side. Should have new ones on hand before you remove these. Okay, you have to feel for it. And do the same for the other side, just kind of find it. There's the bolt, and I can do this with that removed, those bolts removed, this airbag can come out. You have to unplug the horn connection, just down here. I should've done that before I pulled it all the way out. Could do that from below. It's kind of hard to see, it says push right here. Push in on that lock, and it should pull right out. So the other one's your airbag power, this is your horn, and that's your airbag.
To reinstall the airbag, plug in the connector way here. It's a little tricky to do it with only two hands. So this is the horn. Plug this in, and it'll click into place. And this one here, the yellow one, actually powers the airbag. Of course, make sure the battery is still disconnected. You should have disconnected it before getting this far. Plug it back in, and it'll lock into place. Once you're plugged in, these need to be clipped underneath.
So we're going to pull the wires down. Put them down there, and then slide this up into place. It'll sit there. Take the Torx bolts without the ratchet attached, I'm just going to use the extension in the socket. Go right in the opening here, do this for both sides. We'll do the same for this side. You might have to push in on the airbag a little bit to get it to line up. Get that threaded in and tighten it up. I've turned the steering wheel, so you can see what we're doing better. You don't have to do this part, it's just so you can see it.
So this yellow connector—we're going to push up into place here. It's going to lock. And then the little white connector can sit right here. And we'll take the cover. It has two tabs that line up with two openings here, and these two locking tabs. Slide that into place, and push it right in. And your airbag is reinstalled. Now you're going to reconnect the negative, and this one happens to use a 10 millimeter. Tighten that up.
Thanks for watching. Visit us at 1AAuto.com for quality auto parts, fast and free shipping, and the best customer service in the industry.
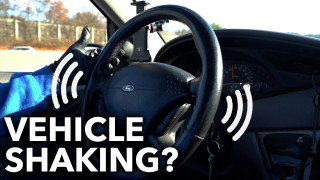
Wheel Vibration on the Highway Could be Out of Balance
Have your wheels started shaking or vibrating while driving at higher speeds recently? If it's not snow stuck in your wheels, it could be an out of balance tire.
