How to Replace AC Condenser Fan 1997-99 Toyota Camry
Created on: 2016-09-08
New A/C Condenser Cooling Fan Assembly from 1AAuto.com How to repair, install, fix, change or replace a broken condenser fan. If your air conditioning doesn't work, this may be your solution. This video shows the process for the 97, 98, 99 Toyota Camry
-
step 1 :Removing the A/C Condenser Fan
- Disconnect the electrical connector
- Pry off the coolant temp sensor harness from the fan and unclip it
- Remove the two 10mm bolts
- Pull the fan out of the tabs
- Lift the fan up and out
-
step 2 :Preparing the A/C Condenser Fan
- Clamp the backside of the connector on the fan
- Pull the connector out
- Wedge a small flat blade to pry the retainer off
- Insert the retainer to the new connector
- Press the connector into the new A/C condenser fan
-
step 3 :Installing the A/C Condenser Fan
- Insert the A/C fan into place
- Tighten the two 10mm bolts
- Press on the coolant temp sensor harness
- Connect the electrical connector
Tools needed
-
Flat Blade Screwdriver
10mm Socket
Ratchet
Needle nose pliers
Brought to you by 1AAuto.com, your source for quality replacement parts and the best service on the Internet.
Hi, I'm Mike from 1A Auto. I hope this how-to video helps you out, and next time you need parts for your vehicle, think of 1AAuto.com. Thanks!
In this his video, we're going to be working with our 1998 Toyota Camry 2.2-liter, 4-cylinder. We're going to be showing you how to remove and replace the A/C condenser fan.
If you like this information, please click "Subscribe." We have a ton more information on this vehicle, as well as many other makes and models. If you want these parts for your vehicles, they are available from 1AAuto.com. You can follow the link down in the description.
Here are the items you'll need for this repair: 10mm socket and ratchet, pliers, and a flat blade screwdriver
Open the hood and secure the hood prop. Your A/C condenser fan is the smaller of your two fans on the back of the radiator, located on the driver's side. We'll disconnect the electrical connector here, push down on this tab, and pull out.
We'll have to remove the harness for the coolant temp sensor here. Just use a flat blade screwdriver to pry out the plastic retainer and unclip the harness from the clips located along the side of the fan. Remove these two 10 millimeter bolts at the top of the radiator with a 10 millimeter socket and ratchet. Lift up to release the tabs at the bottom of the radiator. Then we'll move the fan over to the side here, pull it out to the top.
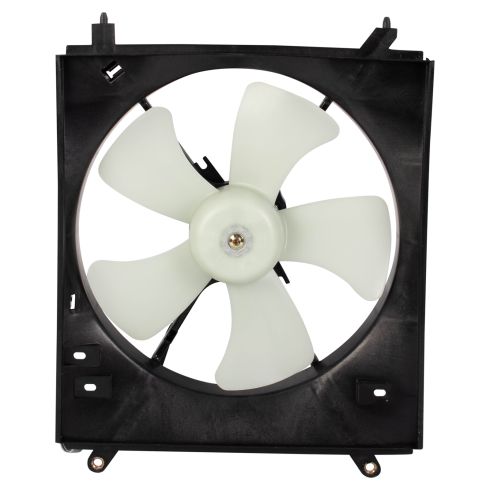
Here we have our old part that we removed from our vehicle and our new part from 1AAuto.com. As you can see, these parts are exactly identical. We have the same size fan, same number of blades, the same shroud, or housing, on the outside here, the same mounting pins on the bottom, same bolt hole locations on the top. We even have the same slots over here.
For the retainers, we’ll have to change over our old one. Same motor, we have a little drain at the bottom here; and the same clips going around to retain our harness for the engine coolant temp sensor at the bottom of the radiator. What happens to these fans as the electric motors can seize up or have an open inside, which prevents the fan from spinning, the A/C condenser cooling fan could cause your AC to not work properly, as well as causing an overheating condition with the vehicle.
If one of these fins brakes or bearing goes bad, it can create a noise or vibration when the fan kicks on; so if you have any symptoms related to the AC cooling condenser fan here. This new part from 1A Auto is going to go in, direct fit, just like your original equipment, and fix you up right.
We'll have to change over this plastic retainer for our electrical connector. The easiest way to remove this without damaging it, is to get on the inside edge of the fan and then clamp down on the tabs with a pair of pliers, and pull it out. There are two small plastic black tabs inside here. We're going to use a pocket flat blade screwdriver. Wedge it in to keep those clips plied out, push down and remove the retainer from our electrical connector.
Now we slide the retainer onto our new electrical connector. Snap it into its slot, and our fan is ready to go back into our vehicle. At the bottom of the radiator at these two holes we'll be inserting these pins on the bottom of our new fan into those holes, to hold the bottom in.
Lower your fan, set it into the pins, lay it forward, and reinstall our two 10 millimeter bolts. We'll reinstall the cooling sensor harness into its clips on the side of our condenser fan. We reinstall the plastic clip into its slot on the shroud, and reconnect the electrical connector. We're good to go.
Thanks for tuning in. We hope this video helped you out. Next time you need parts for your car, please visit 1AAuto.com. Also check out our other helpful how-to and diagnosis videos.
Shop Products
Toyota Camry Solara Driver Side A/C Condenser Cooling Fan Assembly TRQ RFA80392
Part Details:
- 2
- 5
- Male
- Male
- Plastic
- Plastic
- 1
- 320 mm
- White
- No
- 12.60 in

How to Replace Radiator Cooling Fans 2008-12 Ford Escape
How to repair, install, fix, change or replace a broken dual radiator fan. If your air conditioning doesn't work, this may be your solution. This video shows the process for the 08, 09, 10, 11, 12 Ford Escape
