How To Replace AC Condenser Cooling Fan 2002-08 Dodge Ram PART 2
Created on: 2011-04-12
As part 2 of a 2 part video, this video will show how to prepare and install a new AC Condenser Cooling Fan on the 02-08 Dodge Ram
-
step 1 :Beginning the Repair
- This is Part 2 of a two part video
- Please consult Part 1 for prior instructions
- Perform the steps outlined in Part 1
-
step 2 :Preparing the New Fan
- Remove the grommets from the old fan
- Attach the grommets to the new fan
- Cut the shroud where the hoses will thread through
-
step 3 :Installing the New Fan
- Push the fan into place, making sure not to move any wiring or hoses
- Position the shroud around the condenser
- Attach the condenser to the shroud by the tabs
- Push the condenser into the fan and start the four 10mm bolts by hand
- Tighten the four 10mm bolts
- Insert and tighten the 10mm bolts for the condenser fan shroud
- Insert and tighten the 10mm bolts for the radiator fan shroud
-
step 4 :Reinstalling the Battery
- Cut the wire ties holding the battery box
- Slide the battery box into place
- Start the 13mm bolt for the battery box
- Attach the push pin and lock fastener for the battery box
- Tighten the 13mm bolt
- Attach the wiring harnesses to the fan shroud
- Put the battery into place
- Put the battery bracket into place
- Apply penetrating oil to the battery nut and bolt
- Insert the battery nut and bolt
- Reconnect the positive battery cable
- Reconnect the ground strap to the fender
- Reconnect the negative battery cable
- Push the radiator hose into place
Tools needed
-
13mm Socket
Flat Blade Screwdriver
Phillips Head Screwdriver
Rust Penetrant
10mm Socket
Ratchet
Tin snips
Brought to you by 1AAuto.com, your source for quality replacement parts and the best service on the Internet.
This is part 2 of the AC condenser fan in the 2004 Dodge Ram same as any '02 to '08 and we pick it up with comparing the original to the new 1A Auto fan and then show you how to reinstall it. Tools you'll need for this are a 10 mm and a 13mm socket with a ratchet and extension, a tool able to cut plastic because as you can see Chrysler didn't exactly design this to be replaced easily, a flat blade screwdriver, and a Phillips screwdriver.
Here's my original fan and a new fan form 1A Auto. You're going to want to swap all your grommets over. These just pull out and push back in. Push those in. Mostly it's the same. It looks like maybe this is a different design, maybe a later or earlier design. I'll see how that installs, but I am going to cut this off right here, so I can get it around that hose.
Take the new fan, put it down in here. Make sure that the wiring doesn't get in the way. Twist it this way to get it around the mounting tab on the condenser. It goes in a little further. Keep an eye on all the wiring. Make sure it's not getting caught on something. It slides down in. With the condenser up and in, make sure . what I'm doing is just now at the bottom, I'm making sure that the shroud is going underneath the condenser. Now, I'm just backing up the condenser. Pushing it sideways in the shroud. There's tabs on the condenser on this side. Just got to make sure they fit inside of the shroud here. Make sure the lower one's inside. Good. I've got my condenser pretty much in there, so now I'm going to slide this forward a little bit, get it down by that bracket on the battery box. Slide my condenser a little too far in so now, it's right. The condenser's all in, and now I'm down. Let's see. Reaching down, I'm in on that side. I'm going to pull on this side. Everything's pretty much in place. One thing it does look like, once you get it down on . that's right.
I'm going to put my 4 bolts in the side. What you're going to need to do is push the condenser into the fan. Then start the bolts. I've got my upper one in there. It may be easier if you hold it up a little bit. This happens quite a bit. This tends to happen. What you want to do is just pry the fan assembly over so this goes all the way back. Even on the original one that would get stuck like that. Push that back. Start this bolt. Move down. Start my other bolt down here. Now I'm just going to use fast forward again as I put in those four radiator fan shroud to the condenser bolts. Then I use my 10mm socket with my air ratchet to tighten them up. Now we want to make sure that the little rubber feet at the bottom they go into two specific holes. You know when you get them down in there because then the bolts at the top are all lined up. Now we're going to put in the mounting, the big long 10mm bolts. We're going to put those in by hand first on the fan shroud on the AC condenser fan shroud. Then on the radiator shroud, and then tighten them up with our 10mm socket and ratchet with extension. Now we're going to cut our wire tires or whatever you fastened that with. Slide it back into place, push the pins into the side of the battery box, and slide it towards the fender. Start our 13 mm bolt. Then put out little push pin and lock fastener in. Then tighten up the 13mm bolt. Now these harnesses then pushes right back in to there. Then this one down here pushes in to that hole right there. Place the battery back in, and then the little block bracket that goes down in holds the battery in place. Put that down in. Then put in your nut and bolt. I sprayed a little bit of penetrant on there to make them easier to go through. Tighten those up nice and snug, so your battery is held in place. Then you're going to want to reconnect the positive battery cable. Tighten it snug with the 10mm socket. Then reconnect your ground strap onto the fender. Then reconnect your negative battery cable. Then just put your hose back in, lock it up there.
We hope this helps you out. Brought to you by www.1AAuto.com, your source for quality replacement parts and the best service on the Internet. Please feel free to call us toll-free, 888-844-3393. We're the company that's here for you on the Internet and in person.
Shop Products
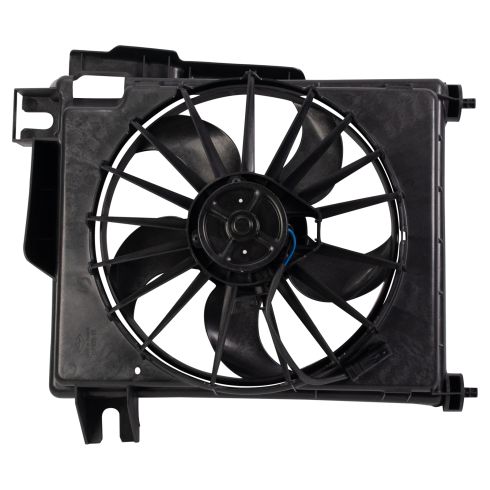
Dodge Ram 1500 2500 3500 A/C Condenser Cooling Fan Assembly TRQ RFA80385
Part Details:
- 2
- Black
- 5
- Male
- Male
- Plastic
- Plastic
- 1
- 335 mm
- No
- 13.19 in

How to Replace Radiator Fan Assembly 2000-02 Ford Focus
Check out this video to learn how to replace the radiator fan assembly on your 00-02 Ford Focus. 1A Auto shows you how to do it yourself!
