How to Replace AC Condenser Cooling Fan Assembly 1994-97 Honda Accord
Created on: 2010-09-08
If the AC condenser fan on your 94-97 Honda Accord has stopped working, you can replace it yourself. Check out this video from 1A Auto to learn how
-
step 1 :Diagnoses
- Turn on the car and the AC and pop the hood.
- The AC fan should be spinning, if it’s not then check the fuse.
- If the fuse is fine and the fan doesn’t work or the fuse keeps blowing, then it’s a sign your condenser is bad.
-
step 2 :Disconnect the battery
- Use an 8 mm wrench to disconnect the negative battery terminal
-
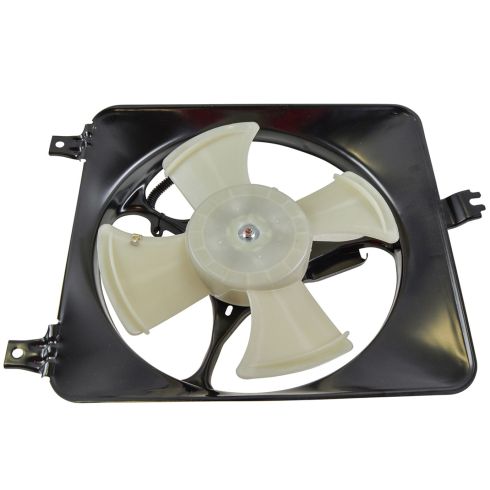
step 3 :Remove the AC condenser cooling fan
- Remove the plastic skid shield and remove the 10 mm nuts on the radiator mounts.
- Remove the seven 10 mm bolts and a few pushpins.
- Disconnect the AC cooling fan
- Unbolt the four 10 mm bolts anchoring the radiator to allow for some extra room.
- Remove the two 10 mm bolts mounting the fan to the radiator.
- Pull the old AC cooling fan up and out.
-
step 4 :Install the new AC cooling fan
- Put the AC cooling fan down and into place
- Plug in the AC cooling fan to the wiring harness
- Bolt the fan to the radiator.
- Mount the Radiator back into its mounts and bolt in the four 10 mm bolts.
- Replace the nut down in the radiator mounts underneath the car.
- Bolt and clip the skid shield back in.
- Reconnect the battery with your 8 mm wrench
Tools needed
-
Flat Blade Screwdriver
8mm Wrench
10mm Wrench
Brought to you 1AAuto.com. Your source for quality replacement parts and the best service on the internet. Hi, I'm Mike Green. I'm one of the owners of 1A Auto. I want to help you save time and money repairing and maintaining your vehicle. I'm going use my 20 plus years experience restoring and repairing cars and trucks like this to show you the correct way to install parts from 1AAuto.com. The right parts installed correctly, that's going to save you time and money. Thank you and enjoy the video.
In this video, we're going to show you how to replace the AC condenser fan which is the fan on the passenger side on this '95 accord with a V6.
Now, the only tools you'll need are a 10 millimeter wrench and possibly a regular screw driver. Okay, we're looking at the fan and actually I'm going to the car to turn the key on. Basically, you can test to see if your AC fan is working. You can see it going there, okay. The one on the passenger side is your AC cooling fan. That fan goes on if your key is on and your AC is on, and actually you can see both of them do go on when your AC is on. You can see here I've turned the key on. I've turned the AC on and that fan is spinning. If that fan doesn't go on when your AC is on, you unplug this cover and my cover is a little bit broken here so it comes off pretty easy. And you turn it this way, and this is the whole key to every fuse.
Okay, so this is your condenser fan right here so it's this fuse here, I've pulled that up and out. Check it, obviously it works on this car, you can see that that fuse is fine. You would see a black mark or a break in this little connector here if your fuse is dead. Okay, now it's also possible that you could replace your fuse and then turn the car on and the fuse blows right away and that's also a sign you have a bad fan. If either your fan doesn't work and your fuse is good, or your fuse blows continuously, those are signs that you probably need to replace your AC condenser fan.
You're going to start by disconnecting your negative battery terminal. We're going to remove this plastic shield and that involves removing seven 10 millimeter bolts and two pushpins right here. Okay, the seven 10 millimeter bolts. It should be a little more right up here but it's missing on this car. One there, one there, there should be another one there, and another one there and then right in these, there's pushpins here if your call is altogether. This car has been apart a few times. Another one here which is missing again. One up in there. So that's seven bolts and then there's one pushpin still on the left and then there's one that should be there too.
Okay now, as this pin is pulling up, pull it down. Okay, still looking up at the passenger side. Okay, now I'm actually looking towards the front of the vehicle. This is the passenger side. You may want to loosen this 10 millimeter bolt for your AC fan. Okay, so back up here on top, this is your AC cooling fan and you'll want to unplug it by using a thumb to push right here and pulling that out. Now there's four bolts that hold your radiator in. One here, here, and then over on the other side here, here. You want to remove those bolts, that's just also to move the radiator to give us some flexibility.
Now, there's two bolts right here, 10 millimeter, holding the top of the AC cooling fan. Okay, your AC cooling fan can come up and out. Okay, then we install a cooling fan and make sure the seal side is down. There's nothing wrong with this fan so we're going to put it back in. Be careful as you let it back down in. Okay, while you're up here, you can re-plug it. I'm just reaching down here and plugging it back in at the tower. Let's get these bolts in, get it start just a little bit, a few turns, enough so that they don't come out for now but enough that you could still move the fan around a little bit so you can get the bottom first.
Okay, now I will take the radiator and make sure it's all settled in its cushions. When I say in its cushions, I mean down here looking through the bottom, here's the mount and then there's a cushion to the radiator. There's two mounts. There's a cushion. The radiator goes down to these mounts so you just want to shake the radiator back and forth to make sure that your radiator is down in those mounts. Okay, and then once you have that one, then you can put your brackets back on top and start your bolts in and then tighten them up. And I'll get into a little fast forward here so that we can get through this.
Back under here, just a little bolt that just goes up in there. And it goes up into a little slot. Then get the nut on, tighten it up. Okay. Put this back up into place. Okay, I'm just kind of speed through putting that seal back on. Just stay tuned because we do have to still tighten up the top of the condenser fan. Okay, now those bottom bolts are tight, tighten this up. You're all set. We hope this helps you out. This is brought to you by www.1AAuto.com. Your source for quality replacement parts and the best service on the internet. Feel free to call us toll-free, 888-844-3393. We're the company that here for you in the internet and in person.
Shop Products


How to Replace Radiator Cooling Fans 2008-12 Ford Escape
How to repair, install, fix, change or replace a broken dual radiator fan. If your air conditioning doesn't work, this may be your solution. This video shows the process for the 08, 09, 10, 11, 12 Ford Escape

