How to Remove Wiper Cowl Cover 2010-15 Toyota Prius
Created on: 2018-04-12
How to replace the wiper cowl cover on 2011 Toyota Prius.
-
step 1 :Removing the Wiper Arms
- Pry the cap off the driver side wiper arm stud
- Remove the 14mm nut from the stud
- Pull the wiper arm off the stud
- Open the hood
- Remove the two 14mm mounting nuts from the passenger side wiper arm
- Pull the wiper arm off the windshield
-
step 2 :Removing the Cowl Cover
- Pry off the two cowl corner trim pieces with a trim tool
- Pry the two push clips out of each side of the cowl with a flat blade screwdriver
- Release the clips along the front of the cowl
- Lift the cowl up and out of the engine bay
-
step 3 :Installing the Cowl Cover
- Slide the cowl under the windshield
- Push in the clips along the front of the cowl
- Insert the two push clips into each side of the cowl
- Clip the corner trim piece onto each side of the cowl
-
step 4 :Installing the Wiper Arms
- Line up the passenger side wiper arm on the windshield
- Fasten the two 14mm nuts onto the wiper arm
- Line up the driver side wiper arm on its stud
- Fasten the 14mm nut onto the stud
- Push the cap onto the wiper stud
- Close the hood
Tools needed
-
Socket Extensions
Flat Blade Screwdriver
14mm Socket
Ratchet
Trim Tool Set
Hi. I'm Mike from 1AAuto. We've been selling auto parts for over 30 years!
To remove the driver's side wiper arm, you leave the hood down, use a small flat blade screwdriver, and gently pry up in this plastic cap. Find the edge and pull it off. There’s a 14mm nut under here. Use a 14mm socket extension and ratchet. Loosen this up. Pull that off. We're going to lift up on the arm and now I'll wiggle it back and forth and it should come right off the wiper arm shaft.
Open the hood. We'll go inside. Pull the release. Find the safety latch. Release that. The prop rod is under the hood. It's got two positions: one position here and then a service position here. It opens further. Passenger side wiper arm has two mounting nuts. They're 14mm. I'm going to use a 14mm socket ratchet again. Loosen that one up and loosen this one up. You might need to hold the wiper arm. Thread it off. It popped right off with just the spring action of the wiper arm. Lift it off the windshield and put it aside.
To remove the side corner trim, this'll be the same on both sides, pry it up with a plastic prying tool. You can buy this at 1AAuto.com. Once it's up, you can slide it out. Put it aside.
There's two push clips on both sides that need to be removed. Use a small flat bladed screw driver. Pry it up. Pull the clip out. If the center part comes out, that's okay. Just push it back in to reuse it.
The center cowl piece is clipped along the edges, and then it slides up under the window glass. We're going to unclip it and slide it out this way. Go underneath and push the clips in. That one's loose. Go ahead and find all the clips. It might be easier to use the plastic trim tool to push the clip in. Push it up. Slide it from underneath the windshield. I think this one clipped back in. Yep. It did. Make sure these stay clipped out. Put that aside.
The plastic upper cowl cover, it's got some little tabs here. They're going to slide underneath of the windshield, the edge of it. Then, clips in the front that will clip down in the middle. Get it in position. Put it over the wiper arms. You want to slide it up. Push it along the edge and slide it over the glass like that. Then, it will clip down into place. Place the push clips. Do that for both sides.
Clip these little corner pieces back in place. So that part will go underneath the windshield, and these will clip into the plastic here. Slide underneath, clip them in place. Do the same for both sides.
Put the passenger side wiper arm in place. There was a little dust line here where the wiper blade was, so I'll use that as a reference point. Right about there. There's some spring tension to this that's pushing it back up. I'll install the nuts. I'll just tighten these down until they get tight. I don't want to break off the studs off the wiper transmission.
I'll reinstall the driver's side wiper arm and blade. You could do this with the hood down or the hood up. It's all right. Just get it in place. Reinstall the nut. Tighten it up. If I feel it get tight, I'll stop. I don't want to break the stud off. And reinstall the cap. It just pushes into place.
Thanks for watching. Visit us at 1AAuto.com for quality auto parts, fast and free shipping, and the best customer service in the industry.
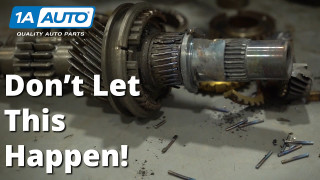
Grinding Whirring Noise from Manual Transmission Why You Need to Check Manual Transmission Fluid
Andy tears down a damaged manual transmission to discover the point of failure.
