How to Remove Washer Fluid Level Sensor 1997-2005 Lexus GS300
Created on: 2019-05-10
Check out this video to learn how to replace a broken or stuck washer fluid level sensor on your 97-05 Lexus GS300. Learn from the experts at 1AAuto.com
-
step 1 :Removing the Bumper
- Remove the ten 10 mm screws along the bottom front edge of the bumper
- Pull away the splash shielding at the corner
- Disconnect the fog light electrical connector, or remove the bulb assembly
- Disconnect the side marker bulb electrical connector, or remove the bulb assembly
- Repeat on the other side
- Remove the 10 mm screw at the corner of the bumper securing it to the fender
- Repeat on the other side
- Remove the four 10 mm screws along the top edge of the bumper
- Pull the bumper free
-
step 2 :Removing the Washer Fluid Level Sensor
- With a drain bucket in place, pull the sensor straight out from the fluid reservoir
- Disconnect the electrical connector from the level sensor
- Remove the gasket from the fluid reservoir
-
step 3 :Installing the Washer Fluid Level Sensor
- Install a new fluid reservoir gasket
- Reconnect the fluid sensor electrical connector
- Install the fluid sensor by pressing it straight in, with the flat tab facing up
-
step 4 :Replacing the Bumper
- Rest the bumper lightly in place
- Replace the four 10 mm bolts along the top edge of the bumper
- Replace the 10 mm screw at the corner of the bumper where it mounts to the fender
- Repeat for the other side
- Reconnect or replace the fog light and side marker light bulbs
- Repeat for the other side
- Seat the plastic under body shield back in place
- Replace the ten 10 mm screws along the bottom front edge of the bumper
Tools needed
-
Socket Extensions
Plastic Fastener Remover
10mm Socket
Ratchet
Trim Tool Set
Hey, everyone. It's Len from 1A Auto. Today, I'm going to be showing how to replace a washer fluid sensor. This is a level sensor. It's going to be very simple. This is a 2001 Lexus GS300, and when you replace it, you should also replace the gasket. If you need any parts, you can always come down to 1Aauto.com.
We're going to start removing the 10 bolts that are under here. They're 10 millimeters. A couple of them are missing, so we'll just skip onto the next. I've got them right here. Very simple. This is what it's going to look like. There should be 10 of them under here. Just go all the way around. Here's the last one. All right. Put those all safely, so we won't lose anymore. Now, we can pull this down. As you can see, it comes down quite a bit, which is perfect. Watch your eyes for any falling debris. I'm going to pull this down a little bit out of the way.
Behind here, you'll notice there's a fog light, so that means there must be a wiring harness that leads to it. We'll take a look up in there. I don't know if you can see it with the camera, or if I can see without the camera. If you can't get the wiring harness off, you can also just try to remove the whole bulb assembly from the unit itself. Here we go. Remove that, being careful not to mess up the filament or the bulb. You don't need to touch any of this glass. Any type of oils or anything could become an issue. It's going to decrease the life of your bulb. On the inside up here, we have a marker light on the side, so that means inside there's going to be another little harness. You can either disconnect the harness or just remove the whole unit from the assembly itself. Then, we're going to go over to the other side and do the same exact thing.
All right. Now that we've got those 10 out, and we've got the bulbs and everything disconnected, I wanted to show you up inside here. Right there, there's another 10-mm head screw. We're going to use our 10-mm socket. Put it on there. If you have an extension, that would be great. Turn it to the left. We're going to remove that fully and then we're going to work our way over to the other side and do the exact same operation. As you can see, it's the same as the other 10 that we removed, so you don't have to keep it separate. It'll match up with all the rest of them.
Continuing with our 10-mm socket, we're going to continue to remove these four screws, one, two, three, four, starting on one side and working your way over. All right. Last one. There we go. All right. Here we go. We're going to give this a yank, being careful because it's only plastic. Let's see. I'm going to come around to the other side and see if I can break this free and maybe it'll help get that side free. Here we go. It seems to be whatever is going on is going on just in this corner. I'm going to come around. There's nothing there. There we go. Now, we're going to put this bumper assembly aside. It's just a plastic cover. We'll put it someplace, so hopefully it won't get too scratched up.
All right. Now that we're going to be replacing this washer fluid level sensor, we're going to notice that it has two wires going into it. What we're going to do is we're going to take a bucket of some sort so we can collect any washer fluid that comes out of this. We're going to give this a little wiggle, watching your eyes. Make sure you're wearing safety glasses at all times. We'll pull that right out. Here's your level sensor. Once this continues draining out, or finishes draining out, I'm going to show you how to disconnect it and replace it.
Now that it's out and mostly drained, we're going to go ahead and squish this tab right here, give it a little pull, once again checking inside this wiring connector and make sure there's no green, blue, or brown, any color that shouldn't be there. When you go to replace this sensor right here, you might notice that you're going to have to replace this gasket right here. It's very simple. You can grab it with your hands and pull it right out.
All right. Now that we have it out, we're going to double check the gasket and make sure it's going to seal right. It looks good to me. We're going to reinstall the gasket, and you'll notice that it goes two ways. We're going to put the fat side out. It goes in nice and easy. Looks good. Next, we're going to take our level sensor, you'll notice that when the level goes up, this goes up. Level goes down, this goes down. When it goes down, light turns on your dash and says, "Hey, add some washer fluid." When we install it, we're going to put this tab facing straight up. Just push it right in. That feels great. Next, we're going to install our wiring harness, you hear a click, and that's good to go.
All right. Now, we're going to go ahead and start putting this bumper cover back on being very careful not to scratch our lenses with any plastic. Just try to come up and over. We're going to just sit it on there. Just like that. Hold it with your leg if you can. Just try to get everything, kind of, set up so it's pretty close. Then we're going to go ahead and grab out bolts. That's going. That looks good. I'm going to grab my bolts and we'll move onto the next step.
All right. Taking some of our fine pitch bolts right here with a 10-mm head, we're going to go ahead and line up our holes. As you can see, it lines up pretty well. Put it in there. Try to get it a little bit started. See, I need to give a little push just to give it a little coercion. It should start screwing right in. It feels good. Just get it started. We're going to want to line up the rest of the holes. Off of there. Move on to our next hole, once again, lining up the hole. Start it in. All right. Those are coming along good. Then, we're just going to move along to the other side doing the same exact thing.
Now that I tightened up the other two, I'm going to go ahead and start tightening all of them down. That feels good. We're just screwing into plastic here, so you don't have to tighten it down too much. Feels good. We're going to move along to the other side and do the exact same thing.
All right. Now, we're going to start the hidden bumper bolt in. See if I can get it lined up with the hole and turn to the right. It should screw right in. All right. Leaving it fairly loose, so in case we have to maneuver the bumper at all. We'll just have to remember that we need to go back in and tighten that puppy up. Next, I'm going to over to the other side and do the exact same thing.
All right. Now, that we have the upper part of the plastic bumper mounted in, we're going to go ahead and reinstall the bulbs that we had removed, one for the fog light and one for the marker light on the side of the bumper there. We're going to take it and come from behind, always with the safety glasses so nothing falls in your eyes. Bring it back down. I'm going to show you there's three prongs. There's going to be three holes inside the fog light assembly, so we're going to try to line those up. If you can't it right off the bat, that's fine, just keep spinning it. At some point, it will line up. Let's see. There we go. There's one.
Next, we're going to grab the marker light assembly. We're going to stick it up in there and do the same exact thing. We're going to try and line up those holes. It latches right now. Now we've got that done. We're going to move on over to the other side of the vehicle and finish up those bulbs. We'll make sure they work, and then we'll go ahead and mount up this undercarriage shield. All right. Now it's time to start installing the bolts that we have for the bottom side of this shielding system. What you're going to notice is that is has a little clip on this one and should have one here. It doesn't, but we'll just go with what we've got. We're going to slide this piece into that clip right there. If there was one here, we would put it there, but since it doesn't have it, we'll just put it above the plastic part of the fender of the bumper cover. We're going to slide it in. It clips in.
Then we're going to take our 10-mm-head bolt, and we're just going to start it in there and we're going to go all the way along the whole lower of this and we're going to put in our bolts everywhere that we took one out. Get that started. All right. Good to go.
Thanks for watching. Visit 1Aauto.com, your place for TIY auto repairs, for great parts, great service, and more content.
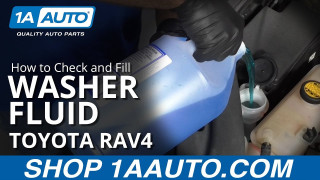
How to Check and Fill Washer Fluid 2005-16 Toyota RAV4
Check out this video to learn how to fill up the windshield washer fluid in your 05-16 Toyota RAV4!
