How to Remove Rear Door Panel 2010-16 Cadillac SRX
Created on: 2018-08-24
How to repair, install, fix, change or replace a door panel. Door panels need to be removed to access the inside components of the door, like the window regulator or exterior door handles on 13 Cadillac SRX
-
step 1 :Removing the Rear Door Panel
- Pry up the window switch panel with a trim tool
- Press the lock tab and disconnect the electrical connectors
- Remove the two Phillips head screws from the door panel
- Pry out the clips from the perimeter of the door with a trim tool
- Lift the door panel up
- Disconnect the window switch connector cable
- Lift up on the latch and slide out the door handle cable
-
step 2 :Installing the Rear Door Panel
- Connect the three wiring harnesses to the door panel
- Connect the door handle cable
- Lift the door panel into place
- Press the clips to the perimeter of the door
- Tighten the Phillips screws to the door
- Connect the window switch connectors
- Press the window switch into the door panel
Tools needed
-
Phillips Head Screwdriver
Trim Tool Set
Hi, I'm Mike from 1A Auto. We've been selling auto parts for over 30 years.
We're going to remove this trim piece right here. I'm going to use the trim tool. Slide it under here. Pry up a little bit. Pry it up like that. These are the retainers that were holding it on. That one was holding up a little bit. Just push down on that. Then we'll disconnect the electrical connector. We're just going to push this button right here and pull out the connector. I'm going to remove these two screws. I'm going to use a Phillips 10 screwdriver. Take those out.
Now we have door pins all around the perimeter of the door panel. I'm going to use a trim tool, get underneath here. I'm just going to pry it out and go all the way around. Once those are all popped out, you can grab the door panel. Lift up and slide it out. Pull the electrical connector through.
Then there's this electrical connector here and here. To disconnect this electrical connector, I'm going to use a small, flat blade screwdriver. Just slide it in there and lift up. Then pull that out. There's a little button that you push right here on this connector. You can slide that out. Then the electrical connectors are disconnected.
Now we can remove this cable that goes to the inside door panel. To disconnect this cable from the inside door handle, you're going to lift up on this side of the cable, this little yellow retainer. Then you can slide this out like that. Then a ball will slide up like that. Then we can remove the door panel.
I'm going to reattach this cable to the inside door handle. This ball is going to go in the slot right here. I'm going to slide the cable to the side, and then lock it on like that. Then I can connect these electrical connectors. This one is going to get connected right here. Just line it up. There is a slot. Lock it in.
This other harness is going to slide through the slot right here. You're going to fish it through the front of the door. That will connect to the window switch. Then there's one more wire harness that's going to connect right here to the LED light. When those are all connected, then we can slide this panel back on. It's going to slide.
Make sure this door lock knob is in the up position. Then we're going to slide it through the hole over here. We put it through. Then we can push the top of the door panel towards the window. Make sure that channel is in place, and then we'll line up all the door pins. Once those are all lined up, we can tap it back on just like that. I'll install these two Phillips head screws snug. That one is snug. I'm going to connect this electrical connector to the window switch, just line it up. Lock it in place. We can take this trim, line the retainers up there and there. We can just push it down, lock it in place.
Thanks for watching. Visit us at 1aauto.com for quality auto parts, fast and free shipping, and the best customer service in the industry.
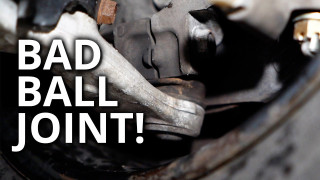
Wheel Clunking Over Bumps How to Diagnose Front End and Ball Joints
Got clunking or rattling noises coming from a wheel, especially when going over bumps? Check out this video, and Andy will show you how to check it out, and find the problem!
