How To Remove Passenger Front Door Panel 2002-05 Mercury Mountaineer
Created on: 2014-10-04
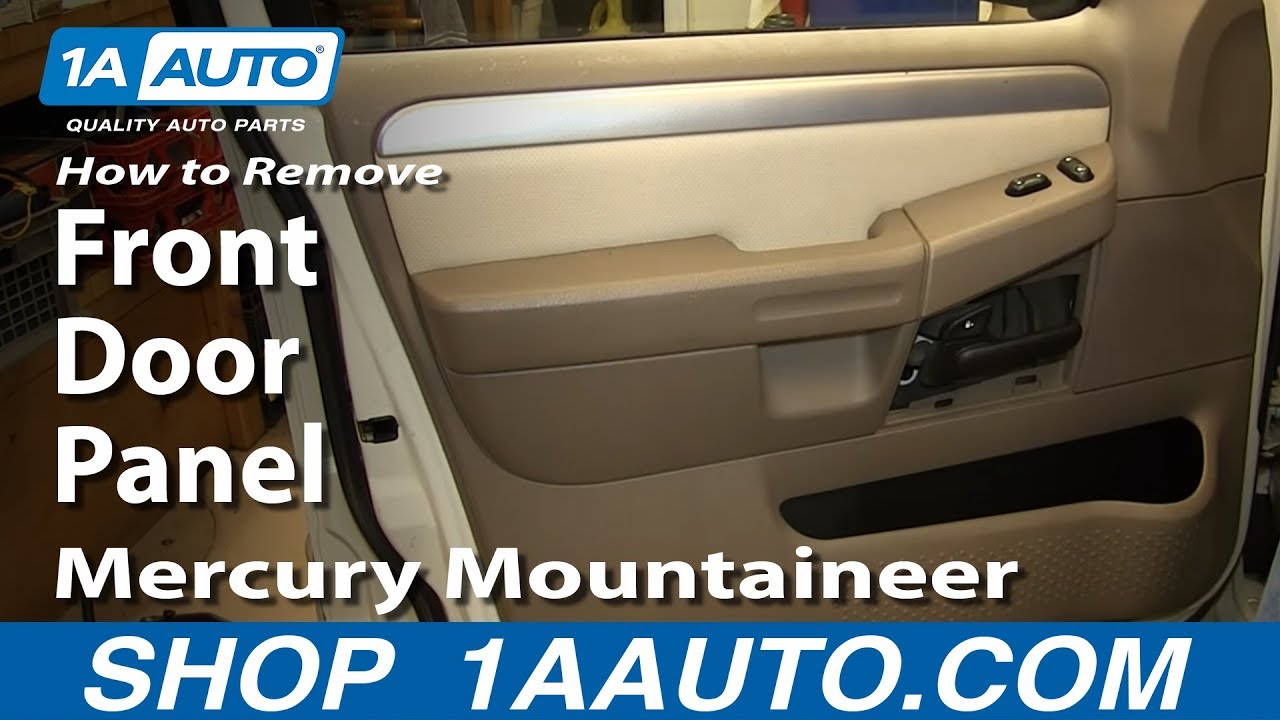
How to remove or replace the interior door panel trim on your vehicle. You need to remove the door panel for a number of different repairs, for example door handles, window regulators, power window motors, door locks and more. This video, will help you do this on 2002, 2003, 2004, 2005 Mercury Mountaineer.
-
step 1 :Removing the Door Panel
- Turn off your courtesy lights
- Pry off the door handle trim piece with a flat blade screwdriver
- Pry up the window switch panel
- Disconnect the wiring harnesses
- Remove the 7mm bolt in the door handle
- Remove the two 7mm bolts at the bottom of the door panel
- Lift the door panel up and off
-
step 2 :Reinstalling the Door Panel
- Lift the door panel into place
- Replace the 7mm bolt in the door handle
- Replace the two 7mm bolts at the bottom of the door panel
- Connect the wiring harnesses to the switch panel
- Push in the window switch panel
- Push in the door handle trim piece
Tools needed
-
Flat Blade Screwdriver
7mm Socket
Ratchet
Brought to you by 1AAuto.com, your source for quality replacement parts and the best service on the Internet.
Hi, I'm Mike from 1A Auto. I hope this how-to video helps you out, and next time you need parts for your vehicle, think of 1AAuto.com. Thanks.
In this video, we're going to show you how to remove and replace the passenger side door panel on this 2003 Mercury Mountaineer. The only tools you'll need for this is a flat blade screwdriver and a 7mm socket and ratchet.
Start off by prying out on this panel. Then just slide it off the door handle. Then lift up on the front of your switch panel and just slide it forward. Then push the tabs on the harnesses to disconnect them. Now remove this 7mm bolt and these two 7mm bolts down here. We'll fast-forward as Mike does that. Now just lift the door panel up and then pull it back, and it's free.
You've got a number of hooks on the door panel that go into slots in the door. If you've removed your water shield for any reason, you just want to make sure it's all lined up. You can put the bottom ones on too and then just make sure your harnesses come through. Then push the door panel in and make sure it's in on the front, back, and top. Push it down, and then reinstall the three 7mm screws.
We'll fast-forward as Mike replaces those 7mm bolts and tightens them up. If you have difficulty starting one of the lower ones, you'd just do the other one first, and it should help the other one line up.
Plug in your switch panel. Going to put the back down in first. We'll press them down, push it in. There's a little slot that comes down that this actually hooks into. Put this in first, make sure those back tabs go in, and make sure it snaps in the place.
We hope this video helps you out. Brought to you by www.1AAuto.com, your source for quality replacement parts and the best service on the Internet. Please feel free to call us toll-free, 888-844-3393. We're the company that's here for you on the Internet and in person.

How to Remove Rear Door Panel 2008-12 Ford Escape
How to repair, install, fix, change or replace a rear door panel on 08, 09, 10, 11, 12

