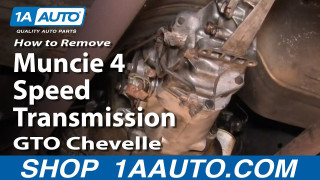
How To Remove Muncie 4 Speed Transmission 1964-72 Pontiac GTO PART 2
Created on: 2011-06-03
How to remove, replace and install the 4 Speed Transmission in a Pontiac Lemans, Tempest, GTO years 64, 65, 66, 67, 68, 69, 70, 71, and 72. This video is Part 2 of a series.
-
step 1 :Beginning the Repair
- This is Part 2 of a two part video
- Please consult Part 1 for prior instructions
- Perform the steps outlined in Part 1
-
step 2 :Aligning the Clutch
- This step is only necessary if you are replacing the clutch
- Insert the clutch line up tool into the clutch
- Tighten the clutch pressure plate
- Make sure the clutch disc is lined up
-
step 3 :Installing the Transmission
- Have one person hold the back end of the transmission
- Have one person hold the front end of the transmission
- Insert the transmission into place
- Insert one of the bolts to hold the transmission in place
- Insert the other three bolts into the transmission
- Torque the bolts to 55 foot-pounds
-
step 4 :Installing the Shifter
- Break the bushings out of the shifter with a hammer and chisel
- Line the shifter up into the boot
- Insert the bolt into the back of the shifter and tighten it preliminarily
- Tighten the lower the bolt
- Connect the backup switch to the rod that goes from the shifter to the backup switch
- Connect the backup switch near the speedometer cable
-
step 5 :Installing the Training Mount
- Insert the training mount into place
- Tighten the bolts preliminarily
- Torque the bolts to 40-45 foot-pounds
-
step 6 :Adjusting the Shifter
- Insert an Allen wrench into the hole that runs through the arms
- Make sure the Allen wrench pushes through the make sure the arms are aligned
- Reinstall the shifter knob
- Insert the shifter into your desired position
- Tighten the bolts on the shifter
- Readjust the linkage by twisting the adjustments until the linkage goes into the shifter
- Insert the retaining clips into the linkage with a pair of pliers
-
step 7 :Installing the Crossmember
- Jack the transmission up
- Slide the crossmember into place
- Insert the hook from the crossmember onto the emergency brake cable
- Lower the transmission jack
- Insert the bolt into the transmission mount
- Insert the bolts onto the side of the crossmember
- Torque the transmission mount bolt to 40-45 foot-pounds
- Torque the crossmember bolts to 35-40 foot-pounds
-
step 8 :Installing the Drive Shaft
- Insert the drive shaft into the back of the transmission
- Lift the drive shaft into the axle
- Insert the rings onto the drive shaft
- Tighten the bolts with a 1/4 inch wrench
- Torque the bolts to 20-25 foot-pounds
-
step 9 :Inserting the Gear Oil
- Remove the plug from the transmission
- Replace oil into the gear oil container
- Insert and tighten the plug once oil leaks
Tools needed
-
3/4 Inch Socket
Torque Wrench
Hammer
Jack Stands
Clutch Alignment Tool
3/4 Inch Wrench
1/2 Inch Wrench
Flat Blade Screwdriver
Chisel
Drain Pan
Floor Jack
Assistant
Needle nose pliers
1/2 Inch Socket
Brought to you by 1AAuto.com, your source for quality replacement parts and the best service on the Internet.
Hi, I'm Mike from 1A Auto. I hope this how-to video helps you out, and next time you need parts for your vehicle, think of 1AAuto.com. Thanks.
This video is part two of a two part series. We're going to install a Muncie 4-speed transmission into this '66 GTO. Muncie's 4-speed was used on a lot of GM cars, so this video applies to a lot of different cars: Chevelles, Camaros, 442s, Skylarks, all that good stuff. Just to refresh on the tools you'll need: nothing special unless you're replacing the clutch. If you're replacing the clutch you will need a clutch disc line up tool, but other than that it's mostly wrenches, pliers, screwdrivers, jack and jack stands, and a catch pan.
All right, we'll start out. Here's our extra transmission laying in wait for a meeting to a new car to go through the gears. If you were replacing your clutch you'd want to use a line up tool like this, and while you're tightening up the clutch pressure plate and pinching the disc between the pressure plate and the fly wheel, you'll want to use this tool and make sure that clutch disc is lined up correctly so that the transmission can go into it. We don't have a transmission jack, so we're using two people; one person holds the back end of the transmission and puts it up into the crossmember, and then the other person looks at the front end of the transmission, guides it right in.
It's a little bit difficult, and then you basically just push it in and then move it up and down, a little side to side, try turning the tail shaft of the transmission, and eventually you find the right spot and it goes in. We've got our transmission up in there. I've started one bolt, now I'm going to start the other three. We'll just speed this up as I start those bolts in there. If you kind of grab the tail shaft of the transmission and move it up and down a little bit, you'll find that the bolts should go into the bell housing pretty easily. Now I'm going to use my torque wrench, a couple of extensions, and the manual says to torque these to 55 foot-pounds plus or minus 5, so I've got my wrench set to 55 foot-pounds.
Now I'm going to go diagonally opposite of that top left one and do the bottom right on, follow that up with the top right one, and then the last one. Now, for this bottom one, we'll use a universal joint not always the best to torque something but when it's give or take a 5 pounds difference, it'll be all right.
You can see here's my linkage, and this actually has the nice adjustable linkage. Actually, a quick note here, most of the linkage for these vehicles or for these transmissions is adjustable Muncie 4-speed with the Hurst shifter. This linkage is nice because the adjustments are down near the shifter, which makes it a whole lot easier to put together. What I want to do, here's my shifter, the bottom of it and there's bushings, I'm going to use a little socket and a hammer, I'm just going to tap these bushings out and replace them.
What I just said was a great idea but then I actually tried it, I didn't film it, but what I ended up doing for those bushings, they are aluminum, but I basically took a chisel or you can take a punch, and just broke the bushings, broke them into little pieces, and then they came out much easier.
I've gotten all the bushings out of my shifter. I'm just going to guide it up through the boot, turn it up in there kind of sideways, get it in place, and then bolt up here. Here's the proper fastener for the backside of the shifter, you just slide it into place, push the bolt in, and try and get the bolt started here. Try it with the other hand here. The top bolt, you want to tighten up a little bit, still so you can move the shifter, but you'll see I leave it a little bit too loose. Now I'll put this bolt in. Now I'm just going to tighten up this bottom one a little bit.
Here's my lead for my back-up lamp, this is my speedometer cable over here. I'm just going to put it around this a little bit and then reach up here and connect it. While I'm doing this, just one note, my back-up switch was already connected on this transmission, but if you haven't connected it you need to just make sure you connect that little rod that goes from your shifter to your back-up switch. We're going to reuse the training mount from the other transmission, one because it still looks good. Two because this car's actually going to get restored pretty soon. We're just doing this as a temporary fix. I'll fast-forward here as put that in, tighten them preliminarily, and then you want to torque them to 40 to 45 foot-pounds.
Now to adjust the shifter, take an Allen wrench of the appropriate size, I'm not sure what size this is, it probably could be a little bigger. There's a hole that runs right through these arms so that makes sure that these arms are at the center point. You just want to make sure that the Allen wrench goes all the way through to there.
If you want, you can reinstall your shift knob right now, and you've got that Allen wrench in there so you can actually put your shifter wherever you like it. You might want to have somebody hold it in place or tighten it up a little more which I'm realizing I should have done right now that's going to be your neutral position. If you like your shifter a little further forward, you can put it a little further forward. A little further back, you can put it a little further back. I generally like mine right in the middle. I'm ready to tighten up my shifter.
One thing to take into account is that this tail shaft is dropped down a little bit. I'm going to push it back just a little to make up for that. I'm going to speed it up from here on out. Tighten up your shifter. Then you're going to want to reconnect all your linkage, and I do have a video on specifically adjusting the linkage correctly. Basically, you just want to twist the adjustments until the linkage goes right into the shifter at the right point. Then put all your retaining clips into the linkage.
Now lift your transmission back up, slide your crossmember in being very careful to make sure that that hook stays on the emergency brake cable. Once you get your crossmember into place, I would recommend starting all the bolts, both the bolts that go into the transmission mount and then the bolts that hold the side of the crossmember. Start them all, get them snug tight. Then the bolts that hold the crossmember in the middle to the transmission mount, tighten those to 40-45 foot-pounds. Then the bolts for the side of the crossmember where the crossmember mounts to the frame those are 35-40 foot-pounds.
Now we can lift up our drive shaft, install it into the back of the transmission, and then lift it into the axle. Now, back here, get it into place, you need to make sure that you push it into place properly, you should be able to get it all the way back into the axle yolk and then put the ring yolks back on. When you tighten these up, they call for 20-25 foot-pounds, so with a good size 1/2 wrench you want to pull them tight with a small wrench. Now, here, remove your plug for the transmission. I hook a little tube to the gear oil container, and that lets me lift the gear oil container right up. Then, once you see some oil flowing down, you put your plug back in. Once that's done, tighten that plug and you should be already to go.
We hope this video helps you out. Brought to you by www.1AAuto.com, your source for quality replacement parts and the best service on the Internet. Please feel free to call us toll-free, 888-844-3393. We're the company that's here for you on the Internet and in person.
How To Remove Muncie 4 Speed Transmission 1964-72 Pontiac GTO PART 1
Check out part one in this instructional video series showing you how to the Muncie 4 speed transmission on a 64-72 Pontiac GTO.
