How to Remove Install Exterior Door Handle 1997-2001 Toyota Camry
Created on: 2016-06-29
Check out this video to learn how to replace the exterior door handle on your 97-01 Toyota Camry. 1A Auto will show you how!
-
step 1 :Removing the Door Panel
- Pry off the trim piece inside the door handle
- Pry off the trim button on the arm rest
- Pry off the trim button on the door panel
- Pry up the switch panel
- Disconnect the window switch wiring harnesses
- Pry off the sail panel
- Remove the three Phillips head screws on the arm rest
- Remove the two Phillips head screws on the bottom of the door panel
- Remove the Phillips head screw in the top left corner
- Remove the Phillips head screw from the door handle
- Pry off the door handle bezel
- Pop out the bottom of the door panel
- Pull the door panel up and off
- Carefully remove the water shield
-
step 2 :Removing the Interior Door Handle
- Remove the Phillips head screw from the door handle
- Pull off the metal latch rods from the door handle
- Remove the metal plate
- Carefully pry off the weather shield
-
step 3 :Removing the Exterior Door Handle
- Connect the window switch
- Turn the key to the run position
- Raise the window
- Disconnect the door handle latch rod
- Pry the door latch rod from the door handle
- Remove the safety latch from the lock rod
- Push the lock rod out of the door handle
- Remove the two 10mm bolts from the door handle
- Lift the door hand up and out
- Remove the 10mm screw from the lock cylinder
- Remove the lock cylinder from the door handle
-
step 4 :Installing the Exterior Door Handle
- Insert the lock cylinder into the new door handle
- Insert the door handle into the door
- Tighten the 10mm screws to the door handle
- Insert the lock rod into the lock cylinder
- Close the clip on the lock rod
- Insert the door handle rod into the door handle
- Close the latch onto the rod
- Press the watershield to the inside of the door
-
step 5 :Installing the Interior Door Handle
- Insert the metal shield into place
- Tighten the three Phillips screws to the shield
- Insert the lock rod into the door handle
- Insert the hooks into the door and slide the handle back
- Tighten the Phillips screw to the door handle
-
step 6 :Reinstalling the Door Panel
- Lift the door panel into place
- Push in the door panel clips
- Tighten the two Phillips head screws at the bottom
- Tighten the three Phillips head screws to the arm rest
- Tighten the Phillips head screw to the top left of the door panel
- Connect the window switch wiring harness
- Press the window switch into place
- Insert the door handle trim bezel into place
- Tighten the Phillips screw to the door handle trim
- Press the trim bezel inside the door handle in
Tools needed
-
Socket Extensions
Flat Blade Screwdriver
Phillips Head Screwdriver
10mm Socket
Ratchet
Pick
Brought to you by 1AAuto.com, your source for quality replacement parts and the best service on the Internet.
Hi, I'm Mike from 1A Auto. I hope this how-to video helps you out, and next time you need parts for your vehicle, think of 1AAuto.com. Thanks.
In this video, we're going to show you how to replace the front exterior door handle in this Toyota Camry. This one is a 1998, but the procedure is pretty much the same for ‘97 to 2001 Toyota Camrys.
You'll need a new front exterior door handle from 1AAuto.com, a 10 millimeter socket with a ratchet and extension, flat-blade and Phillips screwdrivers, and a small pick tool.
Using a small pick, remove the plastic trim that should be inside the bezel here covering this Phillips head screw, as well as this and this plug in the door panel. Our arm rest is a little stretched out here. Normally, you'll have to take a flat-blade screwdriver, place it underneath, pop up the trim panel, pull it back, move the switch housing from the door, and disconnect the electrical connectors. You'll also want to release the top of this black cover behind the mirror with a flat blade screwdriver, pull out, lift up to release the lock tabs on the bottom. Remove with Phillips head screws from the door panel, three on the arm rest, one on the handle bezel, one here closest to the dash and two underneath with a number two Phillips screwdriver.
Using a flat-blade screwdriver, reach between the bottom of the door handle and the bezel, pop it out, do the same thing on the top just above the lock, open the handle, pull the bezel out. Pop out the bottom of the door panel, lift up and remove the panel from the door.
Using a number two Phillips head screwdriver, remove the screw at the back of the door handle. Rotate the interior door handle to release the metal latch rods from the handle in the lock. The upper is going to be for the lock and the lower for the handle. Remember that for when we reinstall. Remove the three Phillips head screws with a number two Phillips head screwdriver: here, here, and here. Begin to carefully pry back the weather shielding inside the door panel. Pull the wiring harness through the shielding before you finish removing it. Place the shielding somewhere off to the side where it won't get wrinkled or torn.
Reconnect the window switch. Turn the key to the run position. Before removing your window switch, make sure the window is up so you have access to the door handle once the panel is removed. Disconnect the latch rod from the back of the door handle by flipping up on the plastic retainer. Using a flat-blade screwdriver, pry the latch rod out of the handle. That plastic clip that you see on the latch rod should stay in the exterior door handle, but ours is broken. Use your finger to remove the safety latch on the lock rod and push the lock rod out of the door handle.
There is a 10 millimeter bolt in this whole and this whole. We're using a quarter inch drive socket and ratchet with a 10 millimeter socket in order to get around the stuff inside the door and loosen those two screws. Lift up on the door handle, pull out to remove it. After you've removed your exterior door handle from the door, flip it over.
Remove this 10 millimeter screw here from the bottom. That secures a lock cylinder into the handle. Once that screw is out, you can remove the lock from your handle. Replace anything that you may need to, be it that you need to change the tumblers or the cylinder as a whole. Reinstall it into your handle. Be sure to line up this hook at the top, as well as the slot in the bottom. Your handle is ready to go back in the vehicle. Reinstall your exterior door handle. Slide this upper assembly in and up. Slide forward to allow the lock into the opening. Line it back up and lock it into place. Reinstall your 10 millimeter screws. I like to just get them started to make sure that everything is going to line up properly. Once they both started, so you know everything lined up, bring them down tight. Reinstall the lock rod into the whole in the bottom of the lock cylinder and snap the while plastic clip into place. Reconnect the latch rod into the back of the door handle and snap the retaining clip back into place. Reinstall the water shield to the inside of the door before reattaching the panel.
Reinstall the three Phillips head screws and the lower metal cover. We'll get one started while we line up the other two. Once we're all lined up, we'll tighten it down the rest of the way. Reinstall the lock rod into the top and the handle latch rod into the bottom. Reinstall the hooks on the back of the latch into the door. Slide back to engage them. Reinstall the Phillips head screw into the back of the latch only. While there is another whole in the center of the latch, that's where our bezel attaches. We'll have to wait until we reinstalled our door panel. Make sure that both rods move properly, ready to reinstall the door panel.
Reinstall your door panel. Hook this channel into the top of the door, line up the plastic clips into their appropriate holes. Make sure that your door lock and window switch wires are pulled through the panel so they don't get locked behind it. Pop the panel back into place and reinstall your hardware. Reinstall the two Phillips head screws at the bottom, three in the armrest. The screw at the top-end side edge of the panel and its plastic cover.
Reconnect the electrical connectors on your lock and window switch. Slide the front tab onto the panel and snap the back and sides into place. Open the handle, slide the hook on the back of the bezel into the square hole. Snap the rear tabs into place, reinstall your Phillips head screw. Snap the crew cover into place, and now we have a nice, new handle and bezel assembly in our door. Reinstall the back of the mirror cover, hooking this tab into the square slot, snapping this one into the plastic retainer there. Reinstall the plastic cover for your armrest grip.
Thanks for tuning in. We hope this video helped you out. Next time you need parts for your car, please visit 1AAuto.com. Also check out our other helpful how-to and diagnosis videos.
Shop Products


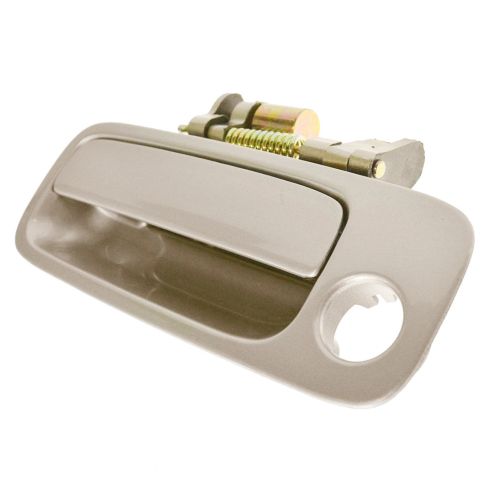
1997-01 Toyota Camry Lexus ES300 Front Driver Side Exterior Door Handle TRQ DHA49065
Part Details:
- Plastic
- Beige

How to Replace Exterior Door Handle 1994-97 Honda Accord
Watch this video to learn how to replace the exterior door handle on your 94-97 Honda Accord.
