How To Remove Fuel Tank 1991-96 Buick Regal PART1
Created on: 2012-10-15
If the gas tank is old or broken and leaking, watch this video and learn how to replace it
-
This is Part 1 of a three part video Please consult Part 2 for further instructions Perform the steps outlined in Part 2
step 1 :Removing the Fuel Pump Relay
- Remove the three 13mm bolts from the bracket
- Slide the bracket over
- Remove the fuse box cover
- Find the fuel pump relay
- Remove the fuel pump relay with a pair of pliers
- Insert the fuel pump relay into place
- Start the vehicle
- Remove the fuel pump relay
-
step 2 :Removing the Filler Neck and Vent Tube
- Loosen the hose clamps on the filler neck and vent tube with a 5/16 socket and ratchet with an extension
- Grab hold of the filler tube and twist to break it loose
- Remove the filler tuber
- Pry off the hose from the vent tube with a pry bar or flat blade screwdriver
-
The less gas you have in the tank, the easier it is to remove
step 3 :Removing the Gas Tank
- Remove the three 7mm bolts from the heat shield
- Place a drain pan beneath the fuel lines
- Disconnect the fuel lines by squeezing the white clip and prying off the hose
- Disconnect the wiring harness at the back corner of the driver side of the tank
- Disconnect the hoses near the fuel filler neck
- Jack up underneath the middle of the tank
- Disconnect the fuel tank straps with a 15mm socket
- Slowly lower the jack to remove the tank
Tools needed
-
A Piece of Pipe (for leverage)
Socket Extensions
Flat Blade Screwdriver
Jack Stands
Drain Pan
Complete SAE Socket Set
Ratchet
Swivel
Floor Jack
3/8 Inch Impact Gun
3/8 Inch Breaker Bar
Complete Metric Socket Set
Brought to you by 1AAuto.com, your source for quality replacement parts and the best service on the Internet.
Hi, I'm Mike from 1A Auto. I hope this how-to video helps you out, and next time you need parts for your vehicle, think of 1AAuto.com. Thanks.
This is part one of a three part video. We show you how to remove the tank. Part two is changing the components like the fuel pump and the fuel sending unit in the tank. Then part three is reinstalling the tank. We're doing it on this '96 Buick Regal, basically the same as any '91 to '96 Buick Regal, Chevy Lumina, Pontiac Grand Prix, and the Oldsmobile Cutlass Supreme. The tools you'll need are a jack and tall jack stands, you'll want to be able to get the car way up off the ground safely and securely so you can pull the tank out from underneath it. You'll want sockets, both standard sizes and metric sizes from 7mms and 5/16 up through 15mms, ratchets with flex joints and extensions, various sizes, breaker bar or pipe for leverage especially, you'll see this car's a little bit rusty so you'll need some extra leverage to break some of that stuff apart, screwdrivers and pry bars.
This is definitely, if you're going to be doing this in your driveway, this is definitely like a two-day job. I would give yourself probably a whole weekend, maybe even an extra day. It's not a difficult project, but some of the steps are difficult, getting to some of the bolts and things like that are just, they're very tedious, and trying to get in the right position to get to them can be challenging. On the passenger side here, we want to get to this fuse box here so we're going to remove these two 13mm bolts. Now press down and remove that, and we're looking to remove the fuel pump relay. Before I start the car up, I'm just going to use a pair of needle nosed pliers, and carefully pull that out, make sure it's nice and free. Put that back in.
Now with the car running, pull that out and the car will slowly run out of gas. That takes pressure out of the fuel line. Underneath the car at the back of the fuel tank, your filler neck and vent tube go in, you need to loosen those clamps up and disconnect those tubes. Use a 5/16 socket with a ratchet and extension, and loosen the clamp that's on the larger filler neck as well as the clamp that's on the smaller vent tube that is to the right of it as you are looking up from the rear. Reach up between the gas tank and the rear suspension, grab hold of that larger filler tube, twist to break it loose, and pull it off the fuel tank. Now use a large screwdriver or a small pry bar, get it up in there on that smaller vent tube, and pry and pull and remove that hose from that vent tube on the tank.
Now we're going to remove this heat shield. With a 7mm socket with a flexible joint, actually get in behind the tailpipe. It helps if it moves somewhat. Then I'll speed it up here as I just remove the three screws. Obviously, I'm working now up closer to the front of the tank, that's where the exhaust pipe comes out and then bends to the passenger's side of the vehicle. There's a heat shield there, you need to take that heat shield down in order to drop the tank down. Here in front of the fuel tank, you've got the fuel lines, I have a pan underneath it. Even though we pulled the relay and reduced the pressure in the lines, you'll still get a little bit of fuel coming out of them. The lines, basically, have clips on them. What you want to do is take the hose or the flexible part, twist it, get it to move around a little bit, even push it towards the tube. Then you squeeze the white clip and pull the tube off.
You can see fuel's coming out there. Then the filter comes down just like that. It's good to get it out of the way as well. This is kind of hard to see, but I'm at the back corner on the driver's side of the tank, and if you reach up here you'll feel an electrical connection. You'll feel the wiring and pull it. You can see it now, but I pulled it off the body. Here's the connector and pull up here and disconnect that connection. Then the only other connection is you follow these two tubes that are right above your fuel filler neck and if you reach up in there, you can feel where they connect to the body. Then there's hoses, just press on them, if you can loosen those hoses, you can also reach up over the exhaust, if possibly, and pull on the hoses on that end and disconnect those hoses.
Now I'm looking from the back of the car towards the front, I've got a jack supporting the middle of the tank and I'm going to use a 15mm wrench or I'm using a, oh boy, this right in the way, isn't it? I'll speed it up here. I'm able to use my impact wrench to get that left hand strap down, pull it down out of the way, and then I use various wrenches, 15mm sockets to get above that exhaust pipe, and get that other 15mm bolt out.
Now here I'm basically just letting the jack down. It's a twist jack, so it comes down slowly. I'm obviously fast-forwarding this quite a bit. Let the tank slowly down. Obviously, you want to have as little fuel in the tank as possible, just makes this step easier. This vehicle only had about a gallon left which was nice, just make sure the tank doesn't get caught on the fuel filter or anything else like that. Bring the tank down and pull it out.
We hope this video helps you out. Brought to you by www.1AAuto.com, your source for quality replacement parts and the best service on the Internet. Please feel free to call us toll-free, 888-844-3393. We're the company that's here for you on the Internet and in person.
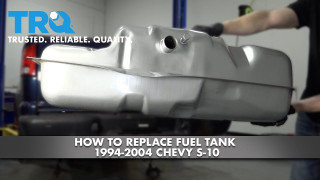
How to Replace Fuel Tank 1994-2004 Chevy S-10
This video shows you how to install a new TRQ fuel tank made specifically to fit your 1994-2004 Chevy S-10.
