How to Remove Drivers Side Door Panel 2014-19 Chevy Silverado LT
Created on: 2016-07-28
Check out this video on how to remove the driver's side door panel on your 14-19 Chevy Silverado LT.
-
step 1 :Removing the Door Panel
- Remove the trim panel behind the door handle
- Pull the silver panel near the master switch out
- Remove the trim panel in the door pull
- Remove the 7mm bolt below the master switch
- Remove the 7mm bolt behind the door handle
- Remove the two 7mm bolts in the door pull
- Remove the 7mm bolts on the bottom of the panel
- Pry out the door panel with a door panel clip tool
- Pull the door panel out
- Disconnect the door latch cable
- Disconnect the master switch wiring harness
- Remove the door panel
- Pull the weather strip out the front
- To remove the clips, press the tab, rotate the clip, and work underneath with a flat blade screwdriver
-
step 2 :Installing the Door Panel
- Set the clips onto the door
- Press the weather strip onto the door with the angled end toward the front
- Connect the master switch wiring harness
- Connect the door latch cable
- Insert the lock rod through the door
- Lift the door panel into place
- Push in the door panel clips
- Tighten the 7mm bolt below the master switch
- Tighten the 7mm bolts in the door pull
- Tighten the 7mm bolt behind the door handle
- Tighten the 7mm bolts on the bottom of the panel
- Replace the trim panel behind the door handle
- Replace the trim panel in the door pull
- Press the silver panel into place
Tools needed
-
Socket Extensions
Flat Blade Screwdriver
7mm Socket
Door Panel Removal Tool
Ratchet
Magnet - Extendable
Pick
Brought to you by 1AAuto.com, your source for quality replacement parts and the best service on the Internet.
Hi, I'm Mike from 1A Auto. I hope this how-to video helps you out, and next time you need parts for your vehicle, think of 1AAuto.com. Thanks.
In this video, we're going to show you how to remove and reinstall the door panel in this 2015 Chevy Silverado LT. You’ll need a small screwdriver or pick, 7mm socket with a ratchet and extension. You may need a trim tool and a magnet.
Open up the door. Remove the trim panel behind your door handle. Right in the corner, there's a little indent. With a small screwdriver, pull there and there's a 7mm bolt there. Down inside your door, pull another panel with a small screwdriver or a pick and expose two more 7mm. Then grab this panel firmly or use a trim tool and pull out and down.
Down here, there's a screw to remove a 7mm way back in there and then there's two down below: here and here. We'll remove those six 77mm bolts. I'll start with this one. You need a longer extension with the 7mm socket to be able to get in there. At any time, it's a good idea to have a magnet around.
Now I'm going to pull out around the sides starting at the bottom first. Just pull firmly, and then make sure you pull out these upper tins, and pull gently from the front so that this will clear. At the back, same thing, pull this clear and then you pull up, slide the weather strip back some and off.
Then, in behind, you've got your door latch cable. You press down on this tab and pull it back then around and up and out. Then, this harness here, pull down. On this clip, push the black in here, and release. Pull that gray tab down and the harness out.
To remove this weather strip, you just pull either the front or the back right out. To get each clip off, just push down on the tab that's here, and rotate the clip down, and then work underneath on the side and pry the clip out. Again, down, and then from the side and off.
Then, rest your clips on to the door. Put your weather strip back in. There's an angled end that goes in the front. Push the front down on, and then you slide it forward into the channel. Then just push it down on the rest of the way. Reconnect your harness connection, and then put the gray button down. Make sure it's secure and flick that safety up. Then reconnect your door handle rod or cable. Pull it around and push it in. Make sure that lock rod is in place correctly. I think it just snaps back in once you put the panel in, so put your lock rod in.
Then there's a couple of guide pins that are larger here and one on the front side. This should go wind it up. Make sure the guide pins are in place and lock it into place. I'll put my six 7mm screws back in place. For this one, I'll load it into my socket and extension, and then just put it right in. This panel, this little indent goes at the bottom rear. Just pop that back into place. Then, on this one, the indent goes towards the front. Then just put this panel back in place—the top end first—and lock it in.
Thanks for tuning in. We hope this video helped you out. Next time you need parts for your car, please visit 1AAuto.com. Also check out our other helpful how-to and diagnosis videos.
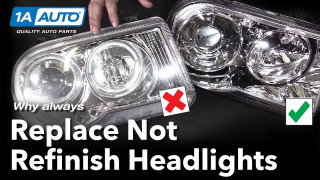
Why you Should Replace Not Restore Headlights
See why replacing your cloudy headlights with new ones is always better than refinishing them Why should you replace your headlights and not clean or refinish them? Three reasons: It's a simple fix, it increases visibility, and it enhances the overall look of your vehicle. Headlights are made from a polycarbonate plastic that can be damaged by UV rays from the sun or suffer pitting caused by road debris light salt and rocks. If you look closely at an old set of headlights, you'll see that the lens is full of micro-cracks. This is called crazing. This crazing, along with pinning, will turn your headlights from crystal clear to hazy yellow and it cuts the output in half, making it very difficult to see at night. It also makes your car look old and dated. With parts from 1AAuto.com and our how-to videos, you can make your vehicle look new and stay safe on the road. To get new headlights for your vehicle, visit 1AAuto.com and visit our YouTube page for do-it-yourself and how-to videos.
