How To Remove Door Panel 1999-2004 Jeep Grand Cherokee
Created on: 2010-04-22
1A Auto shows you how to remove the door panel in your 99-04 Jeep Grand Cherokee in this tutorial video. Check out 1AAuto.com for more how-to videos!
-
step 1 :Remove the door panel
- Remove the little plug concealing a Phillips screw in the top corner by the side mirror.
- Unscrew the Phillips screw and the screw located in the door pull as well as the T25 Torx screw located behind the door latch.
- Use a cloth rag and a putty knife to unclip the door panel.
- Pull the door panel off.
- Unclip the door handle and lock rods and unplug the wiring harness.
-
step 2 :Install the door panel
- Clip the locking and door handle rods into place.
- Plug your wiring harness back in.
- Clip the door panel on.
- Screw in the two Phillips screw and the T25 Torx screw.
- Plug in the little plastic cover to conceal the upper Phillips screw cavity.
Tools needed
-
Flat Blade Screwdriver
Phillips Head Screwdriver
Putty Knife
Cloth Rags
T25 Torx Driver
Brought to you by www.1AAuto.com. Your source for quality replacement parts and the best service on the internet.
Hi I am Mike Green. I am one of the owners of 1A Auto. I want to help you save time and money repairing or maintaining your vehicle. I am going to use my 20 plus years experience restoring and repairing cars and trucks like this, to show you the correct way to install parts from 1AAuto.com. The right parts installed correctly; that's going to save you time and money. Thank you and enjoy the video.
In this video we will be showing you how to take off and then put back on a door panel on a 99-04 Grand Cherokee useful if you are replacing any parts within a door like mirrors, regulators, window motors, or whatever. Pretty straight forward repair all you need are some basic tools; Philip screwdriver, T25 Torx driver, putty knife or door panel clip tool, and a flat blade screwdriver.
To remove the door panel, just going to remove this little plug here, keep it; expose a little Philip screw back in there. Keep your screws around don't just be throwing them around like that. Then there is a little Philip screw down in here under the cup holder. Lastly, there is a Torx screw right in there. It's a T25 Torx screw. Put our driver there. Sometimes it doesn't come out all the way, which is all right, you're just going to make sure that we don't let it fall on the ground and lose it when we take it apart.
Next, there's a series of clips that hold the door. What I do is take that, it's just a putty knife wrapped in a little rag here, and I insert it and I slide down until I hit a clip and then I pop it. What you might need to do is if you find some of them are difficult, you can put the putty knife in, get to the clip, find it's difficult, pull the putty knife a little bit like this and then put a screwdriver in there and use the screwdriver to pull out. I've got most of the clips around the perimeter of the door. There are two clips still in here, which is kind of a matter of just carefully kind of shaking the door.
Once you have the door away you've got- oh there's my screw make sure we gather that. Here are your rods for your door lock and handle. Those little yellow clips, just fold those away. You might want to use a screwdriver to get them off. You pull the clips away and the rods come up and out. You have your harness for your power windows and everything. There's a tab right under here that you push up and then shake and then there's your harness for your mirror. You undo that and the door panel is off.
Put this into the little clip. I'm going to get a little closer. Then let's put these rods in, you kind of bend the rods a little bit. Push them down in. Lock the clip on. Do the other one. Push it down in. Lock the clip on. Harness; should go right in. Pull your mirror harness. Not sure if you can see what I am doing here. Pull the mirror harness through, connect it. Then basically just take and line up one of these little plugs. Make sure as you are putting it on that you make sure the door panel goes underneath this here. Then you can go to your next plugs. I am just going to look in back. Just make sure this goes up above. Then just go right around.
Now you got your three screws that go back in. T25 Torx bit goes up here behind the door handle. Nice and snug. Then you got two Philip screws. One up in here and then one down into the handle.
We hope this helps you out. Brought to you by www.1AAuto.com. Your source for quality replacement parts and the best service on the internet. Please feel free to call us toll free 888-844-3393. We're the company that is here for you on the internet and in person.
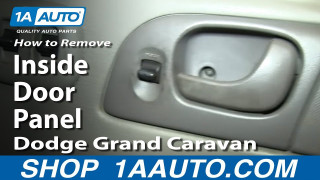
How To Remove Door Panel 2002-07 Dodge Grand Caravan
Check out this video teaching you how to remove or replace the interior door panel on your 02-07 Dodge Grand Caravan.
