How To Remove Door Panel 1982-92 Chevy Camaro IROC-Z
Created on: 2011-07-13
Watch this video to learn how to remove and replace the front interior door panel on your 82-92 Chevy Camaro IROC-Z.
-
step 1 :Removing the Door Panel
- Disconnect the negative battery cable with an 8mm wrench
- Remove the three T27 Torx screws from the door pull
- Pull off the door pull
- Remove the six T10 screws from the door handle bezel
- Pry off the window switch with a flat blade screwdriver
- Disconnect the window switch wiring harness
- Remove the T10 Torx screw from the mirror switch
- Pry off the mirror switch panel with a flat blade screwdriver
- Disconnect the mirror switch harness
- Pry off the door lock with a flat blade screwdriver
- Pull off the door handle bezel
- Pull off the trim piece behind the door handle
- Pry off the door panel with a putty knife or a door panel removal tool
- Pull off the window seal
- Remove the door panel
- Carefully peel back the watershield
Tools needed
-
T10 Torx Driver
T27 Torx Driver
Putty Knife
8mm Wrench
8mm Socket
Ratchet
Brought to you by 1AAuto.com, your source for quality replacement parts and the best service on the Internet.
Hi, I'm Mike Green. I'm one of the owners of 1A Auto. I want to help you save time and money repairing or maintaining your vehicle. I'm going to use my 20-plus years experience restoring and repairing cars and trucks like this to show you the correct way to install parts from 1AAuto.com. The right parts installed correctly: that's going to save you time and money. Thank you and enjoy the video.
In this video, we're going to show you how to remove the driver side door panel on this 1986 Camaro IROC-Z. It's pretty much the same as any Camaro and as well as the Firebirds and also the passenger side is very similar, just a couple small differences. Tools you'll need provided that your car hasn't been modified or anything: T27 and T10 Torx drivers; medium and small size flat blade screwdrivers; an 8mm or socket and ratchet (because you want to disconnect the battery as the very first step); door panel clip tool or a putty knife.
As I said before, the first thing you want to do is disconnect the battery. This is so mainly you don't drain it with the door open the whole time. Also, you have to be careful when you're disconnecting the lock button. To remove the door panel, you'll want to start with three T27 Torx screws: one right in the door pole there, two underneath, one there, and one back here. Then there's T10 Torx screws: two here, a lot of these are fake, but there are two here, and then two here. I'm just going to fast-forward removing those three T27 screws, and then there are six T10 screws.
This car is fairly original but a lot of these cars, they've probably been taken apart and put back together before with different fasteners used. The tools you may need for your car could vary.
Okay, when you pull this, pull your lock button back. Now, use a screwdriver and push it in there high up. You'll have these little tabs you want to pull back at the same time as well. Once you get that, disconnect it, and then there's another T10 Torx screw here. Then you're going to want to take your mirror and remote control out. Grab a small screwdriver and remove this little thin clip up and out. Put it back there and keep it at a safe place.
Now, you take your screwdriver again. Be careful in prying behind your lock. It will come off. There's this clip in there. Now, slide this back out. Pull it off. This little trim panel also comes off so you don't lose it.
Next, your door panel's held in by clips around the edge. If you want to reuse your door panel, you want to do this as carefully as possibly. Basically, use a putty knife and drag it in behind until it stops. You'll find the clip pretty much evenly spaced. Normally, this molding up here is pinched leaving it onto the door panel. This vehicle looks like somebody ripped this apart, and not carefully. Normally, what you would do is remove all these pins. Then is just going to fall off. I'm just going to take it off. This is if your door is not on correctly.
Normally, you would have that whole panel pulled out and then lifted up on this molding here and take the whole door panel and molding off at the same time. Again, like I said, the door panel is supposed to be attached on here, but somebody had already worked this off.
Now, this clip is from later after I've taken more stuff apart, but basically I just wanted to show you that when you take things apart, especially in this case with this car, we're going to take it all apart and then get it painted. I do things, I took the mirror off and I put the nuts back on so I can find them. I put the bolts back into the track.
There's little triangle pieces on and put things back together. I took little bags and clearly marked them as far as maybe the door panel hardware or some of the window hardware and things like that. Then like that little door handle bezel that you can see underneath my hand there, all in black, I reassembled that with the switches and stuff. Just put things back together so that when you're ready to put the car back together, you can find all the bolts and nuts and everything, and it makes it a whole lot easier when you're going to put the car back together.
We hope this video helps you out. Brought to you by www.1AAuto.com, your source for quality replacement parts and the best service on the Internet. Please feel free to call us toll-free, 888-844-3393. We're the company that's here for you on the Internet and in person.
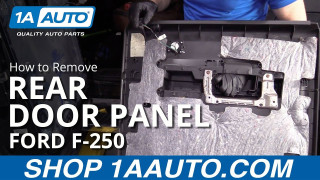
How to Remove Rear Door Panel 2011-16 Ford F250
Watch this video to learn how to replace a rear door panel on your 11-16 Ford F250. You can do it, and 1A Auto will show you how!
