How to Remove B Pillars 2014-19 Chevy Silverado
Created on: 2019-05-06
Watch this video from 1A Auto to learn how to remove or replace the B pillar trim panels on your 14-19 Chevy Silverado if they are scratched or damaged.
-
step 1 :Removing the Front Seats
- If you have electric seats, wait to disconnect the battery until you have moved the seat to unbolt the seat rails
- Disconnect the negative cable of the battery with a 10 mm socket.
- Remove the trim piece on the end of the seat rail
- Remove the trim piece along the side of the seat rail
- Remove the two T50 Torx bolts at the rear of the seat rails
- Remove the seatbelt anchor trim with a trim tool
- Remove the T30 Torx bolt securing the seatbelt to the seat anchor
- Slide the seat back.
- Disconnect the battery now if you have electric seats
- Disconnect the airbag electrical connector
- Remove the trim piece on the front of the inner seat rail
- Rotate the seat forward from the rear, and slide the seat rearward
- Remove the seat
- Repeat the steps for the other seat
-
step 2 :Removing the B Pillar Panel
- Pry away the door sill panel with a trim tool
- Remove the two bolt covers at either end of the B pillar handle
- Remove the two 10 mm handle bolts
- Pry off the B pillar trim, starting at the top and working down
- Slide the seatbelt through the opening to remove the panel
- Repeat for the other side.
-
step 3 :Installing the B Pillar Panel
- Separate the B pillar trim halves
- Replace the top half of the B pillar trim making sure to align it with the seatbelt slider
- Seat the weather stripping overlapping the panel
- Replace the two 10 mm handle bolts, and the bolt covers
- Replace the lower half of the B pillar trim, and seat the weather stripping overlapping it
- Replace the front door sill trim pushing it forward first, then down
- Repeat the steps on the other side
-
step 4 :Installing the Front Seats
- Replace the seat by clipping the front of the rails into the slots on the floor first
- Replace the air bag electrical connector
- Slide the seat forward
- Replace the two T50 Torx bolts at the rear of the seat rails
- Torque the T50 bolts to 33 ft-lb
- Replace the T30 Torx bolt to secure the seatbelt to the seat anchor
- Torque the T30 bolt to 33 ft-lb
- Replace the seatbelt anchor trim
- Replace the rear outer seat rail trim
- Replace the side seat rail trim
- Replace the front inner seat rail trim
- Repeat the steps for the other seat
- Reconnect the negative battery cable with a 10 mm socket
Tools needed
-
Socket Extensions
Flat Blade Screwdriver
Torque Wrench
T30 Bit
10mm Socket
Ratchet
Trim Tool Set
T50 Socket
Pick
What's up, guys? I'm Andy from 1A Auto. In this video, I'm going to show you how to remove and reinstall the B pillar on this 2015 Chevy Silverado. If you need parts for your vehicle, click the link in the description and head over to 1AAuto.com.
To take this B pillar out, we're going to show you how to do it. We're going to take the seats out. It makes it a lot easier, but you don't necessarily have to take the seat out to do it. Just is a lot easier.
So we want to disconnect the battery because we are going to remove the connector for the airbag. There is an airbag in this seat. This vehicle has manual seats. So I'll disconnect the battery now. If you had electric seats, you're going to want to first position this seat forward, remove the anchors for the seat, and then disconnect the battery.
Going to use a 10 millimeter socket and ratchet. Loosen up the negative terminal on the battery. And disconnect it. I'm going to just slide this cable out of the way. I don't want it to accidentally hit the negative terminal on the battery.
We want to access the bolts in the rear of the seat. There's one right there we can access, but this one has a cover over it. So we'll take this off. Just grab this piece, slide this off like that, and then underneath here, we're going to have to slide this off. Might have to move the seat. I am going to move it back. From the front, I'm just going to slide this out. Like that. This comes off. This slide forward a little bit. There's a little clip right there. All right. I'm going to slide the seat forward.
Now we want to remove these two bolts. I'm going to use a T50 and a ratchet, loosen these up. Take those bolts out. Before we move the seat back, I want to disconnect the seatbelt from the seat. So you have to remove this cover right here. So I'm just going to use a trim tool to get under here. This kind of like slides up. Be careful with the plastic. There we go. So there's some clips right here, one of them broke. So sometimes that happens. But it'll still stay secure once we're done.
We're going to take this screw out. Going to use a T30 and a ratchet. Take that out, then just grab the seatbelt, slide it down, pull it up. Just going to back the seat up now. Like I said before, if you have electric seats, you'd want to move it back now and then disconnect the battery before we disconnect the airbag.
Now we're going to disconnect the airbag on this. Just going to use a straight blade screwdriver. It's called a lock back. And then this connector has a little lever right here. Push down on that red tab, and then slide the lever. And that'll disconnect right there.
Before we pull the seat out, I am going to take a straight blade screwdriver, there's a little trim piece right here that has to come off, otherwise it's going to prevent you from sliding the seat out. Just slides forward like that. So there's a clip right here on this slide, and then there's also one on the backside. So it's kind of hard to get that one on the backside right there.
So I have that all disconnected. Sometimes it's easy to come from the backside and lift the seat up, and then you're going to grab from underneath and slide it out. Now the seat is completely disconnected from the car. Now getting the seat out of the vehicle can sometimes be a challenge. So have the doors open. A lot of times seat's pretty heavy, so you might need a helper to help you get the seat out. Just grab the seat, be careful of the door. You don't want to scratch anything. Just close that door a little bit and then pull the seat out.
Now you can do the same with the other side.
All right. We want to take this panel off. I'm just going to grab a trim tool, get underneath the back here. It's going to be a lock that's attached these two panels together. Once that's released, then we can pull it straight up and then pull it out this way. There's the clips that hold it in. There's clips on the bottom that hold it in.
We're going to remove this panel. I just need a straight blade screwdriver, get in under here and right here, and there's two bolts. We're going to take those two bolts out. We're going to use a 10 millimeter socket, extension, and a ratchet.
All right. With those bolts out, now just going to grab the top of this panel, just going to pull it straight forward. So this is pretty difficult to remove. I'm going to use a metal trim tool just get under there, try to pop this off. There we go. Pop that off. Just pull it straight forward. You're going to slide the seatbelt just through the center there, and I'll show you on the backside these retainers. So this is the one that was giving me trouble right up top there. And then these retainers down here, down there. So you could separate this if you needed to, but we're just going to leave it all together and set it aside.
And now we're going to do the same with the other side.
All right. Just going to separate these two pieces right here. We're going to install the top part first. Slide the seatbelt through. So you're going to need to line this up with these two little tabs right here, so that this mechanism actually works, so that you can slide the seatbelt up and down. So this is a little bit tricky because while you're lining that up, you can move this up and down. You have to line the rest of the panel up. So that looks pretty good like that. There is a little alignment tab on this part of the panel right there. So once you get that lined up, push that in. I'm going to use a pick to get around the weather strip. Slide that like that. And then just check this, make sure that's working properly. And then the weather strip on this side. Just slide this out.
I'll just take the 10 millimeter socket and extension, get these bolts started. Get this one and then this one. Snug those down. Get these little covers on. This goes there and this one goes right here. Now I'll take this piece, line this up. You're going to have to push it down pretty far. Just make sure the carpet's in the right position. And then pull the weather strip around the edges with a pick or a screwdriver. Just do it slowly otherwise you're going to rip the weather strip. Once you get it there, you should be able to bang that on. Just like that. Same on this side. Just like that.
If you're struggling with getting the panels on because that weather stripping is giving you a hard time, you can pull the weather stripping off. I like to leave it on and leave it in it's natural shape so that I don't dis-form it or anything. But if you need to, it'll be a lot easier to take the weather strip off.
Take this little trim piece, this is going to slide in the back, and then just get pressed in. Take this piece and just slide this. There's clips on the backside that go forward. Those go in there, and then these get pushed down. Just slide this in. Press it down.
Just try to slide the seat in without scratching anything. Once you're in position, you want to get the front of the seat clipped in. So these clips under here going to go in those slots. Get them lined up, and then you grab the back of the seat, raise it up, and before I do anything else, I like to grab the front of the seat, make sure it's secure. That looks good. Before I secure the backside, I want to plug this connector in. Connector goes on this way. Latch it in. That's latched in, and then take the wire and just tuck it in under the carpet like that. Now if you have an electric seat, you can go hook the battery back up at this point because you're going to have to move it forward so you can get the rear bolts in. We don't have an electric seat, so we can just slide our seat forward. Just like that.
Take these two bolts. One goes here and one goes over here. And then I'm going to take a T50 and tighten these down. I'm going to use a torque wrench, and I'm going torque these bolts to 33 foot pounds. What you want to make sure is when you're torquing these bolts, because there is some thread locker on these bolts, they could not be tightened down all the way. Just make sure you take the seat and wiggle it a little bit. Make sure that it's not loose. Could give you a false torque. And it's good. Everything's nice and tight.
Now we want to reinstall this screw right here. You could put a little thread locker on there, and then take the seatbelt, make sure the seatbelt is not twisted, slide this latch into there, put the screw in using a T30. Then I'll take a ratchet, snug it up, then we'll torque it. And we're going to torque this to 33 foot pounds. And we'll take this cover, this cover is going to slide in down below, and then just lock in place.
Now we want to install these trim pieces. I'll start with this one in the back, just slide this in position right here. Get that like that. This piece I just going to slide in from the front. It might be easier to push the seat back a little bit. Just get this to line up. And there we go. That's on. Make sure that it snaps in together. You might have an easier time putting this piece on than the back piece. Either way.
We have this front trim piece. This is going to go right here, and just slide in place.
And then we're going to do the same with the other side.
Now we just hook up the battery. Get the negative cable, slide it through here. Get that in position. Take a 10 millimeter socket and ratchet, we'll just tighten this up. Just get it snug, and grab the negative terminal and just wiggle it. Make sure it's tight. It's good.
Thanks for watching. Visit 1AAuto.com for quality auto parts shipped to your door. The place for DIY auto repair. And if you enjoyed this video, please click the subscribe button.
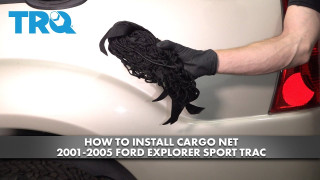
How to Install Cargo Net 2001-2005 Ford Explorer Sport Trac
This video shows you how to install a cargo net on your 2001-2005 Ford Explorer Sport Trac.
