How to Remove A Pillars 2014-19 Chevy Silverado
Created on: 2019-05-03
In this video, learn how to remove and replace a broken or ugly A Pillar on your 14-19 Chevy Silverado. The experts at 1A Auto will show you how to do it
-
step 1 :Removing the A Pillars
- Pry off the two bolt covers
- Remove the two 10 mm bolts
- Pull the panel straight away using the handle
- Repeat for the other side
-
step 2 :Installing the A Pillars
- Replace the A pillar by slotting in the tabs at the bottom and then pressing it to lock in
- Seat the weather stripping overlapping the panel with your fingers or a screwdriver
- Replace the 10 mm bolts
- Replace the bolt covers
- Repeat for the other side
Tools needed
-
Socket Extensions
Flat Blade Screwdriver
10mm Socket
Ratchet
What's up, guys? I'm Andy from 1A Auto. In this video I'm going to show you how to remove the A pillar on this 2015 Chevy Silverado. If you need parts for your vehicle, click the link in the description and head over to 1AAuto.com.
I need a pocket screwdriver, and there's two little covers right here. I'm going to pop these off here and over here. I'll take the two bolts out with a 10-millimeter socket extension and a ratchet. Now, with those bolts out, I can just grab the A pillar and just slide it out like that. There is a clip that's held in right there. Then I'm going to do the same with the other side.
I'm just going to take this panel and slide it down below. There's a slot, and it goes into the panel down here. Then line that up and lock it in place. The weatherstripping--you need to just put something. You can use a screwdriver. I'm just using a trim tool. Just peel this out. You can use your fingers, too. That's good.
Now, I'm going to take the two bolts and use a 10-millimeter socket and the extension and get them started first. Now, I'll use the ratchet to tighten those two bolts up. Just snug those up, and I'll take these covers and install the covers like that and do the same for the other side.
Thanks for watching. Visit 1AAuto.com, your place for DIY auto repairs, for great parts, great service and more content.
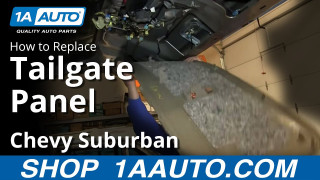
How To Remove Interior tailgate Panel 2000-06 Chevy Suburban
This video will show how to properly remove the tailgate panel to access internal components like the tailgate handle
