How To Jump Start 2005-09 Chevy Equinox
Created on: 2015-09-08
Watch this video to learn how to jump start your 05-09 Chevy Equinox or Pontiac Torrent. The process is a little different compared to most vehicles!
-
Do not let the red and black handles on the jumper cable touch each other
step 1 :Jump Starting Your Vehicle
- Locate the ground found near the front of the engine
- Remove the battery/terminal cover with the positive plus sign
- Connect the RED handle from the jumper cable to the positive battery terminal
- Connect the BLACK handle from the jumper cable to the ground
- Start the vehicle
- Disconnect the RED handle from the positive terminal
- Disconnect the BLACK handle from the ground
Brought to you by 1AAuto.com, your source for quality replacement parts and the best service on the Internet.
Hi, I'm Mike from 1A Auto. I hope this how-to video helps you out, and next time you need parts for your vehicle, think of 1AAuto.com. Thanks.
In this video, I'm going to show you how to jump start this 2009 Pontiac Torrent. Kind of like a lot of newer vehicles, the battery is difficult to get to, so the vehicle manufacturer has made alternate locations for you to be able to hook a jump box or battery cables.
You'll want to pop the hood by pulling the hood release lever. There's a safety latch on most cars that you can pull up on. See right there on this Torrent. Then lift up the hood. If you look around your engine compartment, you'll see here in the center right there, there's that red plus sign. That is the indication of where you need to hook the positive jumper cable, either from the vehicle that's giving you power, a good vehicle with a good battery, or from a jump box like I'm going to use in this video.
You can see I pull that cover forward and pull it off. Underneath, you can see there's a positive terminal right there where I'm going to connect the battery cable. The negative cable on a car like this goes to a ground on the engine. Pontiac has actually put a specific bracket here. It's the same for most Equinoxes as well. This is a 3.6-liter, again, if you have a 3.4-liter, it'll actually look like a little engine lifting eye. You want to hook your negative battery cable, which will be hooked to your negative terminal or ground on the jumping vehicle up to this tab here.
In this shot on the right is a battery booster. It has the red handle and the black handle. We're going to use that. If you were using a vehicle with a good alternator and battery that you were jumping and using jumper cables, you would want to hook your red/positive cable either to the positive terminal on the battery, or, as in if I was using this Torrent as the jump vehicle, I would hook it to that positive terminal that the manufacturer showed me that's underneath on the junction block.
Then you want to hook your negative to a good ground on the engine. If I was using this Torrent, I would hook the negative to the ground bracket that's on the engine and then connect the other end to my car appropriately. You'll see, I'm going to take the red handle and connect it right onto that terminal and move it around a couple times until I feel comfortable that I've got a good connection. I'm putting it on there vertically to get the best connection.
The negative you always want to do the positive first and the negative is the last one that you'll do. Hook the negative onto that bracket, and I'm going to move it up and down a little bit to make sure it gets a good bite into the metal. There's good metal-to-metal contact.
Now, I'm going to turn the battery box on, getting in your car, putting the key in. Everything should light up as normal once you have it correctly connected. You can see the car starts right up.
If your lights are dim or anything like that, that means you probably don't have a good connection. Now you can carefully disconnect your jump box or your battery cables. Again, make sure that the battery cables don't touch each other so that you don't get any kind of a spark. You can also disconnect them from the vehicle that you jumped it from. At this point, your car should remain running.
Replace that box top there. Your car should remain running. Let your vehicle run for awhile. Check your dash lights and if you don't see a battery light, that generally means that your alternator is working correctly and the charging system's working correctly. If you disconnect the cables and your vehicle automatically just shuts off, that usually is an indicator of your battery being totally dead.
What you can do is re-jump it and start it back up again. Have somebody watch the dash lights. As soon as you disconnect the connectors, if the battery light doesn't go on right away while the car is still running for a brief second. If it doesn't go on, that means your alternator's still charging, your battery's just totally dead. If the battery light goes on right away, as soon as you take those jumper cables off, for that brief second while the engine is still running, if the battery light comes on, that means your alternator is bad. Most likely, that's what's killed your battery at the same time.
Thanks for tuning in. We hope this video helped you out. Next time you need parts for your car, please visit 1AAuto.com. Also check out our other helpful how-to and diagnosis videos.
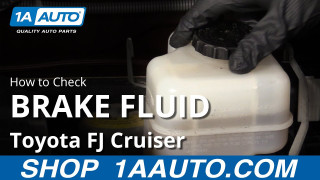
How to Check Brake Fluid 2007-14 Toyota FJ Cruiser
Watch this video to learn how to check and inspect the brake fluid in your 07-14 Toyota FJ Cruiser. 1A Auto shows you how to do it yourself!
