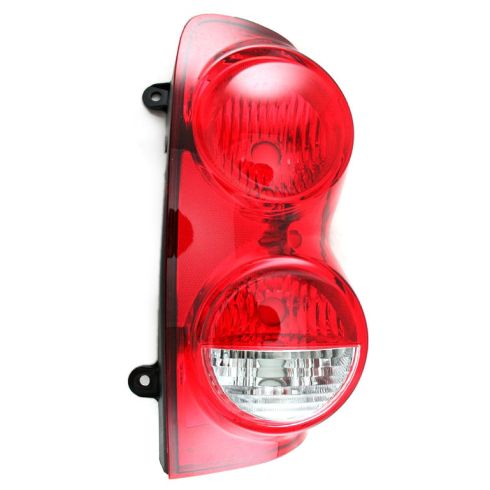
How To Install Replace Taillight and Bulb Dodge Durango 2004-09 1A Auto
Created on: 2012-07-26
Check out this video to learn how to replace the tail light and bulbs on your 04-09 Dodge Durango.
-
step 1 :Removing the Taillight
- Open the tailgate.
- Pry the center of the clips out on the taillight and pry the rest out.
- Pull the taillight out.
- Disconnect the harness.
-
step 2 :Replacing a Bulb
- Remove the T25 bolts from the connector plate.
- Pull the plate free.
- To replace the bulbs pull them straight out and push the new one in.
-
step 3 :Replace the Taillight
- Put the connector plate onto the new taillight assembly.
- Replace the T25 screws.
- Reconnect the harness.
- Push the taillight into place.
- Replace the clips.
Brought to you by 1AAuto.com, your source for quality replacement parts and the best service on the internet.
Hi, I'm Mike from 1A Auto. I hope this how-to video helps you out, and next time you need parts for your vehicle, think of 1AAuto.com. Thanks. In this video, we show you how to service the taillight on this 2005 Dodge Durango. The only tool you'll need is a T25 Torx driver. We show you both if you just need to change bulbs as well as if you need a whole new taillight because it's broken. We do sell the new taillight assemblies at 1AAuto.com.
Okay, to service your taillight, obviously open up the tailgate. These little clips here, use a screwdriver and then start prying them out. Then pull them right out. Then grab hold of your taillight and pull it down and out. Then here is a little kind of safety tab. Use the screwdriver again. Pry this down, and then squeeze and disconnect there.
Okay, if you break a taillight, you'll want to replace it with a new one from 1A Auto. You'll want to take all these kind of shipping covers off. Then, again, remove your connector plate for the newer one. I'm just going to speed up here. I'm using a T25 Torx screwdriver to remove the three screws that hold the connector plate into the taillight. If necessary, the bulbs pull straight out and then push in. Okay. The connector plate goes right into the new 1A Auto light. You'll just have to kind of use a little force to start the screws in.
Here, again, I'm just going to fast forward as I install those three screws. When you tighten them up, you want to tighten them up firm, but don't over tighten them. Okay, make sure you reconnect and lock that on. There's a couple just some little pins here that go right into receptacles there. Kind of look them in. Put that right on and push these pins into place.
We hope this helps you out. Brought to you by www.1AAuto.com, your source for quality replacement parts and the best service on the internet. Please feel free to call us toll-free 888-844-3393. We're the company that serves you on the internet and in person.
Shop Products
How To Replace Third Brake Light Bulbs 1996-2007 Ford Taurus
This video from 1A Auto shows you how to replace the third brake light bulbs on your 96-07 Ford Taurus. Save money and do it yourself!
