How To Install Replace Rusted Gas Fuel Filler Neck 1999-2005 Chevy Cavalier Pontiac Sunfire
Created on: 2013-08-26
A rusted fuel filler neck can be quite a pain! Watch this video to learn what do to to replace the one on your 99-05 Chevy Cavalier or Pontiac Sunfire.
-
step 1 :Removing the Fuel Filler Neck
- Open the fuel door
- Unscrew the gas cap
- Remove the two plastic rivets with a T20 Torx driver
- Pry out the outer part of the two plastic rivets with a flat blade screwdriver
- Apply penetrating oil to the 10mm bolt that holds the filler neck to the chassis
- Loosen the hose clamp with an 8mm socket and ratchet
- Remove the 10mm bolt from the filler neck
- Pull the filler neck away from the fuel door and down
- Apply rust penetrant where the fuller neck meets the fuel hose
- Pry the filler neck out of the fuel hose with a flat blade screwdriver
-
step 2 :Installing the New Fuel Filler Neck
- Apply penetrating oil to the fuel hose
- Replace the fuel hose clamp if necessary
- Push the new filler neck into the fuel hose
- Preliminarily insert the 10mm bolt that attaches the filler neck to the chassis
- Tighten the hose clamp with an 8mm socket and ratchet
- Position the filler neck at the fuel door
- Push in the outer part of the two plastic rivets
- Push the centers into the two plastic rivets
- Twist on the gas cap
- Close the fuel door
- Tighten the 10mm bolt that attaches the filler neck to the chassis
Tools needed
-
Socket Extensions
Flat Blade Screwdriver
T20 Driver
Rust Penetrant
Jack Stands
8mm Socket
10mm Socket
Ratchet
Floor Jack
Brought to you by 1AAuto.com, your source for quality replacement parts and the best service on the Internet.
Hi, I'm Don from 1A Auto. I hope this how-to video helps you out, and next time you need parts for your vehicle, think of 1AAuto.com. Thanks.
In this video we're going to show you how to replace the fuel filler neck for a 2000 Chevy Cavalier. It is fundamentally the same operation for model years 1999 through 2005.In order to do this repair you're going to need a new filler neck from 1AAuto.com, a 10mm socket socket wrench and extension, a Torx 20 bit on the end of a screwdriver or a socket wrench and extension, a pocket screwdriver, and for our hose clamp, we needed an 8mm socket. You can either use that or a flat blade screwdriver.
Open the fuel door and unscrew your gas cap. You're going to find two Torx 20 plastic rivets. I'm using a Torx 20 bit on the end of an extension and socket wrench. Go ahead and unscrew those and pull out the centers of those plastic rivets. I'm going to fast forward as I do that. Now use a pocket screwdriver and pry out the outer part of those plastic rivets. Do that for both and set them aside. Under the car you're going to see the fuel filler neck as it goes down. It attaches to the chassis with a 10mm bolt. Then it goes into a rubber hose which is connected to the fuel tank and that has a hose clamp. Use a little penetrating oil on that 10mm. This hose clamp just so happens to be an 8mm. If yours has been changed in the past, it might have a different size but it's going to need to come off, so go ahead and loosen that up and then slide it down. Use a 10mm socket, extension, and socket wrench, and remove that bolt. Pull down on the fuel filler neck until it's completely free. Use a flat head screwdriver and pry in between the rubber hose and the fuel filler neck. Use some penetrating oil and work that in so that you can twist the fuel filler neck out.
The old part is on top; the new part from 1A Auto is on the bottom. You can see that the new part from 1A Auto is an exact fit replacement. You can use a little penetrating oil on the inside of that rubber hose as you put the new fuel filler neck in, to make it slide in a little bit easier. If you need to replace the clamp, this is the time to do it. Go ahead and thread your fuel filler neck up and put the rubber hose back on. Loosely reinstall the 10mm bolt that holds the fuel filler neck to the chassis. We're going to need some room to play with so don't tighten it down quite yet. Now slide your hose clamp back over where it should be tightened and tighten that up. Now, up top, slide the fuel filler neck into position lining up the two holes, and then reinstall the outer portion of the plastic rivets, both of them. Then go ahead and push in the threaded insert. You don't need to screw them in. You can just push them in. Now you can tighten that 10mm bolt.
We hope this video helps you out. Brought to you by www.1AAuto.com, your source for quality replacement parts and the best service on the Internet. Please feel free to call us toll-free, 888-844-3393. We're the company that's here for you on the Internet and in person.
Shop Products


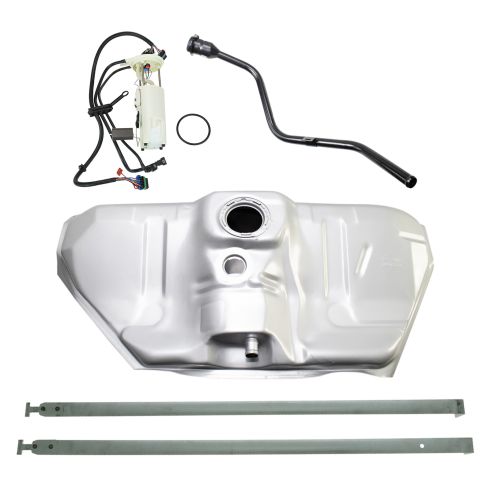
Chevrolet Cavalier Pontiac Sunfire Fuel Tank and Pump Kit TRQ FKA17648
Part Details:
- (1) Fuel Tank Filler Neck
- (1) Fuel Tank Strap
- (1) Fuel Pump Module Assembly
- (1) Fuel Tank

How to Replace Fuel Tank Filler Neck 1999-2004 Oldsmobile Alero
How to repair, install, fix, change or replace a rusted, rotted, bent or damaged fuel filler neck on Oldsmobile Alero, years 99, 00, 01, 02, 03, and 04.
