How To Install Replace Rear Power Window Regulator Toyota 4Runner 1996-2002 1A Auto
Created on: 2012-03-16
How to repair, install, fix, change or replace a slow, stuck, cracked or damaged window regulator on Toyota 4Runner, years 96, 97, 98, 99, 00, 01, and 02.
-
step 1 :Removing the Door Panel
- Pry up the window switch panel with a flat blade screwdriver
- Disconnect the window switch wiring harnesses
- Pry up the arm rest with a flat blade screwdriver
- Remove the Phillips head screw inside the door handle
- Remove the two Phillips head screws behind the armrest
- Push in the center of the retaining clip on either side of the door panel and pry them out
- Pry out the door panel with a door panel clip tool or putty knife
- Lift the door panel up and off
- Pry out the door handle with a flat blade screwdriver
- Disconnect the lock rod from the door handle
- Carefully peel off the water shield
-
step 2 :Removing the Window Regulator
- Disconnect the window motor lead
- Hold the window up by hand
- Remove the four 10mm bolts from the regulator
- Pull the window regulator out through the door
-
step 3 :Reinstalling the Regulator
- Raise the window by hand
- Insert the regulator onto the window track
- Insert the four 10mm bolts into the regulator
- Connect the window motor lead
-
step 4 :Reinstalling the Door Panel
- Put the water shield into place
- Lift the door panel into place
- Push in the door panel clips
- Connect the lock rod to the door handle
- Push the door handle in place
- Insert the two Phillips head screws behind the armrest
- Insert the Phillips screw into the door handle
- Push the armrest in place
- Push in the retaining clips on either end of the door panel
Tools needed
-
Flat Blade Screwdriver
Phillips Head Screwdriver
Putty Knife
10mm Socket
Door Panel Removal Tool
Ratchet
Brought to you by 1AAuto.com, your source for quality replacement parts and the best service on the Internet.
Hi, I'm Mike from 1A Auto. I hope this how-to video helps you out, and next time you need parts for your vehicle, think of 1AAuto.com. Thanks.
In this video, we show you how to remove and reinstall the rear window regulator in this 1999 4Runner, pretty much the same as any '96 to '02. The regulator in this vehicle works absolutely fine, so we just take it out and put it back in to show you how to do it. The tools you'll need for the job is a flat blade screwdriver (both regular and small size), Phillips screwdriver, a door panel clip tool or a putty knife would work, and you'll need a 10mm socket and ratchet.
To remove your door panel, pry up on your window switch. Then there's a little tab here, you want to remove that. Pry up on your armrest as well, and just work that screwdriver in under there and it comes up and off. Remove a Phillips screw here. On the back, there's a little tab, just push it in with your screwdriver and pull that clip out. There's one on the front as well. Now you can go around the edges with a door panel clip tool and just get it in behind. Now you want to push your door handle forward, bring it out, there's a little clip back here, undo the clip, bring it off. I'm going to speed up, you want to carefully remove your water shield, although I'm going through it in fast-forward. Do this carefully, you want to try not to rip it or tear it, and you want to try and stretch it as little as possible.
Here you can see I remove the four Phillips screws that hold the speaker in place and take the speaker off. I'm actually not even sure if that was necessary but I did it because sometimes you have to reach through that hole to release the window from the window regulator. Then just finish up removing the water shield.
We're going to unplug the lead for the window motor which is right here. Press in on the little tab up here and remove that. Just use our screwdriver and pry out the door clip here. With a 10mm socket and ratchet, we're going to remove the four bolts that hold the window regulator. Remove this last one and hold onto your window. There's the regulator, take it and slide it down some, slide the regulator out, and pull it up and out.
Here I'm lifting. I lift the window up and then I put the regulator into place. Once the regulator is in place then I just slide the window down and the arm has a little slide. You just slide the assembly right into the track on the window. You slide the regulator into the track on the window, and then you lift up the whole regulator and window at the same time and line up the holes. Start your bolts that hold the regulator to the door and then tighten them up nice and firm. Now we just reconnect the lead, put the clip back in the door, and in the next shot I've turned the key. I just run a little test, up and down, make sure everything is working correctly.
Speeding up again. Disconnect that switch, bring the water shield back up, carefully, make sure it goes on. What I do is I get the harnesses in place, get it around the door latch rod, and find a spot that lines it up with one of the holes that's in the shield, and then stick it back on. Also put my speaker back on, the four Phillips screws, put it in place nice and firm and reconnect the speaker. Before you put your door panel back on, make sure to pull out any clips. Sometimes they stay in the door, just clip them back into your door panel. Make sure you lift your lock rod up and it's in the right place here. It should be right in there. Your door panel comes up, press the panel against the window, bring it down, make sure your lock comes through, latch it down, and make sure we get our window harness. Now lock all your clips into place.
With your door handle, you'll have to fish your latch rod out and pull it out, put your door handle down on top of it. I'll use my small screwdriver, push that clip and lock it on, put the handle in place, slide it back. Fast-forward as we put that Phillips screw in at the door handle and then the two underneath the armrest. You can put this back in place. Then these little clips, push the center out, put it in, lock it in place.
We hope this video helps you out. Brought to you by www.1AAuto.com, your source for quality replacement parts and the best service on the Internet. Please feel free to call us toll-free, 888-844-3393. We're the company that's here for you on the Internet and in person.
Shop Products


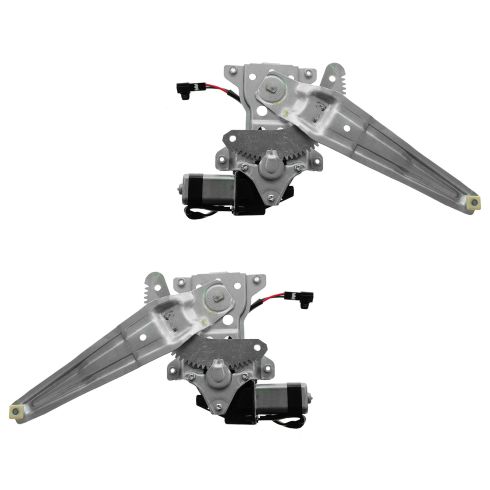
1996-02 Toyota 4Runner Rear Driver & Passenger Side 2 Piece Power Power Window Motor & Regulator Assembly Set TRQ WRA50891
Part Details:
- Power
- 2 Piece
- (1) Rear Passenger Side Power Window Motor & Regulator Assembly
- (1) Rear Driver Side Power Window Motor & Regulator Assembly
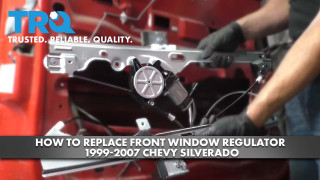
How to Replace Front Window Regulator 1999-2007 Chevy Silverado
This video shows you how to install a new window regulator on your 1999-07 Chevy Silverado.
