How To Install Replace Rear Power Window Regulator 1999-2005 VW Volkswagen Jetta
Created on: 2014-04-08
Window jammed? Broken window regulator? Learn how to do this straightforward repair yourself with the steps in this how-to video
-
step 1 :Removing the Door Panel
- Pry off the door pull cover with a flat blade screwdriver
- Remove two Phillips head screws from inside the door pull
- Remove the two T20 Torx bolts from the bottom of the door panel
- Pry out on the door panel by hand
- Lift the door panel off of the window sill
- Disconnect the wiring harnesses from the door panel
- Pry back the door handle cable clip with a flat blade screwdriver
- Unhook the door handle cable
-
step 2 :Disconnecting the Window Regulator Panel
- Disconnect the window motor wiring harness with a flat blade screwdriver
- Disconnect the speaker wiring harness
- Pull of the lock rod clip
- Pull the door cable rod off its clips
- Disconnect the wiring harness from its clip
- Push in the mounting tabs in the middle of the regulator panel
- Remove the three T30 Torx bolts from the window motor
- Pry off the rubber cover
- Slide the window down by hand
- Twist a screw into the inner window clamp ring
- Pull the screw out with a pair of pliers
- Pry out the outer window clamp ring with a flat blade screwdriver
- Pull the window up by hand
-
step 3 :Removing the Window Regulator
- Remove the 10mm bolts from the window regulator panel
- Push in the three mounting clips in the upper right corner of the panel
- Pull the panel partially out
- Disconnect the wiring harness at the outside edge of the door
- Pull back the door hinge boot
- Disconnect the two wiring harnesses in the door hinge
- Pull the wiring harnesses out through the door
- Unclip the wiring harnesses from the door with a flat blade screwdriver
- Pull the wiring harnesses through the regulator panel
- Pull the door handle rod out through the panel
- Pull the lock rod out through the panel
-
step 4 :Preparing the New Regulator Panel
- Drill the rivets out of the speaker on the old window regulator panel
- Pry the speaker off of the old panel with a flat blade screwdriver
- Transfer all the mounting clips from the old panel to the new panel
- Transfer the rubber door from the old panel to the new panel
- Transfer the wiring mounting clips from the old panel to the new panel
- Push the speaker into place with the wiring harness pointing up
- Rivet the speaker into place with the rivet gun
- Remove the shipping wire tie
-
step 5 :Installing the New Regulator Panel
- Feed the wiring harnesses through the regulator panel
- Feed the wiring harness through the door into the door hinge boot
- Reconnect the harnesses in the door hinge
- Push the boot into place
- Push the wiring back onto its clips
- Push the door lock rod through the regulator cable
- Push the door lock rod onto its clips
- Pull the door handle cable through the regulator
- Reconnect the wiring harness at the outside edge of the door
- Push the regulator into place
- Push in the mounting clips in the upper right hand corner
- Insert the 10mm bolts into the regulator panel
-
step 6 :Connecting the New Regulator Panel
- Slide the window down by hand
- Push in the outer window clamp ring with needle nose pliers
- Push in the inner window clamp ring with needle nose pliers
- Push in the rubber cover
- Push the window motor into place
- Insert the three T30 Torx bolts into the window motor
- Reconnect the lock rod cable to the lock rod
- Connect the window motor wiring harness
- Reconnect the speaker wiring harness
- Reconnect the speaker cover if necessary
-
step 7 :Reinstalling the Door Panel
- Connect the two wiring harnesses to the door panel
- Hook the door handle cable onto the door handle
- Slide on the door handle cable clip
- Push the door panel onto the window sill
- Push in the door panel clips
- Insert the two T20 Torx bolts into the bottom of the door panel
- Insert the two Phillips screws into the door pull
- Push on the door pull cover
Tools needed
-
Flat Blade Screwdriver
Rivet Gun & Rivets
T20 Driver
Phillips Head Screwdriver
T30 Driver
Drill
Slip-Joint Pliers
Needle nose pliers
5/16 Inch Drill Bit
Brought to you by 1AAuto.com, your source for quality replacement parts and the best service on the Internet.
Hi, I'm Don from 1A Auto. I hope this how-to video helps you out, and next time you need parts for your vehicle, think of 1AAuto.com. Thanks.
In this video, we're going to show how to replace the rear window regulator on this 2004 Volkswagen Jetta. The items you'll need for this are a new new rear window regulator from 1AAuto.com, a Philips screwdriver, a flat blade screwdriver, T20 and T30 Torx drivers, pliers, drill, a 5/16 inch drill bit, a screw and a rivet gun and rivets or four similar sized screws.
Carefully, pry off your pull handle cover with a flat blade screwdriver. Then, you want to remove this Philip's screw and this Philip's screw right here. We'll just fast forward as Don removes those. Then you want to remove this T20 screw and this T20 screw. We'll fast forward as Don removes those. Now, pry out on the door panel to release the clips and then lift it up and out of the windowsill and pull it back. Then, you want to disconnect these two harnesses right here by pushing on the tabs and pulling them free. Then you want to pry back on this clip that's on your door handle cable. Once it's out of the bracket, just unhook the door handle cable and your door panel's free. Pry back on the tab and then pull on the harness towards the top and then pry back on the tab on the bottom of the harness and then pull it free. Then, push the tabs on this harness and pull it free. Then, take your lock rod here and just pull it off this clip and separate it from your door cable, pull the door cable rod out and disconnect this harness from that clip and this clip. Then, you want to push this through by just pushing on the tabs while applying pressure to the top of it. I do the same thing with this one.
Then you want to remove these three T30 Torx bolts. We'll just fast forward as Don does that. Now pull the motor free and then pry back this cover and just slide your window all the way down. You can see in there, there's two plastic rings and you want to start off by removing the center ring. Using a screw just twist it into the center ring and then use a pair of pliers to pull the screw out and it will pull that center ring out with it. Watch out, I don't want anyone to get hit with it. Now using a flat blade screwdriver just pry out that outer ring. Once it's broken free, using your pliers, just pull it out the rest of the way. Now just pull your window back up and remove this series of 10mm bolts around your window regulator panel. Push the center of each of these through and our top ones are already pushed through but you'd have to do that one too. Then just pull this panel out a little bit and back and then disconnect this harness. To do that, you just push on the tab and pull it free. Then, in between your two door hinges, you'll see this boot. Just pull it back and inside you'll find these two harnesses, pry up on the clip and pull this harness free and then just pull back and out of the way. You pull the harness from the other side, inside the door. Then you want to do the same thing for this harness. Now you want to separate them from the door by prying off this clip from the bracket. Just pull on the harness while prying up on the tab. Then you just want to pull those harnesses through the window regulator panel. Now just push this boot through and pull your door handle rod out of the panel and do the same with your lock rod.
Next, remove these four rivets by drilling them out. We'll just fast forward as Don does this. Now just pry the speaker up and out.
On the left is the old window regulator. On the right is the new one from 1A Auto. You can see they are identical. They have all the same mounting points and they're going to fit exactly the same.
Now you just have to swap over all the clips, just push the tab and pull this out and push it into place on the other one. Swap over this door and swap over this series of harness clips. You just flip the regulator over, push on the tabs on the clip from the other side and just pull it free. For this one, just punch out the center and then push out the clip and push it into place and push the center back in. Now line up your speaker and push it back into place with the tab facing up. Now re-rivet the speaker into place using a rivet gun or use screws that are similar size to the rivets and just replace it with those. Make sure you clip this wire tie that was used for packing.
Then feed your harnesses back through the window regulator panel. Just push this gasket back into place once you've got both harnesses through. Now feed these harnesses back thorough this boot. Then reconnect those two harnesses. Just put your boot back into place and reseal this area. Then push your harness clips back into place. Feed this underneath the regulator and push that clip back into place as well. Just push this clip back onto the bracket. Take your lock rod cable and feed it back through the door panel and just pull it into place. You want to make sure you pull this boot through. Do the same thing with your door handle rod. Reconnect the harness on the right side of the door. Then feed your regulator back into place. Then just pry out on these circular clips and you just want to make sure you pry them through the regulator and then hold it in place with the screwdriver and push in the centers. We'll just fast forward as Don replaces those 10mm bolts along the edge of the panel. Now, slide your window back into place. Then push in the outside circle. Once you have it pushed into place, take the center and just push that right into place.
Now, cover that cap back up and push your motor into place. Then replace those three T30 Torx bolts. You just may need to raise your window up or down just a little bit just to get the teeth on the window motor to mesh up. Reconnect your lock rod cable to your lock rod and just push that onto this clip. Then, push your harness clips back into the door. Reconnect your speaker and if this fell off of your speaker, make sure you push it back into place.
Now, to reattach your door panel, you just want to connect these two harnesses. Then rehook your door handle cable into place and slide that clip forward. Now put your lock rod back through your door panel and then put the door panel back into the windowsill. Once it's fully into place in the windowsill, just hit around the edges to reactivate those clips. Now, we'll fast forward as Don replaces those two Philip's screws in the pull handle and the two T20 screws along the bottom of the door panel. Now just push your pull handle cover back into place. You are all set.
We hope this video helps you out. Brought to you by www.1AAuto.com, your source for quality replacement parts and the best service on the Internet. Please feel free to call us toll-free, 888-844-3393. We're the company that's here for you on the Internet and in person.
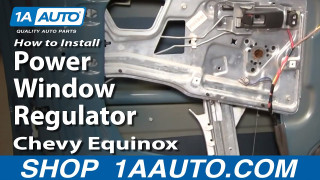
How To Replace Power Window Regulator 2005-09 Chevy Equinox
Learn how to remove the door panel and replace a damaged or bad window regulator motor with the help of the 1A mechanics in this video.
