How to Install Replace Rear Brakes Pads Rotors 2007-10 Chevy Suburban 1500
Created on: 2017-07-25
This video will show the steps for replacing rear brakes and brake pads, including how to prepare the new parts and what the torque specs are for reinstall
-
step 1 :Removing the Wheel
- Pry off the center cap with a flat blade screwdriver
- Loosen the 22mm lug nuts with the vehicle on the ground
- Raise the vehicle with a floor jack
- Secure the vehicle on jack stands
- Remove the lug nuts
- Pull off the wheel
-
step 2 :Removing the Brake Pads
- Make sure the parking brake is off
- Pry the brake pads into the caliper with a flat blade screwdriver to push in the pistons
- Remove 13mm bolts from the brake caliper
- Pull the caliper aside and hang it by a bungee cord
- Pry the brake pads off with a flat blade screwdriver
-
step 3 :Removing the Brake Rotor
- Remove the 18mm bolts from the brake caliper bracket
- Pull off the brake caliper bracket
- Make sure the parking brake is off
- Thread the 10x1.5 bolts into the rotor until it loosens
- Pull the rotor off
-
step 4 :Installing the New Brake Rotor
- Clean the caliper bracket with a wire brush and brake parts cleaner
- Clean the brake slides with a wire brush and brake parts cleaner
- Clean both sides of the rotor with brake parts cleaner
- Slide the rotor on and line it up with the appropriate holes in place
- Adjust the parking brake adjuster if needed
- Put the bracket back into place
- Tighten the 18mm bolts
- Torque the bolts to 122 foot-pounds
-
step 5 :Installing the New Brake Pads
- Apply brake grease to the brake pads
- Install the new brake pads into the bracket
- Put an old pad in the caliper
- Use a large C-clamp and the old pad to push the pistons back
- Put the caliper on
- Thread new 13mm bolts by hand
- Tighten bolts to 28 foot-pounds
-
step 6 :Reattaching the Wheel
- Slide the wheel into place
- Start the lug nuts by hand
- Tighten the lug nuts preliminarily
- Lower the vehicle to the ground
- Tighten the lug nuts to 140 foot-pounds in a crossing or star pattern
- Reattach the center cap
-
step 7 :Testing the Brakes
- Pump your brakes repeatedly until they feel firm
- Test your brakes at 5 miles per hour and then 10 miles per hour
- Road test the vehicle
Tools needed
-
13mm Socket
Large C-Clamp
Torque Wrench
Rust Penetrant
Pry Bar
18mm Wrench
Jack Stands
18mm Socket
Brake Parts Cleaner
Rubber Mallet
Bungee Cord
Anti-Seize Grease
Wire Brush
Floor Jack
Cloth Rags
1/2 Inch Breaker Bar
13mm Wrench
22mm Socket
Hi, I'm Mike from 1AAuto. We've been selling auto parts for over 30 years! We're dedicated to delivering quality auto parts, expert customer service, fast and free shipping, all backed by our 100% satisfaction guarantee. Visit us at 1AAuto.com, your trusted source for quality auto parts.
Okay, we're going to start this rear brake job by popping off the wheel cap. Use a small pry bar or a large flat headed screwdriver. Cap should come off pretty easily. Place that aside so it doesn't get broken. Take a 22-millimeter socket and a breaker bar, we're going to loosen up the lug nuts while the vehicle's on the ground. We're going to be doing this repair on a lift, but you can jack it up and put it on jack stands and do it in your driveway. But it's much easier to loosen these lugs with the wheel on the ground. Okay, now that these are loose, and it's up in here, we'll just take a 22-millimeter and a ratchet. Start taking them off. Eventually they get to a point they're so loose, you can just take them off by hand. We have to wiggle the wheel a little bit, once you get them all loose it might kind of go sideways and get stuck on a lug, so just wiggle it a little bit as you're taking it off—that will free it up.
Okay, so you also want to make sure that you don't have the parking brake on. So just pull that release before you get here. But we're going to use this C-clamp to compress the caliper before we remove it. This will help later when we're reinstalling the pads, and the caliper to the axle. You can see it's compressing in. This will also let you know that your caliper's moving freely. And remember, you don't have to undo the brake line from the caliper, you can leave that all in together.
Right, so now we're going to remove the upper and lower caliper slide pin bolts. This bolt head here is the 13mm, it also has a 20-millimeter. There’s a hex in here to keep that slide pin from sliding as you turn it out. They're in there pretty tight. Probably can't do it by hand, so we're going to use a rubber mallet to help break them free. Okay, so when removing these caliper pin bolts, you need to have new ones on hand, because the manufacturer recommends replacing them with every brake job. Once it's free, you can keep turning with the box wrench or a ratcheting wrench, or a socket and ratchet. Don't take it all the way out yet, because you want to free up the bottom ones so the caliper doesn't move on you. We'll do the same thing with the rubber mallet. They're pretty loose. I'm just going to counter-hold this with my fingers, that's why you had to kind of hold it with the wrench earlier, because it could spin. Make sure you hold on to that caliper, because it is loose and it will fall. You don't want to hang it by the rubber hose. I'm going to take a bungee cord, we'll just take our bungee cord, wrap it around and just keep the caliper out of the way there.
Now we're going to remove the caliper bracket bolts from the back of the axle here. These are 18-millimeter. Probably too tight to do by hand again, so we'll use a rubber mallet. Get the bottom one freed up, then move to the top one, same manner. These are freed up, you can switch to a ratcheting wrench or a socket and a ratchet. All right, so now I've got these pretty loose with the socket, I'm just going to remove by hand. Hold on to this bracket though, because as soon as you release it, it's going to want to fall. Now you can either take these out first, or remove them with the bracket, it doesn't really matter, because either way they're going to come right out. To get this rotor off the hub, we're going to spray some rust penetrant in here, and around the lugs a little bit. We're going to take two lug nuts, thread them down. You don't have to go tight, you just don't want the rotor to fall out. Because you're going to have take your rubber mallet, and just hit the rotor so it comes loose.
All right, so this is pretty well stuck on there. You've got to get it over the parking brake assembly, so we're going to use some 10 X 1.5 bolts. We're just going to thread them in here and basically use them to push the rotor off. Again, you want to leave these lug nuts on here so the rotor doesn't pop off and fall. You want to do this evenly.
All right, so to get this rotor off, it's stuck on the parking brake, there's a little rust ridge, even though the parking brake's released. We had to get some longer bolts, so I'm actually going to turn them in a little bit to loosen them up. So I get this lug nut off here. Now it's basically at the end of the threads, so I can't have it on there to hold it, so when this thing pops off. It might fall, so you have to be very careful. You just try to work it evenly back and forth. There it goes. So what it was stuck on, you get like a rust ridge in here, and they get stuck on this E-brake shoes.
Here we have the old rotor and pads from our vehicle. They're not that worn down, but we're just replacing them to show you how to do it. Here is the new pad and rotors from 1AAuto.com. As you can see, they've got the riveted on backing plates and a little tab just like the originals. They have a groove in them. The originals don't, but the groove doesn't really matter—they'll operate the same manner. Same thing for the other pad, got the riveted on backing plate, and a groove in the friction material versus no groove here. They'll operate in the same manner. This should be nice and quiet, and fit on your vehicle perfectly.
These caliper clips are in pretty good shape. We're going to clean them up with some brake cleaner and wipe them down. Clean them up with a wire brush, and we'll reuse them. They typically don't get too rusty because they're stainless, you just got to clean them up. Just get in there with a wire brush, paper towel, brake parts cleaner. Get them wiped down real nice. Do the other side. Spray some brake parts cleaner in there. Again, these are stainless, they typically don't get too rusty. If they're really gross and nasty, you should replace them, but these are okay, so we're going to reuse them.
Okay, so you can reuse the caliper mounting bolts. They just have to have the thread locking material cleaned off of them, so just take a little bit of brake parts cleaner and a wire brush, and brush it out of there. We got some penetrating oil here on the hub, so we're just going to spray it down with some brake parts cleaner, and then we're also going to spray down the brake shoes, just in case we got anything on them.
Now we'll toss the rotor on backwards. This way you can spray it down with brake parts cleaner. Make sure you get the inside because that's where the parking brake shoes are going to ride. The outside. If you need to, you can take a rag and wipe it down. Now we're going to take it, put it back around, put it on partway, until you go over the parking brake shoes, just like that. Take that brake parts cleaner, clean up the front. Again, we take a clean rag, wipe off any grease, finger prints, dirt.
All right, we're going to reinstall our brake caliper bracket. I put a little bit of thread locker on the caliper bolts. Make sure you get them started by hand, you don't want to cross-thread them. They should go in nice and easy. Use an 18-millimeter socket to bring these down, and a ratchet. They do have a final torque, so we're just going to bring them down so you're just starting to get tight. Okay, now that these are seated, we're going to take the 18-millimeter socket again, and our torque wrench set to 122 foot-pounds, and we're going to torque them.
All right, we're going to take some brake parts cleaner. Just sort of hit the friction material part of the pad, just to make sure if you touch it with any greasy fingers, it gets clean. Take a little bit of brake caliper grease. Put on the ears of the brake pad. This is the inside one. It’s going to go in just like this. Push it up against the rotor. Now we'll take the outside pad, which has the wear indicator on it. Spray it down with brake caliper grease.
Okay, we're going to unhook the caliper here. Put your bungee cord away. Slide the caliper over the pads. Okay, so we need to compress this piston in just a little bit further to get it over the new pads. We're going to take one of the old pads, we'll take that C-clamp we had earlier, and we'll just gently push it in. See how it's compressing the caliper? Now this should slide right over. Now you take your new caliper pin bolts, install those. These are a 13-millimeter. Caliper pins bolts seated, we're going to torque them to 28 foot-pounds. There's a 20-millimeter hex head here. We're going to have to counter-hold, otherwise it's going to spin on you. 28 foot-pounds is not very much.
So now that the brake job is done, get the wheel back on. Thread on your lug nuts by hand to prevent cross-threading. Okay, with all the lug nuts started, we'll take the 22-millimeter socket and a ratchet, just get them snug. Okay, with the vehicle on the ground, now we can torque the wheels to 140 foot-pounds. Put it all in a cross-pattern. Now you can install your center cap. It's got a locating lug here, and a little diagram of the valve stem, so it just needs to be opposite the valve stem.
Okay, so after your brake job, you just want to step on the pedal. Don't push it to the floor, just about 2/3 of the way down and just sort of slowly pump it up. This lets the calipers come out to meet the pads, because we compressed them. It'll be a nice, firm pedal.
Thanks for watching. Visit us at 1AAuto.com for quality auto parts, fast and free shipping, and the best customer service in the industry.
Shop Products

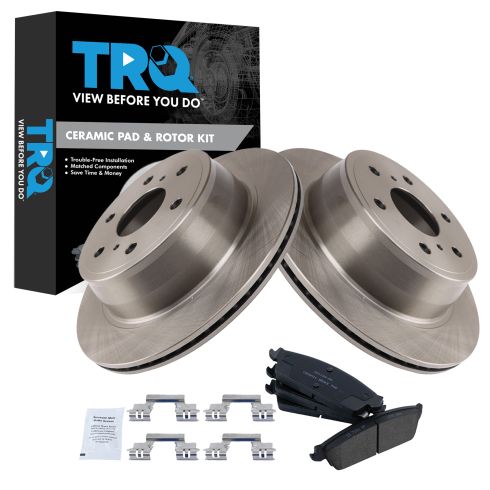
Chevrolet GMC Cadillac Rear Ceramic Brake Pad & Rotor Kit TRQ BKA10675
Part Details:
- Ceramic
- Premium Posi
- (2) Rear Brake Rotors
- (1) Rear Ceramic Brake Pad Set

How to Replace Install Front Brakes 2003-08 Honda Pilot
Fading or worn out brakes? Learn from our experts in this video how to replace and prepare the front brakes yourself, including torque specs
