How to Install Replace Change Battery 2001-06 Hyundai Elantra
Created on: 2013-05-17
Learn how to replace or install the battery on a 2001-06 Hyundai Elantra with this video full of helpful tips and instructions!
-
step 1 :Removing the Battery
- Remove the three Phillips head clips from the air intake shield
- Remove the 10mm bolt from the air box
- Pull off the air intake shield
- Remove the 12mm bolt from the battery hold-down
- Disconnect the negative battery cable with a 10mm wrench
- Disconnect the positive battery cable with a 10mm wrench
- Pull the battery up and out
-
step 2 :Installing the Battery
- Pull the cap off the positive terminal of the old battery
- Put the battery into place
- Insert the 12mm bolt into the battery hold down
- Check that the battery is secure
- Put the cap onto the positive terminal of the new battery
- Attach the positive battery cable with a 10mm wrench
- Attach the negative battery cable with a 10mm wrench
- Put the air intake shield into place
- Push the three plastic clips into the air intake shield
- Insert the 10mm bolt into the air box
Tools needed
-
12mm Socket
Socket Extensions
Flat Blade Screwdriver
Phillips Head Screwdriver
10mm Wrench
10mm Socket
Ratchet
Brought to you by 1AAuto.com, your source for quality replacement parts and the best service on the Internet.
Hi, I'm Mike from 1A Auto. I hope this how-to video helps you out, and next time you need parts for your vehicle, think of 1AAuto.com. Thanks.
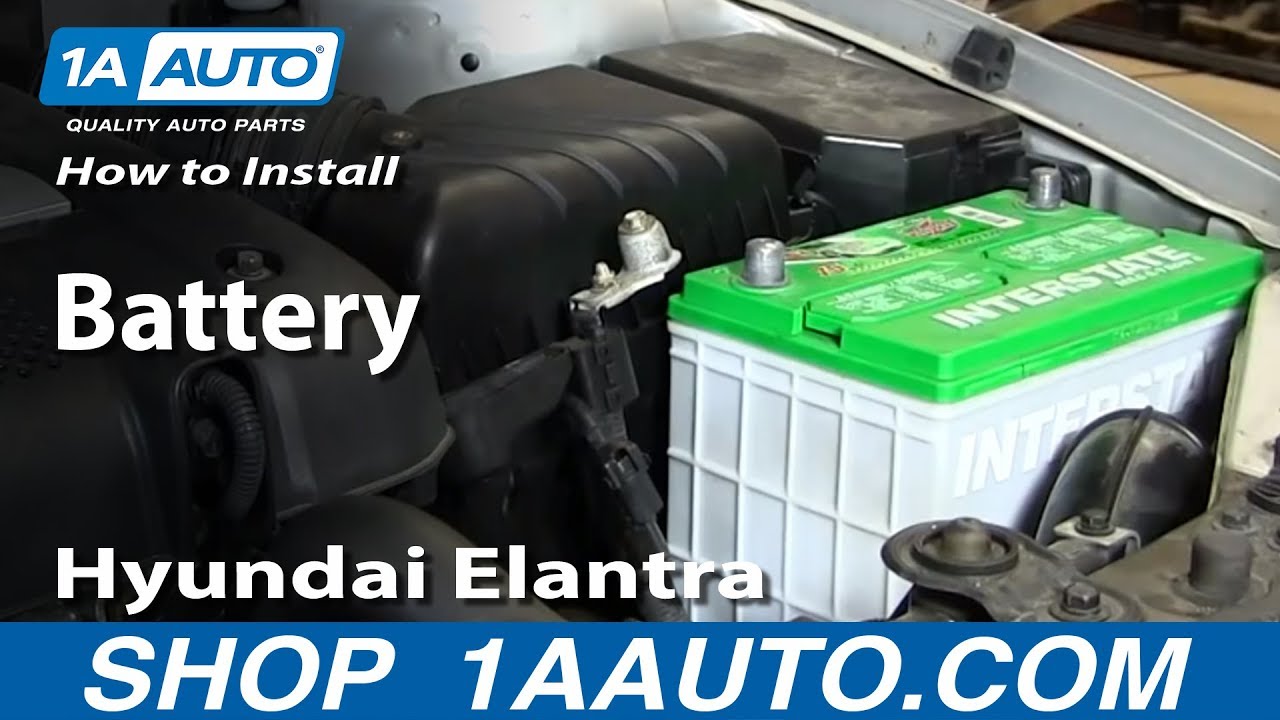
In this video we're just going to show you how to remove and reinstall or replace a battery in this 2005 Hyundai Elantra. It should be pretty much the same as any 2001 to 2006 Elantra. It is pretty easy once you know how to do it. You'll need either a 10mm wrench or a 10mm socket with a ratchet, and you'll also need a 12mm socket with a ratchet and an extension.
Locate the three Phillips head plastic tabs and your one 10mm on the airbox. Here's a closeup of those tabs or clips. You just unscrew the middle, pull it up and out, and then the clip comes up and out. We'll just fast forward here as you take, like we said, three clips out in the front, and then a 10mm bolt, and then lift that shield right out. Looking between the battery and front crossmember, you can see there the red circle is a 12mm bolt that you'll need to remove. I've got my 12mm and my extension. Take out the battery hold-down. We'll go in a little fast motion here. With a 10mm socket or ratchet or wrench, remove the negative first, and then the positive. In the positive, the bolt is right up on top. Loosen it up, and you can pull the positive cable right up and off. Now, grab the battery, pull it up and out. It is heavy.
You'll want to take the cap from the positive lead, and put that on your new battery. I'm putting the battery back in. Here's the battery hold-down bracket. Put your hold-down bolt back in. Start it out by hand. Make sure the battery is good and secure. Put the positive terminal back on first, and the little cap on the positive. It's generally good practice to put the positive cable on first, and then the negative cable.
We hope this video helps you out. Brought to you by www.1AAuto.com, your source for quality replacement parts and the best service on the Internet. Please feel free to call us toll-free, 888-844-3393. We're the company that's here for you on the Internet and in person.

Why you Should Replace Not Restore Headlights
See why replacing your cloudy headlights with new ones is always better than refinishing them Why should you replace your headlights and not clean or refinish them? Three reasons: It's a simple fix, it increases visibility, and it enhances the overall look of your vehicle. Headlights are made from a polycarbonate plastic that can be damaged by UV rays from the sun or suffer pitting caused by road debris light salt and rocks. If you look closely at an old set of headlights, you'll see that the lens is full of micro-cracks. This is called crazing. This crazing, along with pinning, will turn your headlights from crystal clear to hazy yellow and it cuts the output in half, making it very difficult to see at night. It also makes your car look old and dated. With parts from 1AAuto.com and our how-to videos, you can make your vehicle look new and stay safe on the road. To get new headlights for your vehicle, visit 1AAuto.com and visit our YouTube page for do-it-yourself and how-to videos.
