How To Install Replace AC Heater Fan Blower Motor Honda Odyssey 1999-2004 1A Auto
Created on: 2013-02-16
This video shows you how to replace the AC and heat blower motor on your 99-04 Honda Odyssey.
-
step 1 :Removing the Blower Motor
- Disconnect the blower motor harness with a flat blade screwdriver
- Remove the three 7mm screws
- Pull the blower motor down and out
-
step 2 :Installing the New Blower Motor
- Insert the blower motor into the HVC box
- Insert and tighten the 7mm bolts
- Connect the blower motor harness
Tools needed
-
Socket Extensions
Flat Blade Screwdriver
7mm Socket
Ratchet
Flashlight
Brought to you by 1AAuto.com, your source for quality replacement parts and the best service on the Internet.
Hi, I'm Mike from 1A Auto. I hope this how-to video helps you out, and next time you need parts for your vehicle, think of 1AAuto.com. Thanks.
In this video, we're going to show you how to replace the front heater and A/C blower motor on this 2003 Honda Odyssey. It's the same as any '99 to '04 Odyssey. It's not that hard of a repair. You'll need a flashlight, a 7mm socket with a ratchet extension, and a flexible joint will help the most, as well as some type of either flat blade or Phillips screwdriver just to help with the electrical connection to the fan.
Right up underneath the glove compartment on the passenger side. Right here, you'll see this is on the bottom of the motor there are three screws pulling it in. There is one there, one there, and then one right over here. When you go to take those bolts out just use a screwdriver. It's a small tab on the connector, so push the tab and pull the connector down. As you saw, actually, one of those screws was missing and we actually put it back in. You can see here, you can see how Jeremy is looking right, basically, through a slot in the dash, and he can see that third screw. It's back in there. He's using a flexible joint with a 7mm socket and a ratchet and extension to remove that first screw.
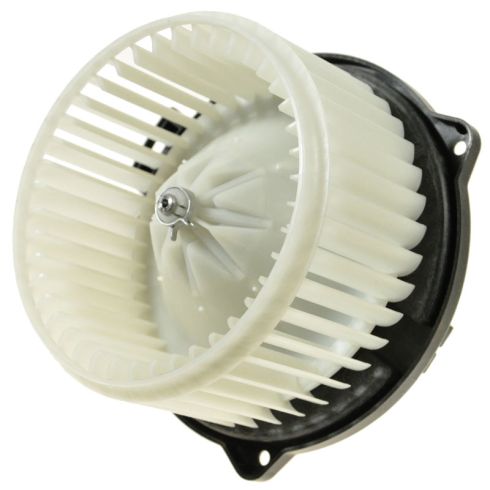
When you have the screws out and unplugged, the motor just kind of pushes down and out. This is the blower motor. As you can see, it comes with a cage. It also has the proper connector on the other side of it. It looks, fits, and works just like the other. Right here is one of the mounting points, and it faces in this direction. Just like it's sitting on the floor, here. You want it to go straight up into the HVC box. Here we go, it's in place. Now, we've got to put some screws in. I'm going to fast-forward through this.
You see what Jeremy does as he puts the two easiest screws in first. Let them hold the motor. Then he threads the last screw in, and then he just tightens them up. Again, I'm going at a lot of fast-forward. It takes a little bit, but if you just kneel on the floor right outside your vehicle and look in through the slot in the dash between the kick panel and the dash, you can see this pretty well, and get to it pretty easily. Last, but certainly not least, make sure you are able to plug the lead back in.
We hope this video helps you out. Brought to you by www.1AAuto.com, your source for quality replacement parts and the best service on the Internet. Please feel free to call us toll-free, 888-844-3393. We're the company that's here for you on the Internet and in person.
Shop Products
How to Replace Blower Motor 1997-2005 Chevy Venture
Check out this video on how to repair, install, fix, change or replace a broken, weak, noisy or screeching heater and air conditioning fan blower motor
