How To Install Remove Window Triangle Seal 1982-92 Chevy Camaro Iroc-Z Pontiac Trans Am 1A Auto
Created on: 2011-07-13
How to repair, install, fix, change or replace a weather strip that is falling down, coming apart, or the adhesive is failingon 82, 83, 84, 85, 86, 87, 88, 89, 90, 91, or 92 Chevy Camaro Iroc-Z and Pontiac Trans Am models.
-
It's recommended to mark bags and organize the parts accordingly as you remove them
step 1 :Removing the Door Panel
- Disconnect the negative battery cable
- Remove the three T27 screws on the door pull
- Remove the six T10 screws on the switch panel
- Pull the lock button back
- Disconnect the lock wiring harness with a flat blade screwdriver
- Remove the T10 Torx screw behind the lock button
- Remove the mirror control
- Remove the retaining clip from the mirror control with a flat blade screwdriver
- Pry behind the lock with a flat blade screwdriver
- Slide the side panel back and out
- Pry out the door panel with a door panel clip tool or putty knife
- Lift the door panel up and off
- Lift up on the door molding and remove it
- For more detailed instructions, please see the '86 Camaro IROC-Z door panel replacement video
-
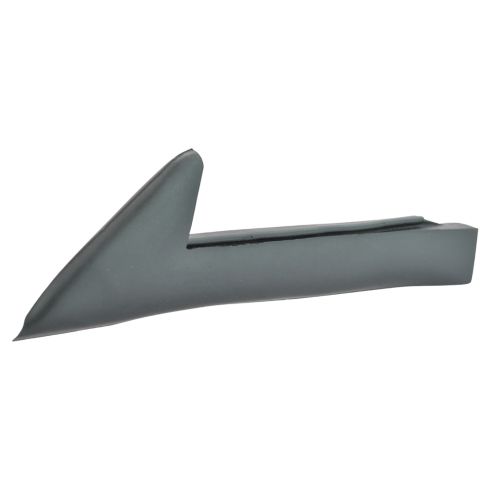
step 2 :Removing the Triangle Seal
- Remove the two Phillips screws holding the top of the weatherstrip
- Peel the top of the weatherstrip back
- Carefully peel the water shield
- Remove the 10mm nuts from the bracket attached to the triangle seal
- Remove the two 10mm bolts from the door
- Lift the triangle seal out of the door
-
step 3 :Separating the Triangle Seal
- Warm up both sides of the triangle seal with a heat gun
- Pull the triangle seal off with a pair of pliers
- You can try this process to skip removal of the door panel, though it is not recommended
Tools needed
-
Putty Knife
7mm Wrench
8mm Wrench
10mm Wrench
T10 Torx Driver
Flat Blade Screwdriver
T27 Torx Driver
Phillips Head Screwdriver
Heat Gun
8mm Socket
7mm Socket
10mm Socket
Ratchet
Needle nose pliers
Brought to you by 1AAuto.com, your source for quality replacement parts and the best service on the Internet.
Hi, I'm Mike from 1A Auto. I hope this how-to video helps you out, and next time you need parts for your vehicle, think of 1AAuto.com. Thanks.
In this video, we're going to show you how to remove the little seals that are attached to the triangles right behind the side view mirror on this '86 Camaro IROC. It's the same as any '82 to '92 Camaro, as well as the Firebird. There are two ways to do it: the correct way is to take the door panel off and take the whole triangle assembly out, heat it up, and remove it. We also show you how to do it just on the car, but if you just pull it off on the car, there's some challenges of getting it back together. We recommend taking it apart, taking the whole assembly out, the way we do it the first time. The tools you'll need are mainly for getting the door panel off: T27 and T10 Torx drivers; medium and small size flat blade screwdriver; 7mm, 8mm, and 10mm wrenches or socket with a ratchet; a door panel clip tool or putty knife; Phillips screwdriver; pliers; plastic bags; and a marker. We have that because on this vehicle we're actually taking it apart, then we're going to have it painted, and then we're going to put it back together, so we use the plastic bags and markers to organize things, and you'll also need a heat gun for removing this weather strip.
The first thing you're going to want to do is probably disconnect your battery, because if you keep the door open for a long time you could run down the battery with the interior lights. We're actually going to speed through removing the door panel. It's fairly easy. There are a few T27 and T10 bolts, and then you need to remove the clips carefully either with a door panel clip tool or a putty knife. If you'd like to see this procedure in regular speed, just check out our other videos for the Camaro door panel removal.
There are two Phillips screws to remove so you can pull back the top of the weather strip. One here, then right into here. You'll see there's a little hole in the weather strip. You can remove the screw and you peel that back. I'm just going to pull the screw out here so I don't lose it. Then you want to pull your shield back and use your 10mm socket and ratchet with extension. There are two 10mm bolts to remove. We'll just speed it up here as we remove those two 10mm nuts. They're on top of a little bracket that's attached to that triangle seal and the front window channel.
Once you've removed those two 10mm nuts, there are two 10mm bolts here to remove. Once those are removed, pull this right up, and twist it correctly here. Let's get this out first. Then it comes out. Taking the whole assembly out like this is the recommended way. These are glued in. You may be able to grab on here and yank them out, but I highly recommend a heat gun because what that'll do is you'll heat it up and that'll loosen up the adhesive. Then everything will slide out, and it'll be nice and clean. I'm just going to heat up my heat gun and warm up both sides. We'll just speed it up here while we're heating up.
You just want to make sure you get both sides good and warm. Then you should be able to grab a hold with a pair of pliers and pull it right out. Now, if you do want to try and replace your seals here on the car, a heat gun is necessary because you want to release them clean, because if you don't, if any of residue or anything stays in there, then you'll have a really hard time getting your new ones in. It's the same thing. I'm just going to heat up both sides. It's a little bit tougher. Then you hit up the top too because it's always glued right in here. Grab hold with pliers again.
Yeah, this doesn't want to come up because I haven't - you can't get down low and release the glue that's down low. Oh, here it comes. There you go. The other issue with doing it this way is that they flair out at the bottom, so when you're putting the new in there you have to make sure you get that down in correctly. Now this clip is from later.
After, I've taken more stuff apart, but, basically, I just wanted to show you that when you take things apart, especially in this case, where, with this car, we're going to take it all apart and then get it painted, I do things like take the mirror off, and then I put the nuts back on so I can find them. I put the bolts back into the track. There's a little triangle piece is on and put things back together, and then I took little bags and clearly marked them as far as maybe the door panel hardware or some of the window hardware and things like that. Then, like the door handle bezel that you can see underneath my hand, all in black, I reassembled that with the switches and stuff.
Just put things back together so that when you're ready to put the car back together, you can find all the bolts and nuts and everything. It makes it a whole lot easier when you go to put the car back together.
We hope this video helps you out. Brought to you by www.1AAuto.com, your source for quality replacement parts and the best service on the Internet. Please feel free to call us toll-free, 888-844-3393. We're the company that's here for you on the Internet and in person.
Shop Products


Easy Trick to Fix Dragging Power Windows for Good
An easy way to keep your windows from dragging or going up slowly. This easy trick will save you lots of money!
