How to Install Rear Shock Absorbers 2010-15 Kia Sorento
Created on: 2020-06-05
Watch this video to learn how to install new TRQ rear shocks on your 2015-20 Kia Sorento.
Tools needed
-
24mm Socket
Air Chisel
Torque Wrench
Hammer
Rust Penetrant
Pry Bar
19mm Socket
Safety Glasses
21mm Socket
Pickle Fork
Gloves
Blowtorch
Air Compressor
10mm Socket
Ratchet
Floor Jack
1/2 Inch Impact Gun
Now, it's gonna be time to do these rear shocks. When you do then, you want to do them as a pair, and it's also a great practice to go ahead and get yourself an alignment afterward.
Now what we're gonna do, we're gonna safely raise and support the vehicle so that the weight is off the wheel. We're gonna remove all 5 of these 21-millimeter lug nuts. Remove your wheel. With the wheel off, we have a nice, clear view. We've got our 10-millimeter bolt right here. We're gonna remove this plastic. And then, we'll come right here. Let's get this off of there. Use a 19-millimeter to remove this nut. Grab all that hardware. Now, we're gonna use a 24- millimeter to remove this bolt. It's gonna go straight through. Make sure you're holding onto your shock just in case anything happens. That feels pretty safe. Just gonna try to pry it away. Do the same down along the bottom. Now, I'm just gonna go ahead and give this a couple light bonks. I'm gonna hold onto the shock so it can't go anywhere. Let's try a pickle fork. All right. If you needed to, you can try to heat this up. Just go right along the edge where the stud is and where the bushing on the inside of the shock is. Just be careful. Of course, you don't want to heat up anywhere close to the gassed area of the shock.
Okay. So what's happening here for us is the outer portion of the shock, right around here, is pulling away due to the rubber separating. But the inner portion that's supposed to go over the stud is still frozen on there. What I'm gonna have to do, take off this nut, get the existing portion of the shock off of there, and then we'll work out getting out this metal piece of the bushing.
Get that out of there. The next thing you need to do with your shock is to make sure you gas it up. To do that. Hold it stabley between your feet. Press it down all the way to the bottom. Let it rise. Once it's done that, continue doing this three to five times.
What we need to pay attention to is the top of the shock. And what I mean by that is this side you have a nice bushing area. And this side, you have a concave area. You want the concave area facing in, towards the body of the vehicle. You wanna have this facing towards the front. So, I'm gonna give it a little twist. And now, I'm gonna come in here like this. I'm gonna compress this down. Put it up and through. Start it on the stud right here. And then, as it comes up, I'm gonna go ahead and guide it right into the area that it needs to go on that.
So now, if you were to pay attention to right up here, you can see that it still has the metal coupling on there. I'm just gonna spray down the area using a little bit of penetrant. Let it sit. And then, I'm gonna give this a couple loving bonks and see if I can get it off of there.
So now all you would do is just compress back down the shock. Line it up with that area right there. Slide it over. Now, we're gonna put our bolt through here, and that'll pull it right in. Let's grab our nice, big bolt here. Start it in by hand. Make sure it's not cross-threaded. Let's go ahead and tighten it up. Okay. That's bottomed out. Get the lower together. We're gonna use our nice, flat washer. Then the locking washer. And then, of course, our nut.
Now let's go ahead and torque this bolt to 116-foot-pounds. Torqued. And torque the lower one to 116-foot-pounds as well. Now, it's time to put on our little cover. See you have the hole and the slot. Right here you have a hole and then a piton. The piton's gonna go through your slot. And line that up. Start our bolt in. Go ahead and snug it up. On there. Start on a couple of my lug nuts. Then, we're gonna bottom them all out. And then, we'll torque them to 80-foot-pounds. Now with the tire just barely touching the ground, we're gonna go ahead and torque these to 80-foot-pounds in a star pattern.
Shop Products


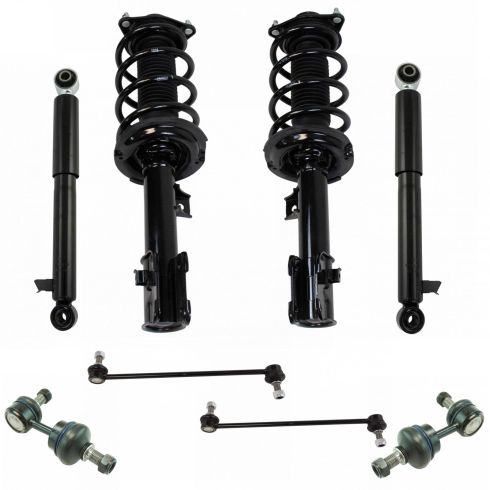
Hyundai Santa Fe Santa Fe Sport Front & Rear 8 Piece Suspension Kit TRQ SKA67288
Part Details:
- (2) Front Sway Bar Links
- (2) Rear Sway Bar Links
- (2) Front Strut & Spring Assemblies
- (2) Rear Shock Absorbers
- 8 Piece
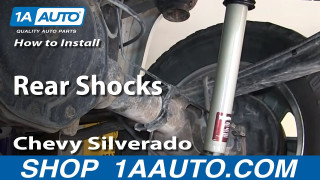
How to Replace Shock Absorbers 2007-16 Chevy Silverado
You can learn how to change the rear shocks on your 07-13 Chevy Silverado or GMC Sierra. Watch this video where 1A Auto experts show you step by step!
