How to Install Rear Mud Flaps 2011-15 Ford F-350
Created on: 2019-05-24
These splash guards will provide added protection to the body of your 11-15 Ford F-350. They're easy to install, watch this video to find out how!
-
step 1 :Installing the Rear Mud Flaps
- Insert the plastic clip into the bottom pre-drilled hole
- Line up the mud flap in place to determine which of the side pre-drilled holes you should use for the metal threaded bracket
- Insert the threaded bracket into the correct hole with the threaded part to the rear
- Secure the flap into the clip and bracket with the 5.5 mm screws
- Remove the 10 mm bolt from the 13 mm nut already in place on the body
- Attach a threaded bracket to the inner mounting hole on the mud flap
- Attach the round hole end of the stabilizer bar to the inner bracket on the mud flap loosely with a 5.5 mm screw
- Attach the slotted end of the stabilizer bar to the body with the 10 mm bolt and 13 mm nut
- Adjust the placement of the stabilizer bar and then tighten the 10 mm bolt
- Tighten the inner 5.5 mm screw
- Repeat the process for the other side
Tools needed
-
Impact Screwdriver
Socket Extensions
5.5mm Socket
10mm Socket
Ratchet
13mm Wrench
Hey everyone. Sue here from 1A Auto and today I have a 2015 F350 in the shop and I'm going to be putting on mudflaps. These came from 1A Auto and they are factory designed, they even have the emblem Ford etched in it. Real easy to install. Let's take a walk.
Comes with all the brackets you're going to need. Comes with three plastic clips and three bolts that go in it, in this metal bracket that's used specifically for vehicles that have extended flare out. And the package has the directions in it so it's really easy to follow. You can look right in here in the fender well and it's already got the pre-drilled holes so what you're going to do is put the clip in, the plastic one, goes on the bottom slot. Snaps right up in there. And then you're going to take your mudflap, line it up and see which one out of the two up here, so it's going to go in this hole. You want to make sure you put the threaded part on the inside of the fender well and it's going to snap and fit right in there. That little piece right there, that metal piece, will hold it right in center. We're going to put those, that up in there. Start that by hand. And I'm going to put plastic one in the center here. Start that by hand.
That's a 5.5 socket, so it's 5.5 millimeter socket. You don't need a swivel on back mudflap, just the front. First thing I'm going to do is hold it flush right where I want it to be and I'm going to tighten the top one first. And then this bottom one right here. I'm going to hold it flush right where I want it to be. Beautiful.
Now for the next step, we're going to have to go underneath and it's not really a big deal but you see this bolt right here? That's a 10 millimeter socket, that's going to come out and on the backside of it is a 13 millimeter wrench. Line that right up. I already pre-sprayed it, 10 millimeter socket on this side. There you go. You're going to reuse the nut and the bolt for that back.
We're going to take this brackets that's supplied, take this clip. It's going to go on this ear part right here. Obviously I'm going to put the clip so that the threaded piece is facing down. Slide that right over that hole. Hear it snap in. Now, I'm going to guide this back there where I know it's going to go. I'm just going to hand guide that bolt in. Not going to tighten it yet. You can see the fender right there and that slotted piece of that bracket lines right up. And there's a mudflap, not a mudflap, there's like a fender well in here. You're going to line all those pieces up together. Take your old bolt, guide it through. Take that fender well, plastic piece, guide that through and then there's a bracket on top. This is basically this bracket holds the fender from flapping in the wind. Then you're going to guide that right into the spot.
I've put my head up inside the fender well because I can. Now I guide it in there. I can see more instead of playing around. I can put the nut back on. I'm going to grab the actual socket and I'm going to start it. I'm not going to tighten it because I want to make sure I line up the mudflap properly.
Now I'm just going to hold the mudflap, put my 5.5 millimeter socket down on this little bolt. Snug it down. Put my 10 back on. See the flex in this? Obviously I want it as tight as possible so I'm going to reach in there, tighten this up. Rear mudflap's on.
Thanks for watching. Visit 1AAuto.com for quality auto parts shipped to your door. The place for DIY auto repair. And if you enjoyed this video, please click the subscribe button.
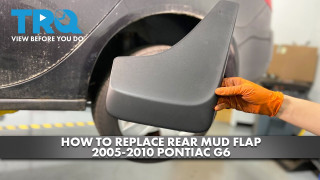
How to Replace Rear Mud Flap 2005-2010 Pontiac G6
This video shows you how to install mud flaps on your 2005-2010 Pontiac G6.
