How to Install Rear Bumper Step Cover 2013-17 Subaru Crosstrek
Created on: 2018-02-12
How to remove or replace the rear bumper cover on your vehicle to the 13, 14, 15, 16, 17 Subaru Crosstrek
-
step 1 :Removing the Bumper Protector
- Heat the protector with a heat gun to soften the adhesive
- Thread string underneath the protector and slide it down
- Rub off any remaining adhesive with a rubber glove and adhesive remover
-
step 2 :Installing the Bumper Protector
- Line up the arrow on the protector with the latch
- Clean off the bumper with soap and water
- Clean the surface of the bumper with an alcohol pad
- Heat the back of the protector with a heat gun
- Line up the protector
- Slowly peel off the tape and press the protector on
Tools needed
-
Wire or String
Gloves
Heat Gun
Paper Towels
Adhesive Remover
Hi, I’m Mike from 1A Auto. We’ve been selling auto parts for over 30 years!
Open the tailgate. To remove an old, faded bumper protector like this, it's stuck on with double-sided tape. We're going to use a heat gun. You can also use a hair dryer. You do want to be careful that it's not set too hot, because you can melt and damage the paint. We just want to heat this up enough to soften the tape and be able to pull it off. We're going to start with it at a fairly high setting. I'm going to start by heating up a corner. You can either use a string or thin wire. After it's heated up, we're going to slide it underneath just like this and just work it down.
I'm going to heat it up. This tape along the outer edge here, here, and then around the back. Just moving it around so I don't overheat one spot. I don't want to melt anything. I just want to soften up this double-sided tape. Try that out. That's some of it. Whoops. That's working pretty well, so I'll keep going, keep heating it up. If you don't have access to a hair dryer or a heat gun, you could always set this out in the sun. On a summer day, it can get pretty soft.
Once you get it started, usually you can peel it off. That stuff's going to be fun to remove. Just keep heating it. And there's your old one. I'll wipe some of the dirt out of here, just dust it off. Sometimes, you can take your fingernail and just peel it off. This is pretty tedious, and you're just going to have to do this until all of the remainder of this double-sided tape is removed. I'm using a rubber glove. I can actually remove it pretty easily, just rub it. Just go along. I'm going to take some adhesive remover. This adhesive remover is also safe on paint. I'm just going to finish getting off the remainder of it. It won't come off with my gloves. Just keep doing this until any traces of double-sided tape are gone. No more step pad. This is our original step pad we took off.
Here's a brand new, exact replacement one from 1AAuto.com. It has brand new, double-stick tape on it. It comes with installation instructions and alcohol prep pads so that we can clean the bumper and install the new one. This will look great and fit perfectly.
There's a very, very tiny arrow right here. You're going to align that up. Just eyeball it in the middle of this latch, and that's going to be the middle of your bumper. It's not going to fit all the way up against the bumper, because it has a lip. It's going to fit right up against there. You're going to test fit it before you take any of the tape pieces off. Just make sure that's where you want it. That looks real good, nice and even. You're going to take it back off. I'm going to prep the area with these wiping pads.
If your vehicle is dirty, you'll want to wash it, soap and water, just like you do in a car wash. Dry it off. Then, you can take these alcohol pads, and we're going to wipe. It's got tape that's going along the outside edge. We're just going to wipe this whole area down. I don't want any dirt, oil, wax. If you wax your car a lot, it will make the double-stick tape not stick, so just make sure it's really clean. The alcohol will just evaporate, and then you're ready to install it.
Just a tip to help the tape stick better, we're going to use a heat gun or a hair dryer. I'm not going to have it set to a super high setting. I want to warm up the tape, and I want to make sure the bumper is warm, so that when they make contact, they stick really well. I'm just going to warm this up.
Just keep moving it. Don't let it sit in one spot. You don't want to melt or burn your paint. It doesn't have to be blistering hot. Just warm to the touch is good. That's probably going to be hard to keep bit of a surface area hot, so if it's a really cold day, you might not want to install this. You might want to wait until it's warmer outside, or do it inside where it's warm. We're going to warm up the tape. We're not going to pull the backing off, yet. We're going to align this back up. That looks good there. I'm going to hold down on it.
I'm going to start with this piece of tape on the front, first. I'm just going to pull it down and away, gently. We'll stick it. I'm going to hold it in place and just peel away. Don't just rip it, but just peel it slowly, so it doesn't tear. Push that one in. The next piece of the tape, I think we have this one. I grab this one, here. This is the side one. Push that down. I'm going to go to the other side. Lift this tape up. Peel it away. Oops. There we go. And, finally, the back tape is going to be a little trickier. Then, I'm going to push down on it. You want to put your weight onto it. That's it. Your bumper protector is installed.
Thanks for watching. Visit us at 1AAuto.com for quality auto parts, fast and free shipping, and the best customer service in the industry.
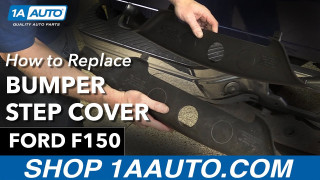
How To Replace Bumper Step Cover 1997-2004 Ford F-150
New Bumper Step Pad from 1AAuto.com How to install a bumper step cover on 98 Ford F-150 pickup truck.
