How to Install Power Folding Tow Mirrors 2009-10 Dodge Ram 1500
Created on: 2014-09-29
Check out this installation video on how to replace your side view mirrors with power folding tow mirrors from our website on your 09-10 Dodge Ram 1500.
-
step 1 :Removing the Door Panel
- Remove the Phillips head screw inside the door handle
- Remove the Phillips head screw at the front top corner of the door panel
- Remove the two Phillips head screws on the bottom of the door panel
- Lift the door panel up and off
- Pop the lock bezel out
- Pry up the window switch panel by hand
- Disconnect the window switch wiring harnesses
- Remove the four Phillips screws from the speaker
- Pry off the speaker
- Disconnect the speaker wiring lead
-
step 2 :Removing the Side Mirror
- Disconnect the mirror wiring harness
- Remove the three 10mm nuts from the mirror
- Have an assistant hold the mirror
- Push in the clips on either side of the harness connection
- Remove the mirror
-
step 3 :Removing the Protective Rubber Boot
- Pry up the door soleplate with a flat blade screwdriver
- Pull the glove box down
- Push in the tabs on either side of the glove box
- Pull the glove box down and remove it from the hinge
- Push in on the tabs on the body harness
- Pry out and remove the body harness
- Disconnect the wiring harness
- Push the rubber boot through the door to release the harness
- Carefully peel the top left corner of the water shield
-
step 4 :Removing the Dash Panel
- Remove the side dash panel by hand
- Remove the screw from the pillar trim with a 4mm Allen wrench
- Remove the pillar trim
- Disconnect the dome harness
- Remove the two Phillips screws from the lower dash panel
- Pull out on the lower dash panel
-
step 5 :Installing the Power Fold and Light Wiring Harness
- Run one of the power fold harnesses behind the center and across to the passenger side
- Feed the wire up through the dash and through the hole on the body
- Repeat the process for the light harness for the passenger side
- Move back 18 inches on the wire
- Cut a foot of the insulation off toward the body of the car
- Pull the rubber body off the body harness
- Pull the harnesses out with a flat blade screwdriver
- Feed the folding and light harness through the body harness boot
- Place the wires on the corner of the harness connection
- Slide the harness back into the body
-
step 6 :Installing the Mirror Wiring Harnesses
- Feed a straightened out coat hanger or stiff wire through the boot
- Pull the wires through the boot
- Tape the wires to the coat hanger or wire with electrical tape
- Feed the wires and coat hanger carefully back through the boot
- Feed the wires into the door and out through the top hole without interfering with the window regulator
- Feed the wires through the door and into the mirror pad
- Hook the wire harnesses into the mirrors
-
step 7 :Installing the Folding Tow Mirror
- Put the mirror into place
- Insert and the three 10mm nuts to the mirror
- Tighten the 10mm nuts
- Remove the end of the all black wire
- Loosen the 10mm bolt below the mirror
- Wrap the ground wire around the bolt
- Tighten the 10mm bolt
-
step 8 :Installing the Protective Rubber Boot
- Pull the rubber boot into place and back through the door
- Reconnect the harnesses
- Pull the wires through on the other side
- Snap in the body harness
- Wire-tie the light and folding wires to prevent movement
- Push on the water shield
-
step 9 :Installing the Mirror Wiring Harnesses
- Sustain the harnesses together on the passenger side with electrical tape
- Wire-tie the harnesses up into the lower panel to prevent them from hanging
- Wiretap the power fold harness to a switched power source
- Probe the orange line with an electrical connector
- Hook the puddle light wiretaps to the blue and green striped wire that ran the dome lights
- Connect the dome light harness
- Test the puddle lights
- Push in the pillar trim
- Tighten the screw with a 4mm Allen wrench
- Ground the fold switch to a screw at the bottom of the dash
-
step 10 :Installing the Mirror Switch
- Drill out a hole in a small panel with a dremel to fit the mirror switch
- After running the harnesses through both doors connect the switch to the wiring harness
- Turn the vehicle on
- Test the power folding switch
- Turn the vehicle off
- Disconnect the wiring harness in the engine compartment to create more room
- Place a piece of stiff wire up through the harness boot
- Hook the stiff wire onto the power source wire
- Pull the wire back into the vehicle
- Open the fuse box
- Remove the parking light fuse
- Hook the power source fuse to the parking light fuse
- Push in the parking light fuse
- Push the fuse box cover down
- Reconnect the wiring harness
- Hook the driver side marker light to the power wire ran from the fuse box with a wiretap
- Turn the vehicle on
- Test the marker light
- Turn the vehicle off
- Wire-tie the excess wires up into place underneath the dash panel
-
step 11 :Installing the Lower Dash Panel
- Push the lower dash panel into place
- Insert and install the lower Phillips head screws
- Connect the power mirror switch harness
- Press the power mirror switch into the dash panel
- Push in the side panel
- Push in the door soleplate
- Push in the glovebox
-
step 12 :Installing the Door Panel
- Reconnect the mirror harness
- Put the speaker into place
- Insert the four Phillips screws into the speaker
- Connect the speaker wiring lead
- Lift the door panel into place
- Push in the door panel clips
- Push in the lock bezel
- Insert and tighten the two Phillips head screws on the bottom of the door panel
- Insert and tighten the Phillips head screw at the front top corner of the door panel
- Insert and tighten the Phillips head screw inside the door handle
Tools needed
-
Electrical Tape
Flat Blade Screwdriver
Phillips Head Screwdriver
Drill
Wire Ties
10mm Socket
Slip-Joint Pliers
Ratchet
Assistant
Coat Hanger
Wire Cutters
4mm Hex Wrench
Brought to you by 1AAuto.com, your source for quality replacement parts and the best service on the Internet.
Hi, I'm Mike from 1A Auto. I hope this how-to video helps you out, and next time you need parts for your vehicle, think of 1AAuto.com. Thanks.
In this video, we're going to show you how to install our upgraded power folding mirrors on this 2006 Dodge Ram. This truck does not have power folding mirrors. We're going to put the power folding mirrors on it and show you how to wire them. On this vehicle it also has the optional running lights as well as puddle lamps. We wire up all those things. You will be able to purchase the mirrors as you want maybe you just want the power fold, maybe you want the puddle lights, maybe you don't. We'll show you how to do each one of those. You'll need new mirrors from 1AAuto.com and a bunch of other pretty common tools. You will need wiring pliers and you'll need something to make the dead panel on your dash into a good place to mount the switch as you'll see later. We're going to show you in detail everything to do on the passenger side, but the driver side is the same procedure.
You want to remove the screw that's in behind the door handle, as well as couple of other screws: one up top and two down the bottom. With those screws removed, you can lift up on the panel and then just pop the lock bezel out and then reach up and through. I like to do it this way just to make sure you don't break that panel. You can push the clips, pop that panel up, and then there are tabs on those harnesses. Push the tabs in, remove the harnesses, and pull your panel up and off.
Four Philip screws hold the speaker, so remove those screws. Once you got the screws out, just pull the speaker out. On the back there is harness connection. There's just a little tab you press and pull that connection out. The harness has a little tab on the top. Push it down, disconnect the harness, and then remove the three 10mm nuts that hold the mirror in place. It's actually clips that hold the mirror even after the nuts are off they're on each side of the harness connection. You see here, we push them in as a helper holds the mirror and takes it off.
Okay, use a screwdriver to help yourself get under the door soleplate and then pull up, snap out. and then pull up to release the other clips that hold it in. You want to pull your glove box down so you can access behind it. There are just tabs on each side. You just push in on the sides of the glove box, pull it down, and it will unhook from the hinge. Now, you need to disconnect the body harness. There are basically four tabs around the harness. I'm actually pushing in on the tabs with the screwdriver and prying out at the same time. Then I reach in, I'm going behind it to push on the other final tab, pull that out, and then disconnect the harness by pushing down on the little tab and pulling it apart.
Okay, we're going to run our wires through the body harness connection. I'm going to reach in the door and just push the rubber boot through the door. Slowly and carefully pull your water shield down. Be very careful not to tear it or rip it, and you just need to pull the top corner down on each side.
On the driver side, you want to pull the side dash panel off. Work your fingers in and under the bottom and then slide them up and release the clips all the way around. We need to access the dome light harness. You want to remove this screw that holds the pillar trim in. Two screws on the bottom hold the lower dash panel in there and in behind that break controller. Once you have the screws out, pull out on that dash panel. You don't want to pull it down, you want to pull it mostly back and a little bit down to release all the clips.
Now, we're going to run one of our power fold harnesses across, and that will pull that harness through the rest of the way. Then feed it up into the dash and through the whole on the body of the truck. You want to repeat this process with the harness for the light as well. The folding harness has an insulation on it, and you basically have to put it through the body harness boot. You want to go back about 18 inches and cut it, and then cut about a foot of the insulation off back from there to the body of the car. I'm just going to fast-forward as I do that. We're actually not removing the insulation that's near the plug; we're removing an intermediate piece of the insulation.
Now, on the plug end, you want to pull the rubber boot off and then use a small flat blade screwdriver and there's a tab right inside to release that and pull the harnesses out. Now you can feed both your light harness and your power fold harness through. You could see I get the power fold harness through, and I pull that back insulation through to the point where I have just the bare wires. Then you get those wires, make sure they're placed in the corners of your harness connection. Once you get them pretty straight you can slide your harness back in and it's nice and tight and the wires are through.
Okay, here I'm using basically a straightened out coat hanger or you can use a piece of stiff wire. I'm feeding it through the boot and out the other end so I can hook it on to the wires and then pull the wires through the door hinge or the door Now with the wires through, I tape my wires on to it and then carefully pull it through that boot. Now, feed your wires into the door and very careful at this point, you need to make sure they come in into the door and then they exit out through this hole here. Make sure that they do not in any way interfere with the window regulator. You need to make sure that they're in behind the regulator and come up without interfering with the window. Both harnesses are routed up through the door, and make sure the harnesses come through the mirror pad.
Now we're going to hook those harnesses in as we put the mirror up the door. These are prototype mirrors that I'm fitting, so the harnesses were a little bit short so they had caused a little bit of difficulty. That won't be a problem on the production mirrors. With all the harnesses routed through correctly, put the three 10mm nuts back on and we'll tighten them up. Okay, you want to take the all black wire and hook it to a ground. Remove the end of it and put a wiring eye on it. Loosen up that 10mm bolt that's just below the mirror, and put the ground wire in there and tighten it back up. Now your door is all wired.
You're going to want to reach in and get the boot back in place. Pull it through the door through that speaker hole and get it back into the door. Then reconnect your harness. You have to pull the wires through on the other side just to make sure they don't kink it all and just work it in place. If you move the door around a little bit, it makes it a little easier to lock it in place. Make sure the boot is all back where it should be snapped in. Then just put on some wire ties to hold everything in place so it doesn't move around. Make sure you've cut those off and put the insulation back in place.
Here, we're just wire-tying the harnesses together using some, actually, electrical type. Tie them together, and then wire-tie them up into place so that they don't hang down at the passenger's feet. We have to hook the harness for the power fold to a switched power source. On this truck, once we opened up that side panel, there's an empty harness connection here. The orange wire is a switches power source. Just to make sure, you might want to just probe it with an electrical connector or an electrical probe. Just to make sure that it's only on when the power of the truck is on.
On our vehicle we had optional puddle lights on the other prototypes. We hook those puddle lights into the blue with green stripe wire that ran the dome lights. Here's a close up of using those fuse or the wire taps. Tuck in, and then we reconnect the dome harness after we had hooked the power source for those puddle lights up. Okay, just a test here. We'll turn the inside lights on and off. And you can see the puddle lights are lighting up.
And now just put that pillar trim back in place. Tighten up the screw that holds it. You'll need to ground the fold switch, so this wire is the one coming from the power folding switch harness. And we're just hooking it up to a screw at the bottom of the dash there. We've run our wires for both doors and the wire for the switch. Now we're going to mount our switch into this small panel, and we're going to be using a precision drill tool to fill out an exact hole for the switch.
Now just a test. Again, like I've said we've run the harnesses for both doors and the switch harness into the dash. And just a test . the mirrors fold and move back.
Now you have to run a wire out to the engine compartment of the vehicle. That's a power source for the marker lights. So we're going to run it right through the wiring boot. Seems like the best way to do it. And we're going to disconnect this harness it just seems like an easier way to get to things. Pull that back and disconnect that harness. So we use the same method that we used with the boots through the door. You put a piece of stiff wire up through that harness boot, hook it on to the wire, and pull the wire through to the engine compartment.
You can see here the wire is taped to a coat hanger, and we're pulling it back through into the vehicle. Now we're going to hook that wire to the parking light fuse, and we're kind of using an oldr style fuse tap. The new kit will come with a newer style fuse tap that create a separate circuit for the mirror lights. But the parking light fuse on the fuse box is right here, pull it out, put the tap in with it, and reconnect it. There's our wire hooked in, so put the fuse box cover back down.
Then, here we are just reconnecting a harness that we connected that made it easier to get the wiring through. Okay, again here using a wire tap and I'm hooking one of the lights, or actually the driver side marker light to that power wire we just ran from the fuse box. You can see I turn it on, a little test, and the marker light works, and so now I'm using another wire tap and connecting the wire for the other side. And the lights are LED so there's very little draw.
With all the wiring mostly complete, we've wire-tied everything into place to make sure it's nice and secure and it's not going to drop down on anybody's feet or get tangled or anything. Put the lower panel back into place and secure it with two bottom screws.Here we have our switch in that little panel, press the switch in, and put it into the dash.
Put the side panel back in place and any of the carpet trim on the sides. Hook your glove box back into place, and it just raises up and you put it back into place. And we've secured all the wiring with wire pads. And put the carpet and side trim back in place, Reconnect the main mirror harness. And reinstall the radio speaker, and we're going to fast-forward as we go through and putting the door panel back on. We showed you in detail on the passenger side, so you need to repeat everything we did on the driver side.
With everything back together we'll do a quick test. The power fold works nicely, and then the lights come on with the truck lights. And again our prototypes also had puddle lights. You may or may not have puddle lights on the mirrors that you purchase.
We hope this video helps you out. Brought to you by www.1AAuto.com, your source for quality replacement parts and the best service on the Internet. Please feel free to call us toll-free, 888-844-3393. We're the company that's here for you on the Internet and in person.
Shop Products


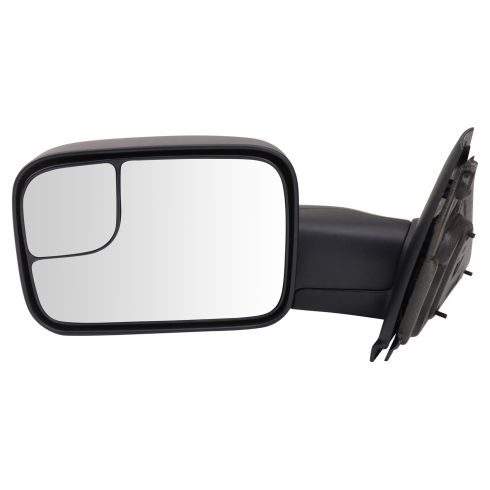
Dodge Ram 1500 2500 3500 Driver Side Mirror Trail Ridge TR00181
Part Details:
- Flip-Up
- Towing
- Textured Black
- Upgrades and extends vision ideal for towing
- Premium finish upgrades for enhanced appearance
- Enhanced mirror options for visibility and damage prevention
- Direct-fit replacement
- Highest quality construction and materials prevent corrosion, dust and chipping
- Easy plug and play install with original mounting and connectors
- No
- Black
- No
- No
- Textured
- No
- No
- Plastic
- Flat
- No
- No
- No
- No
- No
- No
- No
- Manual
- Manual
- No
- Clear
- No
- No
- Yes
- Manual
- No

How to Replace Side Rear View Mirror 1992-99 Buick LeSabre
Find out how to replace the door panel and the side view mirror with this how-to video
