How To Install Front Outside Door Handle 2004-09 Dodge Durango
Created on: 2012-08-01
How to repair, install, fix, change or replace a broken or snapped off exterior door handleon and Dodge Durango model years 04, 05, 06, 07, 08 and 09.
-
step 1 :Removing the Door Panel
- Pry up the window switch panel by hand
- Disconnect the door lock wiring harness
- Disconnect the window switch wiring harnesses
- Disconnect the mirror switch wiring harness
- Pry off the trim piece inside the door handle with a flat blade screwdriver
- Remove the Phillips head screw inside the door handle
- Remove the two Phillips screws at the bottom of the door panel
- Pry out the door panel with a door panel clip tool or putty knife
- Lift the door panel up and off
- Remove the clip from the door lock rod
- Remove the door lock rod
- Carefully peel off the water shield
-
step 2 :Removing the Door Handle
- Remove the blue clip and remove the door latch rod
- Remove the orange clip and remove the door lock rod
- Remove the two 8mm nuts from the door handle
- Pull out and forward to remove the door handle
-
step 3 :Installing the New Door Handle
- Remove the T20 screw from the door lock
- Insert the door lock into the new door handle
- Tighten the T20 screw
- Insert the door handle into place
- Tighten the two 8mm bolts to the door handle
- Insert the door handle rod in place and reclip the blue clip
- Insert the door lock rod in place and reclip the orange clip
-
step 4 :Reinstalling the Door Panel
- Put the water shield into place
- Lift the door panel into place
- Push in the door panel clips
- Insert the two Phillips screws at the bottom of the door panel
- Insert the Phillips head screw inside the door handle
- Push on the trim piece inside the door handle
- Connect the door lock wiring harness
- Connect the mirror switch wiring harness
- Connect the window switch wiring harnesses
- Push in the switch panel
Tools needed
-
Flat Blade Screwdriver
Phillips Head Screwdriver
8mm Wrench
8mm Socket
Ratchet
Brought to you by 1AAuto.com, your source for quality replacement parts and the best service on the Internet.
Hi, I'm Mike from 1A Auto. I hope this how-to video helps you out, and next time you need parts for your vehicle, think of 1AAuto.com. Thanks.
In this video, we're going to show you how to replace a front door handle on this 2005 Dodge Durango. Pretty much the same for any 2004 to 2009 Durango. We show you the front left hand or the front drivers side, which is basically the same procedure as the front passenger side as well. Tools you'll need for the job include a replacement door handle from 1A Auto.com, small flat blade screwdriver, a Phillips screwdriver, and an 8 millimeter wrench or a socket with ratchet.
Take a small screwdriver and kind of push towards the front to pry up on your panel here. That comes up and out and, then front slides out, and then there is three connectors. They just have little tabs. You push with your thumb, pull up and out. Now, in behind here, door handle, just pry out this little cover here with a small screwdriver. There is a Phillips screw there, as well as a Phillips screw, under there, and one further back there. I'll just fast-forward here. I'm just using a Phillips screwdriver and removing those three screws I just showed you. Once those screws are off, just lift up on the panel and then start pulling it out. You'll see a little blue clip back here. Pull that blue clip back off the rod, then pull the rod up and remove your door. Carefully pull this water shield off.
To remove your door handle, look right in here and you'll see two clips, a blue and orange one. The blue one, push it straight back and then remove that rod. Same thing with the orange one. Push it back towards the back of the door and pull that rod out. Then, there are two bolts: one here and one there. Two nuts are 8 millimeter. Just got to reach right in with an 8 millimeter socket with ratchet. A wrench would work as well. Okay, once those screws are out, we'll pull out on the door handle, pull it forward, and right out.
Here's my old handle, new handle from 1A Auto. You do just need to switch the lock over. T20 Torx driver. Take this screw right out. Lock comes out. Into the new one. Fit right in. Put your handle in, pull it out back from there. Pull it out, put it in, make sure the back goes all the way in, slide it back, then get the studs in. Keep pushing it back as you push it in. The door, put your two 8 millimeter nuts back on.
Make sure your rods are free. They didn't get bound up when you were putting the handle on. Tighten up these two nuts. I'll come back in here, make sure this clip is kind of down, push that rod in, and then take this rod here, put it in place, and clip that rod on. For this one, what you want to do is pull your handle out, then reach in there and clip that rod. Pull the handle out, reach in there, grab that clip, clip it on. Make sure unlocked.
Make sure you put your water shield back up in place. To put this panel back on, make sure your harnesses goes in through there. Pull this rod out, put it into that blue clip, and lock the clip on. Now, make sure your door lock goes through there. You can look back in here and see where all the hooks are. Just make sure that the front and rear are going flush to the door. Just going to make sure all the hooks are on correctly. Slide it down. Oops, never realized that this came out. Try to lock this on there. Everything should be nice and tight around the edges. Here, I'm going to speed it up again as I just reinstall the three screws the two at the bottom and the one in behind the door handle. Those three screws hold the door handle down in place. Slide this down, the front end first. This can be a little bit of a pain. Just put this little trim back on.
We hope this video helps you out. Brought to you by www.1AAuto.com, your source for quality replacement parts and the best service on the Internet. Please feel free to call us toll-free, 888-844-3393. We're the company that's here for you on the Internet and in person.
Shop Products


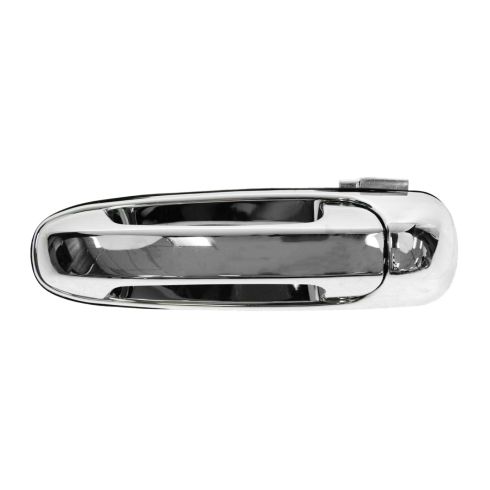
Dodge Ram Mitsubishi Rear Driver Side Exterior Door Handle TRQ DHA48827
Part Details:
- Chrome
- Plastic
How To Replace Front Door Handle 2002-07 Jeep Liberty
How to repair, install, fix, change or replace a broken or snapped off interior door handle on Jeep Liberty, years 02, 03, 04, 05, 06, and 07.
