How to Check Engine Oil 2007-14 Toyota FJ Cruiser
Created on: 2019-07-08
Watch this video from 1A Auto to learn how to check the engine oil level and top it off, if necessary, on your 07-14 Toyota FJ Cruiser.
-
step 1 :Checking the Engine Oil
- Check the oil after the engine has been running
- Turn the engine off and wait 30-60 seconds
- Locate the oil dip stick on the passenger side of the engine
- Remove the dipstick and clean it off
- Replace and remove the dip stick to read the oil level
- Proper level should be between the two indicator dots
- The space between the two dots represents about 1 quart of oil added.
-
step 2 :Filling the Engine Oil
- Locate the oil filler cap on the driver side of the engine compartment
- Refer to the cap or vehicle manual for the proper oil type
- Remove the oil filler cap
- Add oil as necessary
- Replace the oil filler cap
Oh, hey friends. It's Len here at 1A Auto. And today I'm working on a 2007 Toyota FJ Cruiser and I want to show you something very basic. We're going to check the oil level.
The oil dip stick's right over here. It's clearly marked engine oil, okay. Nice and yellow and bright, easy to see. The way you want to check this is after your vehicle's been running for a little while, okay, you want to turn it off, let it sit maybe 30 seconds or even a minute or so. After that, remove your dip stick, wipe it off with a clean rag. Here's our markings. We want to be anywhere between this dot and this dot, okay. That's your low, this is your high. Generally speaking, if you're at that dot or under it, if you add a quart, you'll come right up to where you need to be.
So I've got it cleaned off, let's put it back in. I like to let it sit for a couple seconds here. Doesn't have to be very long at all. You lift it out, take a look, you can clearly see where the fluid level is. Right in between the two dots, right where we want it to be, just below the upper one there. This oil level looks perfect. I don't see any reason why I want to add any more. I'm just going to clean it off again, it's a good habit, put it back in and off we go.
If for some reason you did need to add some oil, maybe it was a little low, you come right over here to the driver side of the engine. This is the oil cap, says engine oil right on it. It tells you what kind of oil you need to use. You would just grab it, turn it counter-clockwise. There we are. Check your gasket, this one looks decent. We'll set it aside. You can use a little funnel if you want so you can make sure you don't spill any oil. Or if you think you're pretty good and you can just get it in. You do you, boo-boo. Just make sure you don't spill it because your alternator's right down there and that's not really supposed to be covered in oil.
Anyway. So assume you fill it up to where it needs to be, your oil dip stick says it's good to go. Take your cap, screw it back on all the way, feels nice and snug. And off we go.
If you need any parts, you can always check us out at 1A Auto.com. Thanks.
Thanks for watching. Visit 1A Auto dot com for quality auto parts shipped to your door. The place for DIY auto repair. And if you enjoy this video, please click the subscribe button.
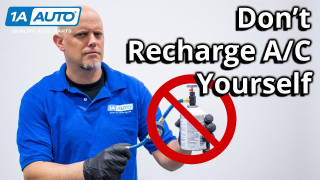
Why You Should Not Recharge Your Truck or Cars AC Yourself
This video discusses DIY A/C recharge kits, and the potential harms you may be doing to your vehicle.
