How to Change Rear Differential Fluid 1997-2006 BMW 325 Xi
Created on: 2019-07-10
This video shows how to drain and refill the differential fluid on the BMW 325 Xi. Watch this video and learn to DIY
-
step 1 :Draining the Differential Fluid Level
- Raise and support the vehicle if necessary, and make sure it is level
- Have a drain pan ready
- Remove the differential fill plug using an H14 hex socket extension
- Inspect the differential fill plug for wear and metal deposits
- Remove the differential drain plug using an H14 hex socket extension
- Let the fluid drain
- Clean the area with a rag
- Replace the drain plug seal
- Replace the drain plug
- Torque the plug to 48 foot-pounds
-
step 2 :Filling the Rear Differential Fluid
- Use the appropriate fluid as directed by the vehicle owner's manual
- Add fluid until it begins to spill out of the fill hole
- Plug the fill hole with your finger for several minutes to allow the fluid to settle into interior passages in the differential
- Allow excess fluid to drain out
- Replace the fill plug
- Torque the plug to 48 foot-pounds
- Clean the surface with brake parts cleaner
Tools needed
-
Gear Oil
Torque Wrench
Brake Parts Cleaner
What's up guys? I'm Andy from 1A Auto. In this video I'm going to show you how to replace the rear differential fluid on this 2001 BMW 325xi. If you need parts for your vehicle, click the link in the description and head over to 1aauto.com.
First thing I want to do is take out the fill plug on this. You always want to at least check to make sure you can get the fill plug out. If you can't get the fill plug out and you drain all the fluid out, you're not going to be able to add fluid to it. So I'm gonna start with that. You want to use an H14 Hex socket. And it's a little bit rusty, so I'm just going to tap it in with a hammer. Take an extension and a ratchet, loosen it up. All right. Now that I know that's loose, now I can drain the fluid out. And I'll do the same right here. And then tap it in to the drain plug. This is a H14 Hex socket. Loosen that up, make sure you have a drain bucket underneath here, and drain it out.
We can take the fill plug out, it'll be a little bit smoother. That fluid actually looks pretty good. There you go. I'm just going to take a rag and just wipe this area and make sure there's nothing that's going to go back into the differential. That looks good. Now I'm going to take the drain plug. There's a seal right here, take that seal off. If it looks good, you can try to reuse it. But it's a good idea to replace it, put a new seal on, reinstall it. Then I just use my socket, my H14 and a ratchet, just snug it up. And then I'm gonna torque it and torque this to 48 foot-pounds.
All right, so now I need to add the fluid. Make sure you check your owner's manual and get the correct fluid for the vehicle. This has a fitting on the actual oil can, so I can use that and just put a hose on here. I'm just going to put that in there and I'll just squeeze the bottle. Keep the drain bucket underneath here so when it starts spilling out. Oops. What I do is I just stick my finger in the fill plug for a minute and just let the oil disperse, the gear oil disperse. And then pull my finger out. Now I know the level is right up to that spot, which is good. We'll just let that drain out just a little bit. We want the level to be right at the base of that fill plug. All right, so now that's stabilized. Now, as you can see, it would be important for the vehicle to be level. So make sure that the vehicle is level. If it's tipping back, then you're not going to add enough fluid. If it's tipping forward you're going to add too much.
So now I'm going to put the fill plug back in. I put new seal on this, as well. Now I'm going to use that same H14 and torque this to 48 foot-pounds. And it's good. Now there's some residual leftover, so I'm just going to take some brake parts cleaner and clean it all off.
Thanks for watching. Visit 1aauto.com for quality auto parts shipped to your door, the place for DIY auto repair. And, if you enjoyed this video, please click the subscribe button.
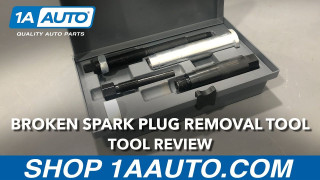
Broken Spark Plug Removal Tool
Check out this video if you need a tool to get stuck spark plugs out of your Ford V8 engine! This tool is available at 1AAuto.com
