How to Change Oil 2010-17 Chevy Equinox
Created on: 2019-06-12
Check out this video to learn how to change the oil in your 10-17 Chevy Equinox 3.6L V6.
-
step 1 :Removing the Oil
- Remove the oil fill cap
- Take note, this vehicle requires dexos approved 5W-30 Oil
- Raise and support the vehicle if necessary
- Remove the 15 mm oil drain plug
- Allow oil to drain into a pan
- Replace and tighten the 15 mm drain plug
- Remove the oil filter, using a filter wrench, if necessary
- Catch excess oil from removing the filter in the drain pan
- Check to ensure the old oil filter gasket was not left on the engine
- Clean the oil filter area on the engine
-
The vehicle in this video requires 6 quarts of new oil, however there are several different engine sizes in the Equinox line. Verify your vehicle's requirements in your owner's manual before adding new oil.
step 2 :Filling the New Oil
- Prime the new oil filter by filling a small amount of fresh oil into it
- Wipe fresh oil on the filter rubber gasket
- Install the new filter hand tight
- Tighten the filter about 1/4 turn with a filter wrench
- Add 6 quarts of new oil using a funnel
- Replace the oil fill cap
- Make sure the dip stick is in
- Run the engine for 30-60 seconds
- Check the oil with the dip stick, using the cold level markings
- Lower the vehicle if it was raised
Tools needed
-
Funnel
15mm Wrench
Oil Filter Wrench
Jack Stands
Drain Pan
Cloth Rags
Floor Jack
Hey friends, it's Len here at 1A Auto, today we're working on a 2015 Chevy Equinox, we're going to be doing a quick oil change. It's going to be very simple, I want to be the guy that shows you how to do it. If you need any parts, or instructional videos, you can always check us out at 1aauto.com.
All right, so one of the first things that we want to do, once we pop the hood, we're going to take the oil cap, we want to take a look at it. It tells us what kind of oil we need to use. This says we need to use dexos 5W-30. It's very important that the oil you use is dexos approved. It's a Chevrolet, so they recommend a very special oil for this, you don't want to use regular 5W-30, you can look into why, I'm sure you can find it all over the internet, and they'll tell you about it.
But anyway, dexos approved, 5W-30 oil, okay? We'll set this right here, that way there we can't forget to put oil in it. We can put this someplace else, and you do your thing and maybe your friend, or whatever, calls you, and you walk away and you forget if you added oil. You just close the hood and then drive away, that could become an issue.
If you put it right here, you trying closing the hood, it's not going to close. Booya. Cool, so right here's the oil dipstick, this is how you're going to check your oil when you're done, okay? It's pretty basic, but I'm just going to state it. I'm just going to pull it up, leave it like this for now. You can look down inside here, all the way down there, that's the oil filter, it's going to be much easier to get from down bottom. So, I'm going to wait on it, but I wanted to show you it.
All right, so we're underneath the vehicle now. I'm lucky enough to have a lift, if you don't, and you're laying on the ground, well good luck. But you're going to want to be very careful, to make sure that when you pull your drain plug right here, the fluid's going to come out and it's going to prob come backward a little bit, you know what I mean?
So, you're going to want to make sure you have your face nowhere near it. Wear some safety glasses, some hand protection, oil's a chemical, very dangerous for you. I'm just going to take my 15 millimeter wrench, and I'm going to turn this drain plug counter-clockwise to the left. My collection receptacle here. There we are. Drain plug's ready to come out. That's what it looks like. Just going to wipe it off, and I'll show you what to look for on this. While we've got our drain plug out, we can check the threads, make sure they're not all munched up or look like they're cross threaded. Cross threaded would mean that somebody tried putting it in, they didn't have it started in right, and they just cranked it in anyway. So, these threads would kinda be... dijombled.
This one actually looks really good. Lastly, there's a gasket right there, it's a rubber gasket on this particular vehicle. You want to make sure that it's not cracked, or stretched, or anything like that, swollen. If it looks like it's garbage, just go ahead and replace it if you have access to that, okay? You want to make sure that you have a good seal, you don't want your oil dripping out of your oil pan. Okay, so I've got my drain plug all nice and cleaned up. I've got this thing, so it pretty much stopped trickling, it's just a slow drip here. I can wait a couple more days, and let it keep on dripping. It's just going to keep going, and going, and going. It's been 15 minutes sitting here. I'm just going to go ahead, and I'm going to put in the drain plug, turning it clockwise, which is to the right.
There we are. I'm going to use my 15 millimeter wrench, and turn it so it bottoms out, and then just give it a little bit, just like that. Easy peasy. Wipe it off, looks like it's nice and clean, now I'll move up here. We're going to put our collection receptacle underneath the oil filter. We don't want any of this oil getting on the ground, we want to save the penguins, and dolphins and unicorns, and all those guys, right?
So, got my little filter wrench, I put it on just like this, and then I turned it, it tightens up around the filter, and it turns it to the left, okay? Oil's going to come down at this point. Almost there, there it is. Here's our oil filter, we'll just drain that out into the recycling receptacle. Now, what you want to do, is you want to look up in there, and you want to make sure, let me grab my pointer. Right up along here is where the filter gasket rides, right along the edges. So, you want to make sure that the old gasket isn't still on there. On the filter itself, that's the gasket, the black area.
Sometimes if the person that put on the last oil filter, they didn't put any little ring of oil around it, that'll actually stick to the engine from the heat of over time, and it'll stick on there. If you leave that gasket on the engine, and then put on a new filter, with a new gasket, it's called double gasketing and two gaskets right there, will not hold pressure. So, what'll happen is, you'll start up your vehicle, and maybe it'll leak right then, or maybe it won't, but it will technically leak at some point. I mean you're probably going to be driving down the road when it actually leaks, you'll be revving the engine high revs, it'll be pumping the oil like it's supposed to and you're going to have an oily mess, and probably EPA problems.
So, we'll just go ahead and clean all this down, and just use something as simple as a rag. I'm not going to spray any parts cleaner up in there, just because of that O2 sensor that I mentioned. That's your preference if you want to try risking it, I don't want to buy an O2 sensor today. Just going to make sure it's nice and clean up there. Looks pretty good, let's try it one more time here, get off as much of this gunk as I can. The cleaner the better, there we are, beautiful, love it.
Okay, now I'm going to grab the oil filter, and I'll show you what to do next. All right, so now it's time to get ready to put on this oil filter. What we want to do is, we want to make sure that we're using the correct oil, like I said dexos approved, super important, okay? 5W-30, we're using the right stuff. I'm just going to put a little bit inside the filter, it's going to prime it, and a little bit up along the edge there.
I'm going to take my gloved finger, I'm assuming you're wearing a glove, if you're not, don't use your skin obviously, use something else. Maybe dip a rag, or whatever, and just coat the seal there, or the gasket. That's going to help prevent keeping it from sticking to the engine later on down the line, next oil change, or whatever, you won't have to worry about it sticking to the engine.
So, now that we've got a little bit of oil inside the filter, it's primed, and we coated the gasket. We'll take another look up inside here, make sure it's still nice and clean. Looks pretty great, now I'm just going to take my oil filter, get it lined up, and then I'm just going to turn it to the right, clockwise. Let's see if I can get it started on here, hopefully. There it is. Once you get it so it's bottomed out, we're going to use our oil filter wrench again. Just like that. I've got my oil filter wrench, this time I'm going to turn it around this way, so when I grab my oil filter it's going to tighten, but clockwise. Once I have it bottomed out, like I do, I'm just going to give it another quarter turn.
So, if I get the wrench on about here, I'm just going to go, maybe to there, okay? I don't need to keep cranking it around two, three, four, five, 10 times. All we want to do is just make sure it's bottomed out, and then just give it a little bit more. Slipped a little bit, it's hard to get the angle here, there it is, just like that. Basically I just, it kept slipping, but anyway, I went from about here to maybe like right about there, you can go a little bit further if you need to, but you don't need to go too much further than that. So, like I said, bottomed it out, give it a little bit more. You don't need to bring it around two or three times, all it needs to do is make a seal and be nice and snug.
Cool, we'll clean this down the rest of the way, we'll bring the vehicle down, and we'll go ahead and add oil. All right, so now we're going to go ahead and fill. If you've got good aim and you think you can just pour it in with the bottle, you could do that, or just use something as simple as a funnel. Make sure our dipstick's down at this point. We want to make sure that we're using our dexos approved oil, we've got our hand gloves on, and wear some safety glasses in case something splashes up. 5W-30 dexos, here we go, this requires six quarts. Get that going, we'll put in all six, and then we'll run it.
Try to get out as much of the oil as possible obviously, paid big bucks for this stuff, and of course it helps the environment. There we go, quart number six, going to let this drain into here for a little bit. All right, so once we get that fully drained we're going to replace our cap. dexos 5W-30, we used the right stuff. You can clean this up of you want, get any of the crud that might've gotten on there, just use something simple as a rag obviously. That looks pretty great. Just get rid of that. Funnel. Here we go, the point we've all been waiting for. Here we go, perfect. So, we've got the dipstick down, the cap on. We know we tightened everything up down bottom, let's spark this puppy up.
We'll let it run for, I don't know, 30 seconds, maybe a minute or so. Let the oil to get to doing what it's supposed to do. We'll shut it off, we'll let it sit for about a minute, and then we're going to pull that dipstick, check the oil level. Here we go, I turned it off, let it sit for a little bit, not very long, half a minute or so.
Just going to pull the dipstick, going to clean it off, so we can have a nice, clean dipstick for our initial reading. I'll show you real quick. So, here we have our levels, the engine's cold, should be at the bottom level there, in the hatches. If the engine's hot, you've been running it for a while, maybe went for a drive, I don't know to the beach or back, whatever you're doing, it should be in the hatches up here, okay?
Theoretically right now, I haven't been running it for very long, it should be in the cold. Put that down there for a sec, pull it back out, perfect. Right at the top dot of the cold hatches, that's great. If it was up here someplace, maybe in the middle there, or even up in the hot, like I said, the engine's cold, so it definitely shouldn't be up this high. If you had your engine oil overfilled that would be very bad for your engine. It's actually better to have it a little low, than a little high, what happens is, is aeration inside your engine and it could burn out your oil pump, cause big issues.
So, the oil level looked perfect, we've got everything nice and tight. We checked our fluids if that's what you're into, or if you're not into it, don't do that. And let's close the hood, take it for a road test.
Thanks for watching. Visit 1aauto.com. Your place for DIY auto repairs, for great parts, great service, and more content.
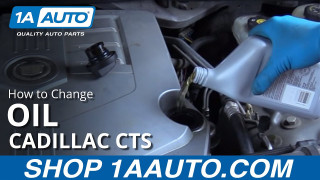
How to Change Engine Oil and Reset Oil Light 2003-07 Cadillac CTS
New Engine Oil Filter from 1AAuto.com How to change the engine oil and the reset the oil light on 2005 Cadillac CTS
