
How to Replace Upper Ball Joint 1995-2002 Ford Crown Victoria
Created on: 2012-03-02
Watch this video to learn how to replace the upper ball joint on your 95-02 Ford Crown Victoria.
-
step 1 :Remove the wheel
- Loosen the lug nuts with a lug wrench or 19 mm socket and ratchet.
- Raise and secure the vehicle.
- Remove the lug nuts and wheel.
-
step 2 :Remove the cams
- Secure the frame of the vehicle.
- Jack up the control arm/suspension of the car.
- Mark your inner and outer cams to help align your vehicle during assembly.
- Remove the 22 mm bolts and remove the inner and outer cams.
-
step 3 :Remove the upper ball joint
- Remove the 18 mm nut and remove bolt.
- Remove the upper ball joint.
-
step 4 :Install the new upper ball joint.
- Fit the ball joint into the steering knuckle and over the control arm studs.
- Work the upper ball joint into place.
- Bolt down with the 18 mm ball joint locking nut.
- Put your cams down on the control arm studs and thread on the locking nuts.
- Line up your marks on the cams and tighten down the lock nuts the rest of the way.
- Tighten up the pinch bolt to 90 ft lbs.
- Torque the control arm nuts to 118 ft lbs.
- Insert your grease fitting and fill with the grease gun.
-
step 5 :put your wheel back on
- Hand tighten your lug nuts
- Lower the suspension and the vehicle.
- Torque your lug nuts in a star pattern to 100-110 ft lbs.
Tools needed
-
20mm Socket
Adjustable Wrench
Socket Extensions
Torque Wrench
Jack Stands
18mm Socket
19mm Socket
Grease Gun
21mm Socket
Flat Blade Screwdriver
Phillips Head Screwdriver
Lug Wrench
Ratchet
Floor Jack
1/2 Inch Breaker Bar
Marker / Writing Utensil
22mm Socket
Brought to you by 1AAuto.com, your source for quality auto replacement parts and the bets service on the internet. Hi, this is Mike from 1A Auto. I hope this how to video helps you out. Next time you need parts for your vehicle, think of 1AAuto.com. Thanks.
In this video, we're going to show you how to replace an upper ball joint on this 2000 Ford Crown Victoria. This process is the same for any '95 to '02 Crown Victoria or Lincoln Town Car. You'll know if your ball joint is getting loose, what you do is you jack up the front of the vehicle and you'll feel some play in the top of the wheel, if you try and shake the top of the wheel back and forth, you'll feel it give a little bit and the bottom doesn't give. That's the indication that your upper ball joint is bad. Tools you'll need for this repair are jack and jack stands, 18 to 22 millimeter sockets with a ratchet and extension. You'll need a breaker bar or pipe for some extra leverage for some of these bolts, a screwdriver, a tool to mark the alignment cams, you'll see what I mean, I use a hammer and a cold chisel then you'll need a large adjustable or 34 millimeter wrench, a grease gun and grease, and a torque wrench. Start by removing the front wheel.
Pry the cap off and then if you don't have air tools, you want to loosen the log nuts then raise and support the vehicle and remove the lug nuts the rest of the way and remove the wheel and tire. Make sure you support the vehicle onto the frame just like the lift is there. Put a jack stand there. Now, use a fore jack to support the vehicle under the front suspension. Your ball joint is mounted right here. You'll see the large nuts on top and then these here are tall alignment cams and if you turn them; that's how you align the vehicle. What you want to do is mark your alignment cams with the suspension so that you can put it back together the same. What I basically do is take this ad on and then mark it right here right along the center of my ball joint. Just take a chisel and hammer I. Okay, make a pretty good divot in my alignment cams so I know where it is. Here, I'm going to do the same thing to the inner alignment cams. I generally point the mark towards the shock, just a good reference point, just make a mark that again points towards the shock and that's how you can put that cam in correctly again. These bolts are 22 millimeter and I'm using impact wrench.
They actually come apart fairly easily so you'll need a pretty good sized ratchet and an extension. So as you're removing these with the cams come right up and out, that's good. Just make sure which cam goes in which spot. What I do is I generally take the inner cam out first, put that kind of close to the middle of the vehicle on the radiator support and then I take the outer cam off and kind of put that towards the side of the vehicle. Next is a pinch bolt down lower, its 18 millimeter. You remove the nut off of one side and then use a hammer and you'll actually want to take and pull the ABS wire out of the way and just use the hammer and drive the pinch bolt out. Once that's out, then you can remove the ball joint. Mine comes out pretty easy. You may need a hammer or a pry bar or something to help you get it out. Here's the upper ball joint from 1A Auto. It's just like the original. Put it on. Basically, what I'm doing here is I'm trying to put the stud end of the ball joint down into the steering knuckle the same time that you're putting it over the control arm studs, the two control arm studs and then just kind of use a little bit of muscle and forcing it back and forth to force it down in.
Once you have it down in, you take your pinch bolt and slide it in from the back. Make sure it goes in. It actually is square headed so it locks into place so it won't turn when you put the nut on. I'm just using the hammer to drive it in all the way. It should drive in there pretty easily. Then I'll start the nut on it. Make sure you use the locking side. For now, just start that on and then we'll go up the top. Again, make sure that your cams don't get mixed up. Put one in. It's not so important that they line up perfectly when you first put it together. What you want to do is put both cams on and line them up best you can then tighten down the locking nuts and then what you do is after you tighten them down is you loosen them back up and move one of the cams and tighten that one down just so it's snug then move the other cam with a large wrench and tighten it down. I'll kind of show you the whole process here. Kind of in fast motion here. Like I said, just kind of snug up the nuts. You can see I use a large adjustable wrench to turn the cam and align it to where it was before and then tighten them up. You don't want to tighten one up all the way first.
You'll have to be able to move the other one because when you move it, you move the ball joint as well. Then just make sure that you get both aligned where they were. All installed. There's my mark pointing straight ahead. Here's my mark here pointing right at the feel for the grease. I preliminarily tighten up that pinch bolt and nut. Tighten this to 90 foot pounds. Tighten these to 118 foot pounds. Now, insert this grease fitting. Use a 10 millimeter wrench. Speed it up here as we tighten up that grease fitting. Then we'll use a grease gun and you basically want to squirt grease in there. Watch the boot on the ball joint and you'll see it start expanding. Once it start expanding, it's probably enough grease. Put that harness back into its clip. Get the jack down and move it out of the way and put your tire back on. Start the log nuts by hand. Make sure you don't cross thread them. Use your wrench while the vehicle is in the air just to kind of tighten them preliminarily. Once the vehicle is down on the ground, you want to torque the log nuts to 100 to 110 foot pounds. I use a star pattern, basically kind of draw a star with your wrench as you're tightening them and then put your cap back on. You should be all set.
We hope this helps you out. Brought to you by www.1AAuto.com, your source for quality auto replacement parts and the bets service on the internet. Please feel free to call us toll-free, 888-844-3393. We're the company that serves you on the internet, and in person.
Shop Products


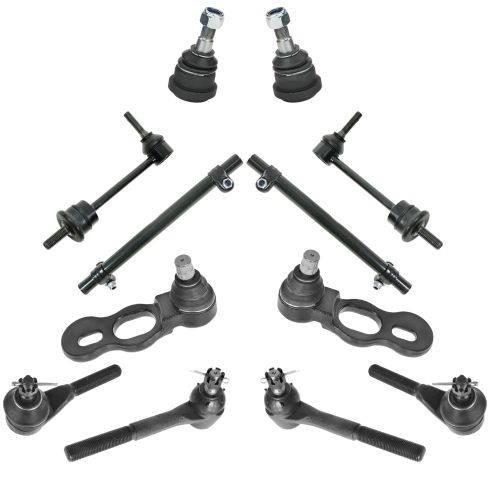
1998-02 Ford Lincoln Mercury Front 12 Piece Steering & Suspension Kit TRQ PSA60024
- (2) Front Lower Ball Joints
- (2) Front Outer Tie Rods
- (2) Front Sway Bar Links
- (2) Front Upper Ball Joints
- (2) Front Inner Tie Rods
- 12 Piece
- (2) Front Tie Rod Adjusting Sleeves

How to Replace Front Lower Ball Joint 1993-95 Toyota Corolla
Check out this video from 1A Auto to learn how to replace the front lower ball joint on your 93-95 Toyota Corolla. Save money and do it yourself!

