
How to Replace Ignition Coil 1998-2004 Dodge Intrepid
Created on: 2011-03-30
Check out this video to learn how to replace the ignition coil on your 98-04 Dodge Intrepid. Learn to do it yourself and save some money!
-
step 1 :Accessing the Ignition Coils
- Undo the cable clip
- Move the cables aside
- Disconnect the PCV hose
- Move the PCV hose aside
-
step 2 :Removing the Ignition Coil
- Disconnect the ignition coil wiring harness
- Remove the two 8mm bolts from the ignition coil
- Pull the ignition coil up and out
-
step 3 :Removing the Spark Plug
- Loosen the spark plug with a 5/8 inch spark plug socket
- Remove the spark plug
-
step 4 :Preparing the New Spark Plug
- Find the spark plug gap for your vehicle in the under hood decal or your owner's manual
- Check the gap with a spark plug gapping tool
- The correct setting of the tool should slide into and out of the gap with some resistance
- Adjust the gap as necessary
-
step 5 :Installing the New Spark Plug
- Put the new spark plug into place
- Tighten the spark plug with a 5/8 inch spark plug socket
- Tighten the spark plug to between 20 - 25 foot-pounds of torque
-
step 6 :Installing the New Ignition Coil
- Push the new ignition coil into place with the wiring connector facing the rear of the vehicle
- Insert the two 8mm bolts into the ignition coil
- Connect the ignition coil wiring harness
- Repeat Steps 2 through 6 for the remaining coils
-
step 7 :Reconnecting the Cables
- Reconnect the PCV hose
- Put the cables back into their clip
- Fasten the cable clip
Tools needed
-
Socket Extensions
8mm Socket
5/8 Inch Spark Plug Socket
Ratchet
Brought to you by 1AAuto.com, your source for quality replacement parts and the best service on the Internet.
Hi, I'm Mike Green. I'm one of the owners of 1A Auto. I want to help you save time and money repairing or maintaining your vehicle. I'm going to use my 20-plus years experience restoring and repairing cars and trucks like this to show you the correct way to install parts from 1AAuto.com. The right parts installed correctly: that's going to save you time and money. Thank you and enjoy the video.
In this video, we're going to show you how to replace the ignition coil as well as remove and replace the plugs on this 2004 Dodge Intrepid. This car has a 2.7L V6. The procedure's basically the same for the 3.5L as well. The tools you'll need are 8mm socket and ratchet with an extension and a 5/8 spark plug socket with ratchet and at least a 6-inch extension.
Here are your coils on top of the engine. There is one for each cylinder. This is a 6 cylinder so there's three here and three on the other side. I'm going to change the most difficult one in this video. The only thing that makes it difficult is a few cables and stuff. There's a clip here. You're just going to push the clip over, pry it up, then these cables will kind of come up out of your way. There's a PCV hose here. Just twist and pull that out of your way.
Then, I'll show you here, these coils have a harness into them. You basically just push down on a clip here and pull them off. I'm just going to reconnect that one for now. I'll push down and pull this one off. Then there are two 8mm bolts, here and here, on each one. We'll fast forward a little bit as I remove those two bolts. Then, we have the bolts removed. You simply just pull right up on the coil. There it is out.
While you have that coil out, you can see down in there is actually the spark plug. So if you're going to change the spark plug, obviously this is the time to do it. To remove the spark plug you want a proper spark plug socket like this. This one's actually a little bit worn out so it doesn't grip the plug as well as it should. Obviously, you just kind of put the socket down in, and make good contact with the plug. You also obviously need an extension like I have here, even a little longer one would be good. We're going to hit fast forward again here as I remove that spark plug. You can get it loose with the wrench and then pretty much just turn it with your hands. Like I said, the grommet in my socket's not very good so I'm just going to take a little piece of paper towel, kind of stuff it in there with my pinkie and use that. Once it sticks down on the spark plug, you should get a good grip on it. It brings the spark plug right up and out.
You want to make sure you check the spark plug gap which is basically the distance between the diode and this tip. This vehicle calls for a .050 inch, which if you have a tool like this which is a spark plug gapping tool, you just run it through and it should go through there with a little bit of resistance. Then you use this to either kind of release it or bend it closer if you need to. You can find the gap usually on this decal. You can see right there, a spark plug gap of .050 inch or 1.27mm. This information usually is also in your owner's manual.
These plugs are pretty recent so I'm just going to put this back in. As you can see, I just put a little piece of tape with paper towel in there. Make sure the paper towel's not going to get down around the threads or anything. That holds it in although if you have a good spark plug socket you don't have to worry about that. Just like before, just kind of put it right down through the center. It should thread in easily. I'm just going to put an extra extension on here to make it a little easier. Then, you want to tighten it until it's seated, usually about another 1/8 of a turn. Spark plugs you usually want to have about 20, to 25 foot-pounds of torque. You don't want to overtighten them, but you want to get them in there firm.
Here's our original coil and a new coil from 1AAuto. You can see everything's the same. The plugs are the same and everything so it's going to all go right on there exactly the same way. The plug faces the rear of the motor on this side so it faces the rear on the other side as well. Put it down in, try to get it as straight as you can as quickly as you can. Put it down. Screw in the bolt. Okay, tighten these up nice and firm. They don't have to be extremely tight, but should be on there firm. Reconnect the harness and your PVC hose back on. Clip these cables back on. Now we can just do the rest of them and you're all set.
We hope this video helps you out. Brought to you by www.1AAuto.com, your source for quality replacement parts and the best service on the Internet. Please feel free to call us toll-free, 888-844-3393. We're the company that's here for you on the Internet and in person.
Shop Products


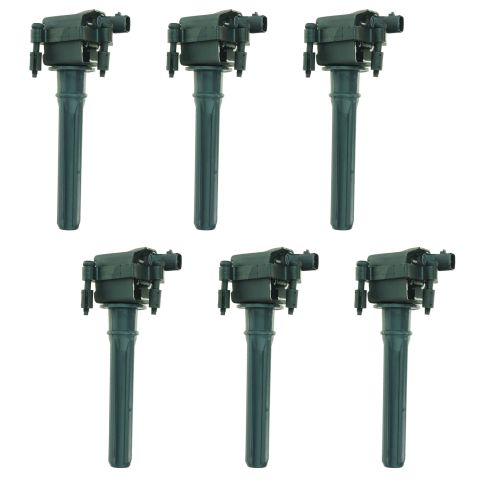
Dodge Chrysler Plymouth 6 Piece Ignition Coil Set TRQ ICA61473
- 6 Piece
- (6) Ignition Coils
- Direct Replacement

How to Replace Ignition Coils 2007-09 Honda CR-V
How to repair, install, fix, change or replace a bad or broken ignition coil / coil pack on 07, 08, 09 Honda CR-V

