Replaces
This part doesn’t fit a . Select from parts that fit.
Frequently bought together
Part Details
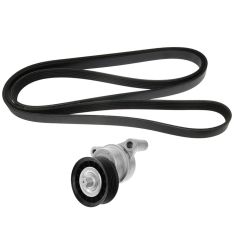
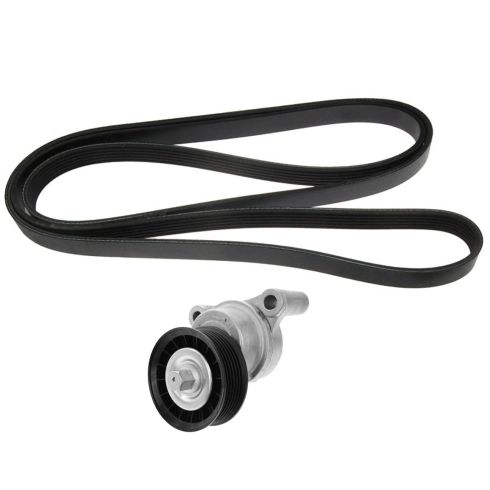
Complete Repair in One Purchase - Stop searching for parts individually and complete your repair with a customized kit or set from DIY Solutions.
High-Quality Parts from Trusted Brands - DIY Solutions' kits and sets are selected from the best automotive brands and include hard-to-find and even obsolete parts you may need for your vehicle.
Guaranteed Fit - DIY Solutions ensures its selected parts are quality-tested to guarantee fit and function.
Item Condition:
New
Attention California Customers:
 WARNING: Cancer and Reproductive Harm - www.P65Warnings.ca.gov.
Lifetime Warranty
This item is backed by our limited lifetime warranty. In the event that this item should fail due to manufacturing defects during intended use, we will replace the part free of charge. This warranty covers the cost of the part only.
FREE Shipping is standard on Orders shipped to the lower 48 States (Contiguous United States). Standard shipping charges apply to Hawaii, Alaska and US Territories. Shipping is not available to Canada.
Expedited is available on checkout to the United States, excluding Alaska, Hawaii and US Territories as well as P.O. Boxes and APO/FPO/DPO addresses. Final shipping costs are available at checkout.

Created on:
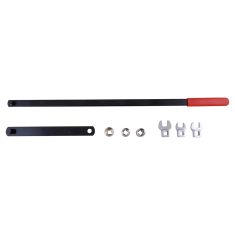
Tools used
Brought to you by 1AAuto.com, your source for quality replacement parts and the best service on the Internet.
Hi, I'm Mike from 1A Auto. I hope this how-to video helps you out, and next time you need parts for your vehicle, think of 1AAuto.com. Thanks.
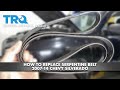
In this video, we're going to show you how to replace the engine serpentine belt. This is a 2011 Silverado 1500. It has the 5.3-liter engine. This process is the same for many SUVs: the Yukons, Tahoes, as well as Sierras and Silverados with this 5.3-liter. The only tool you'll need is a 15 millimeter socket with a ratchet.
Your serpentine belt is right here, and you can see this is your tensioner, right here. What you want to do is use a 15-millimeter socket and ratchet. You just push that down and then you can pull your serpentine belt off all the pulleys.
When you go to put your serpentine belt back on, it's important that you do it in the right order. You're going to want to use this belt diagram as a reference, just to make sure. When you put your belt back on, it should look exactly like this diagram. The red belt in the picture here is your AC belt. It's a separate belt entirely.
It's a little hard to video, but we'll do our best. He puts a loop down around the power steering pulley there and then comes up around the water pump and down around the main crank pulley. All the while, he's holding it on the alternator and then he puts it over on the tensioner. Basically, he's got the belt routed 100% except for the middle idler pulley. Now he pulls it down near the idler pulley and he's going to grab the wrench, put it on the tensioner, push the tensioner down, and push the belt underneath the idler pulley there. Then just check it and make sure it's on all the pulleys correctly.
We hope this video helps you out. Brought to you by www.1AAuto.com, your source for quality replacement parts and the best service on the Internet. Please feel free to call us toll-free, 888-844-3393. We're the company that's here for you on the Internet and in person.
Tools used
Brought to you by 1AAuto.com, your source for quality replacement parts and the best service on the Internet.
Hi, I'm Mike from 1A Auto. I hope this how-to video helps you out, and next time you need parts for your vehicle, think of 1AAuto.com. Thanks.
The first thing that you want to do is take your 15 millimeter socket and ratchet and put it on the tensioner. Then, push down on the ratchet and it will loosen up the belt so you can pull off all the pulleys.
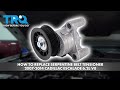
Once the belt is off, you want to remove these two 15 millimeter bolts right here. We'll just fast forward as he does this. Those bolts are removed. You can pull the tensioner off and out.
Take your new tensioner and you want to line these two bolts up with the two holes down here. Just go in to get it lined up. You just want to tighten those bolts up by hand at first just to secure it into place. Then using your socket and ratchet, tighten it up the rest of the way. We'll fast forward as he does this.
You didn't have to take the belt off to do this repair but if your belt did happen to fall off the other pulleys, here's a belt diagram just to help you get it on correctly. We'll show you the whole process after this. It's a little hard to video but we'll do our best. He puts a loop down around the power stirring pulley there and then comes up around the water pump and down around the main crank pulley. All the while, he's kind of holding it at the alternator and then he puts it over on the tensioner. Basically he's got the belt routed 100% except for the middle idler pulley. Now, he kind of pulls it down near the idler pulley and he's going to grab the wrench, put it on the tensioner, push the tensioner down and push the belt underneath the idler pulley there. Just check it and make sure it's on all the pulleys correctly.
We hope this video helps you out. Brought to you by www.1AAuto.com, your source for quality replacement parts and the best service on the Internet. Please feel free to call us toll-free, 888-844-3393. We're the company that's here for you on the Internet and in person.
Tools used
So, to get started on doing your serpentine belt, you want to make sure your engine is off, obviously. Once you've done that, you want to make sure that you pay attention to the belt routing, so you know exactly the way that the new belt is going to go on. If you were to follow the belt coming over in this direction towards the passenger side, this upper pulley right here is the tensioner. You're going to get on that with either a 15-millimeter wrench or, of course, your serpentine belt tool. I'm going to turn that clockwise. It's going to relieve tension, and I'll take the belt right off. I'll bring this up here, so it hangs out. Now, I'm going to remove the belt. There it is, friends.
When I'm doing these serpentine belts, the first place I like to start is way down at the bottom at the crank. So, I'm going to take one of my ends, put it down along the bottom of that crank, and try to get the belt, so the grooves sit on the grooves of the actual crank pulley. I'm going to bring this around. And now, I'm going to line it up with the direction that the belt originally ran, coming around to the water pump here. Back down around the power-steering. Up over the alternator. Down under the idler pulley.
Okay. So, this looks good. Have it around the tensioner. I'm going to double-check to feel as though it goes around all the pulleys. Oh, look right down here, I can see it's coming right off that power steering pulley. Loosen up the belt a little bit. Slide it in. This looks good. The next thing I want to do is relieve tension from the tensioner, and slide the belt underneath the smooth pulley of the idler. Slide this right over the idler. Carefully release. Now, what I want to do is I want to check to make sure that the belt is sitting on all the pulleys flush.
If you have it hanging over, there's pretty good odds that you're going to damage your belt, and you're going to have to re-replace it again. That feels good. Ok this one. Yeah. Perfect. We'll get our tool out of here, and then we'll start it up and check it.
That looks good. Let's go ahead and start up the vehicle. We're going to run it for approximately 15 seconds, turn it back off, and then double-check.
Tools used
Tools used
Brought to you by 1AAuto.com, your source for quality replacement parts and the best service on the Internet.
Hi, I'm Mike from 1A Auto. I hope this how-to video helps you out, and next time you need parts for your vehicle, think of 1AAuto.com. Thanks.
The first thing that you want to do is take your 15 millimeter socket and ratchet and put it on the tensioner. Then, push down on the ratchet and it will loosen up the belt so you can pull off all the pulleys.
Once the belt is off, you want to remove these two 15 millimeter bolts right here. We'll just fast forward as he does this. Those bolts are removed. You can pull the tensioner off and out.
Take your new tensioner and you want to line these two bolts up with the two holes down here. Just go in to get it lined up. You just want to tighten those bolts up by hand at first just to secure it into place. Then using your socket and ratchet, tighten it up the rest of the way. We'll fast forward as he does this.
You didn't have to take the belt off to do this repair but if your belt did happen to fall off the other pulleys, here's a belt diagram just to help you get it on correctly. We'll show you the whole process after this. It's a little hard to video but we'll do our best. He puts a loop down around the power stirring pulley there and then comes up around the water pump and down around the main crank pulley. All the while, he's kind of holding it at the alternator and then he puts it over on the tensioner. Basically he's got the belt routed 100% except for the middle idler pulley. Now, he kind of pulls it down near the idler pulley and he's going to grab the wrench, put it on the tensioner, push the tensioner down and push the belt underneath the idler pulley there. Just check it and make sure it's on all the pulleys correctly.
We hope this video helps you out. Brought to you by www.1AAuto.com, your source for quality replacement parts and the best service on the Internet. Please feel free to call us toll-free, 888-844-3393. We're the company that's here for you on the Internet and in person.
Tools used