How To Replace Windshield Washer Reservoir 2002-07 Jeep Liberty
Created on: 2014-01-24
Find out how to replace the windshield washer reservoir yourself with help from our experts in this how-to video
-
step 1 :Removing the Wheel
- Pry off the wheel cover with a flat blade screwdriver
- Loosen the lug nut covers with a 19mm socket
- Pry off the center cap with a flat blade screwdriver
- Loosen the lug nuts with the vehicle on the ground
- Raise the vehicle with a floor jack
- Secure the vehicle on jack stands
- Remove the lug nuts
- Pull off the wheel
-
step 2 :Removing the Washer Pump
- Remove the clips from the inner fender with a flat blade screwdriver and pliers
- Lift up on the tab and pull the inner fender free
- Pull up on the tab and disconnect the washer harnesses
- Place a drip pan underneath
- Lift the washer pump up and out
-
step 3 :Removing the Washer Bottle
- Let the washer bottle drain
- Remove the 10mm bolts with a ratchet
- Drill out the rivet holding the washer bottle
- Remove the bottle cap and bracket
- Pull the washer bottle down and out, twist to fit the neck through
-
step 4 :Preparing the New Washer Bottle
- Pry off the level sensor
- Pull off the gasket from the sensor and place it on the new bottle
- Push the sensor into place
- Make sure the old rivet is drilled out
-
step 5 :Installing the New Washer Bottle
- Feed and twist the washer bottle angling it properly
- Replace the bottle cover and bracket
- Use a bolt and nut or rivet to tighten the bracket
- Replace and tighten the 10mm bolts
-
step 6 :Reinstalling the Water Pump
- Insert the bottom of the washer pump into the washer bottle
- Push the water pump into the washer bottle
- Reconnect the washer pump harnesses
- Push the inner fender into place and replace the four clips
-
step 7 :Reattaching the Wheel
- Slide the wheel into place
- Start the lug nuts by hand
- Tighten the lug nuts preliminarily
- Lower the vehicle to the ground
- Tighten the lug nuts with a 19mm socket
- Tighten the lug nuts to between 100 ft/lbs in a crossing or star pattern
- Reattach the wheel cover
-
step 8 :Servicing the Washer Bottle
- Remove the washer bottle cap
- Using a funnel with a screen, replace the washer fluid into the washer bottle
- Replace the cap
Tools needed
-
Funnel
Flat Blade Screwdriver
Jack Stands
19mm Socket
Drill
Drain Pan
10mm Socket
Ratchet
Wire Cutters
Brought to you by 1AAuto.com, your source for quality replacement parts and the best service on the Internet.
Hi, I'm Don from 1A Auto. I hope this how-to video helps you out, and the next time you need a part for your vehicle, think of 1AAuto.com. Thanks.
In this video, we're going to show you how to replace the washer bottle on this 2006 Jeep Liberty. It's the same part and process on these Liberties from 2002 to 2007. The items you'll need for this includes a 10mm and 19mm socket, a ratchet, a pair of pliers, a flat blade screwdriver, a drip pan, jack and jack stands, a funnel, a drill, and an inch drill bit.
Pry off your wheel cover if you have one and remove the 19mm lug nuts. If you don't have air powered tools, you'll want to loosen the lug nuts up while the vehicle is on the ground. Jack the vehicle up, remove the lug nuts, and your wheel pulls right off. Now, you want to remove these two clips. Use a flat blade screwdriver to pry them out. Then you want to pry out this clip down here, and this clip back here. This one for us was a little more difficult to get out so we used a pair of wire cutters. They slide underneath it and then we pried it out that way.
Now, you want to pull back this inner fender. Pull back the tab, disconnect that harness, and move it up and out of the way. Then push the tab on this and pull it up and off. Now you can lift. Make sure you have a drip pan underneath, and lift your washer pump up and out and let this drain. The washer bottle is held in by two 10mm bolts; one there and one right here. We'll fast-forward as Don removes both of those.
Using an inch drill bit drill out the rivet holding the top of the washer bottle in place. Now remove the cap, and you want to make sure you get this bracket with it. Now you can pull your washer bottle down and out. You do have to twist it so you can get the neck to fit down through the hole. Up front is the old washer bottle, behind it is the new one from 1A Auto. You can see they're identical in every way, and they'll mount exactly the same.
Next, pry off your level sensor. Pull off the gasket from the sensor and push it into place on your new washer bottle. Then push the sensor into place. Before installing the new washer bottle make sure that that old rivet was completely drilled out. We're going to fast forward here a little bit as he feeds the washer bottle up into place. You want to twist it up into place and constantly check up above and make sure that it's angled properly. You have to make adjustments below and above. Once you finally get it in the right place, you want to make sure that this part clips in right back here and that this part clips in over here, so that you can bolt them back up into place. You want to replace your cover and make sure that that hole is lined up. You can either use a bolt with a nut on the other side, or you can use a rivet. We're going to go with a rivet. Just replace and tighten up those two 10mm bolts on the bottom of the washer bottle.
Pull the bottom off, push it in. Then push your washer pump down into place. Reconnect your harness and your lower harness. Then push your inner fender back into place and replace those four clips. Replace the wheel and replace the lug nuts. You want to tighten them preliminarily, lower the vehicle, and then tighten them the rest of the way. Then torque each of them in a crossing pattern to a 100 foot-pounds. If you have a wheel cover, replace it. Remove your washer reservoir bottle cap, and using a funnel we recommend one with a screen just in case something dripped into your washer fluid you want to replace all that washer fluid back into the reservoir. Then replace your cap and you're all set.
We hope this video helps you out. Brought to you by www.1AAuto.com, your source for quality replacement parts and the best service on the Internet. Please feel free to call us toll-free, 888-844-3393. We're the company that's here for you on the Internet and in person.
Shop Products

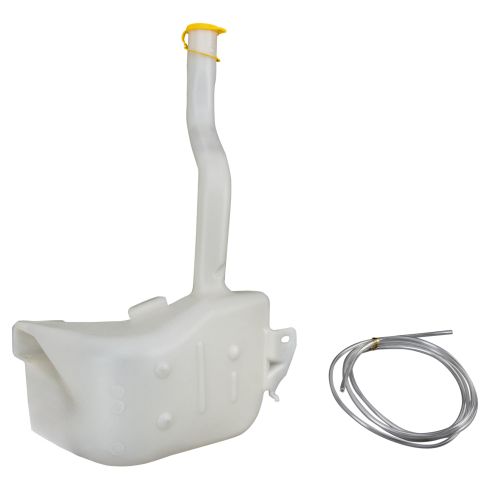
2006-07 Jeep Liberty Windshield Washer Reservoir TRQ WWA62630
- Cap
- Plastic
- No
- Yes
- Yes
- Yes

How to Remove Washer Fluid Level Sensor 1997-2005 Lexus GS300
Check out this video to learn how to replace a broken or stuck washer fluid level sensor on your 97-05 Lexus GS300. Learn from the experts at 1AAuto.com

