
How to Replace Timing Belt 2001-05 Volvo V70
Created on: 2014-03-29
Watch this video to learn how change a loose or snapped timing belt. 1A Auto's mechanics will show you how to replace the timing belt on 01-06 Volvos with the 2.5 L engine.
-
step 1 :Accessing the Belts
- Removing the two T30 Torx bolts from the cam cover
- Remove the cam cover
- Clip the wire tie
- Pry up the power steering bottle with a flat blade screwdriver
- Pull the power steering hose out of its clip
-
step 2 :Removing the Serpentine Belt
- Push the serpentine belt tensioner forward with a 14mm socket and ratchet
- Pull the belt off
- Release the tensioner
- Pull the belt out of the engine compartment
-
step 3 :Removing the Timing Cover
- Remove the 10mm bolt from the timing cover
- Pull the timing cover up and out
-
step 4 :Removing the Wheel
- Loosen the 19mm lug nuts with the vehicle on the ground
- Raise the vehicle with a floor jack
- Secure the vehicle on jack stands
- Remove the lug nuts
- Pull off the wheel
-
step 5 :Removing the Crank Panel
- Remove the two 10mm bolts inside the inner fender
- Remove the fender panel
- Pull back the inner fender
- Clamp the inner fender in place with vise grip pliers
- Remove the two 10mm bolts from the crank panel
- Pull the crank panel down and out
-
step 6 :Setting the Timing
- Put the cam cover back on
- Mark the cam timing marks with a marker
- Turn the crank pulley with a 30mm socket and ratchet
- Turn the crank pulley until the marks on the cam line up with the notches on the cam cover
- The marked teeth on the crankshaft should also line up with a post on the engine block
-
step 7 :Removing the Timing Belt and Tensioner
- Check the position of the timing belt tensioner
- Loosen the 10mm bolt in the timing belt tensioner
- Slacken the timing belt tensioner by pulling it forward with a 6mm Allen wrench
- Remove the cam cover
- Pull off the timing belt
- Remove the 10mm bolt from the timing belt tensioner
- Remove the timing belt tensioner
- Pull the timing belt partially out through the wheel well
- Clip the old timing belt with wire cutters
- Pull the timing belt all the way out
-
step 8 :Removing the Idler Pulley
- Remove two 12mm bolts from the idler pulley
- Pull the idler pulley off and out
-
step 9 :Installing the New Idler Pulley
- Put the new idler pulley into place
- Insert the two 12mm bolts into the idler pulley
-
step 10 :Installing the New Timing Belt and Tensioner
- Put the timing belt tensioner into place using the locating tabs
- Preliminarily tighten the 10mm bolt in the timing belt tensioner
- Loop the new timing belt around the crank pulley
- Wedge a screwdriver between the belt and a post in the engine block to hold the belt in place
- Loop the timing belt around the cam pulleys
- Put the timing cover into place
- Make sure the cam timing marks line up with the cover notches
- Push the timing belt tensioner to the correct position with a 6mm Allen wrench
- Holding the timing belt tensioner in position with the Allen wrench, tighten the 12mm bolt
-
step 11 :Checking the Timing
- Turn the crank pulley with a 30mm socket and ratchet
- Check that the marks on the cam line up with the notches on the cam cover
- The marked teeth on the crankshaft should also line up with a post on the engine block
-
step 12 :Reinstalling the Crank Panel
- Pull the crank panel into place
- Insert the two 10mm bolts into the crank panel
- Unclamp the inner fender
- Push the inner fender down into place
- Put the fender panel into place
- Insert the two 10mm bolts into the fender
-
step 13 :Reattaching the Wheel
- Slide the wheel into place
- Start the lug nuts by hand
- Tighten the lug nuts preliminarily
- Lower the vehicle to the ground
- Tighten the lug nuts to 100 foot-pounds in a crossing or star pattern
-
step 14 :Reinstalling the Timing Covers
- Push the cam cover back
- Push the timing cover into place using the locating tabs
- Put the cam cover into place
- Insert the 10mm bolt into the timing cover
-
step 15 :Reinstalling the Serpentine Belt
- Familiarize yourself with the serpentine belt routing diagram
- Loop the serpentine belt around the crank pulley
- Route the serpentine belt around the other pulleys
- Check that the belt is routed correctly
-
step 16 :Reinstalling the Power Steering Bottle
- Push the power steering bottle into place using the tabs
- Push the power steering hose into its clamp
- Insert the two T30 bolts into the cam cover
Tools needed
-
12mm Socket
Socket Extensions
Torque Wrench
14mm Socket
Jack Stands
19mm Socket
10mm Wrench
6mm Allen Wrench
Flat Blade Screwdriver
T30 Driver
30mm Socket
10mm Socket
Ratchet
Floor Jack
Wire Cutters
Marker / Writing Utensil
Brought to you by 1AAuto.com, your source for quality replacement parts and the best service on the Internet.
Hi, I'm Don from 1A Auto. I hope this how-to video helps you out, and next time you need parts for your vehicle, think of 1AAuto.com. Thanks.
In this video, we're going to show you how to replace the timing belt on this 2002 Volvo V70 with the 2.4 liter non-turbo engine. The items you'll need for this are a new timing belt kit from 1AAuto.com, 10, 12, 14, 19, and 30mm sockets and a ratchet with an extension, T30 Torx bit, 6mm Allen wrench, flat blade screwdriver, wire cutters, locking pliers, jack and jack stands and a torque wrench.
You want to start off by removing these two T30 Torx bolts. We'll just fast forward as Don does that. Now flip up the clip on this side and the clip over here on this side, and pull that shield off. Use your wire cutters to clip the wire tie. Then using a flat blade screwdriver, pry up your power steering bottle and pull the hose out of that clip and set the bottle aside. Your serpentine belt tensioner is right here. Using a 14mm socket and ratchet, just push towards the front of the car and this will release tension on that belt and you can pull it off. Carefully release the tensioner and pull the belt off the rest of the way.
Next, you want to remove this 10mm bolt right in here. Now pull this cover up and out. Now using a 19mm socket and ratchet, you want to loosen up your lug nuts and if you don't have air powered tools, you want to loosen them while they're on the ground, raise the vehicle, remove them the rest of the way and pull your wheel off.
Next, remove these two 10mm bolts inside the inner fender. Then, remove this panel. Now pull this panel back and using a pair of locking pliers just clamp it right here. Now you want to remove these two 10mm bolts right here and we use a 10mm wrench for this. Once those are removed, you can pull this panel down and out.
All right, the next step in this repair is going to be to set our timing marks. Now there are marks on each one of these cams, the intake and the exhaust cam as well as the crank shaft down there. You can see the crank pulley. This is how we're going to do it. We're going to put our cam cover back on and you see it's got two notches here. Install it fully, back into the clips on each side. Now what we're going to do is we're going to go down with a 30mm socket and ratchet on the crack pulley down there. You see the nut. We're going to go through the wheel well where we just took the wheel off. What we're going to do is we're going to turn it until the marks that are very subtle here on the cam, there and over here, line up with the corresponding notches in this cover. That's important but it's also important that the crank shaft notch . it has a notch and teeth lines up with a tooth . the tooth lines up with a post on the side of the engine block. If you come from over here, you can just about make it. We'll get an up close shot for you as we turn it. I'm going to go ahead now with my 30mm ratchet and socket and turn it until I get those marks to line up but before I do that I'm going to use just a marker or a red marker and make those a little bit more visible.
All right so here's the setup I'm using. Go in on the crank pulley and I'll turn clockwise, this slowly and you can see those marks starting to come up. We're getting there. Now what we're going to do is focus our attention down on the crank. It's really tough to see the mark, I'm going to try and point it out. On two of the teeth on your crank, you'll see these two notches that we have circled right here, and you want to locate those and then line them up so that this post that comes down is directly in between those two notches. When you're done, it should look something like this.
All right, the next stage of the repair is to take the belt off and in order to do that we have to loosen up on the tensioner. There's three different points of tension that we're going to set it to when we go to put the new tensioner in and we're going to use a 6mm Allen key on this elliptical here. This is very crucial that we get this right and this is temperature sensitive. Our vehicle's been running for a while now; it's in the hot. If it was cold, you'd want to set your tensioner here, right here. We'll go through this later as we do this. This is warm and this is hot. This is the way that we're going to set it when we go to put the new one in but I'm just showing you now because we have to slacken off the one that we have in the car and you'll see here that ours is indeed in the hot position, the furthest to the right tab, there. If we do this repair in reasonable amount of time, it's probably still going to be hot and that's what we're going to go ahead and set our new tensioner.
For right now, we're going to loosen up on the 10mm that goes through the tensioner and then we're going to use our Allen key to slacken it off. You only want to loosen this bolt a couple of turns. Now using a 6mm Allen wrench, just loosen that up by turning it all the way to the front of the vehicle. Now you can just remove this cover again and pull your timing belt off. Once you've got the majority of the belt off, you can remove your tensioner. Just remove that bolt the rest of the way and pull the tensioner up and out. Now, pull the timing belt down through the wheel well and, using your wire cutters, just clip the belt and pull it out the rest of the way.
Next you want to remove this pulley and it's held in with two 12mm bolts. We'll fast forward as Don removes those. Now just pull that pulley up and out.
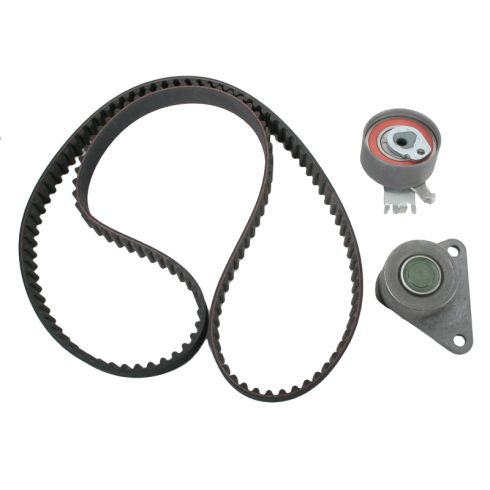
On the left are the old timing belt, tensioner, and idler pulley. On the right are the new ones from our timing belt kit and you can see they're identical and they're going to fit exactly the same. Replace the idler pulley and tighten up those two 12mm bolts.
We're going to go back in with the tensioner, the new one here, and it's important to seat it correctly. You can see this tab and this tab. These are going to go on either side of this casting right here. Put the tensioner back into place and tighten that bolt, and really you're just tightening it preliminarily, you don't want it too tight so it can still move.
Now, feed your timing belt back up and around the crank pulley. We've got the belt on the crank pulley and what we're going to do is we're going to wedge a screwdriver in between the belt and the post that comes out on the block so that the belt doesn't move or skip. This is just for purposes of installing the belt. You've got to find the spot. Now it's up in there, so now the belt won't skip on the teeth while we set it up on the pulleys up above. Now put the belt around the rest of the pulleys. Now replace the cover so that you have the notches as a reference point. You want to make sure that this line lines up with the notches as it did before. Now, we're going to go ahead and tighten or tension up the belt tensioner and lock it up into place. We're using that 6mm Allen and the 12mm socket. Go ahead and put it in there, in the slot and the engine at this point is warm. It's was hot before, so we're going to tension it to warm, which is right there in the middle. Once you've got it where you need it, go down with your 12mm socket and tighten up on that stud on the bolt. Just a quick reminder, here is the cold setting then there's cold, warm and hot. Remove the screwdriver.
All right, at this point, now, we're going to use our crank turning setup here with the 30mm breaker bar and what we're going to do is give it one full revolution, check our cam marks, crank mark and our tensioner.
Once you've checked it and made sure that all the marks like up, you can replace this panel. Then replace those two 10mm bolts that hold it into place. Now push this panel back down and replace that other panel and those two 10mm bolts.
Fast forward as Don replaces the wheel and those 19mm lug nuts and you want to tighten them preliminarily and lower the vehicle and tighten them the rest of the way and torque each of these lug nuts in a crossing pattern to 100 foot-pounds.
Now, replace this cover and you just want these two tabs to go down into these two slots. Lower the cover down into place and it helps if you push this cover back. Now, put the top cover back into place. Then replace that 10mm bolt on the side there.
Now, when you go to put your serpentine belt, this is your belt diagram. You want it to follow this order as you put it back on the pulleys. We'll fast forward as Don does this. Again, if it doesn't seem like it's going on right just refer to that belt diagram.
Now, line up these tabs and push your power steering bottle back down into place. Push the hose back into place and reclamp it. Then replace those two T30 bolts and you're all set.
We hope this video helps you out. Brought to you by www.1AAuto.com, your source for quality replacement parts and the best service on the Internet. Please feel free to call us toll-free, 888-844-3393. We're the company that's here for you on the Internet and in person.
Shop Products


Volvo High Quality Timing Belt and Component Kit Preferred Components Inc TS26331
- High Quality

How To Replace Engine Serpentine Belt 1998-2005 Volkswagen Beetle
Use the belt diagram and step-by-step instructions provided in this video to help you replace the serpentine belt on your 98-05 Volkswagen Beetle.

