
How To Replace Steering Tie Rod 2003-07 Cadillac CTS
Created on: 2012-06-11
This video will show you how to diagnose and identify a bad tie rod and also how to properly replace it yourself
-
Regarding alignments, it's suggested that you have an alignment performed after you do a replacement like this.
step 1 :Testing the Tie Rod
- Jack up one of your front wheels
- Grab it by the sides of the tire and try to move it back and forth. If you feel more play than just the steering rack moving back and forth, then your tie rod probably needs replacing
-
step 2 :Removing the Front Wheel
- If you don't have air tools, you'll want to loosen the lug nuts with the wheel on the ground
- Lift the vehicle with a jack, support it with a jack stand, and take the wheel off the rest of the way
-
step 3 :Measuring the Tie Rod
- Before you disassemble the tie rod, you want to measure the tie rod
- From a fixed point on the rack, like the end of the boot, you want to measure to the middle of the tie rod
- Measure a few times to be sure-you're going to set the new tie rod up the same length
-
step 4 :Removing the Tie Rod
- You'll see a lock nut at the end of the tie rod. Holding on to the tie rod with a wrench, use your adjustable wrench to loosen that nut about a quarter of a turn
- There is also am 18 mm bolt that nut that holds the stud on. Remove that
- Separate the tie rod from the steering knuckle by using a tie rod fork. Taking a hammer, you'll drive the tie rod fork between the rod and the knuckle
- Once the tie rod is separated from the knuckle, turn it clockwise to get it off the steering rack
-
step 5 :Replacing the Tie Rod
- The new tie rod should come with the bolt in it. Take the bolt out for now.
- Thread the tie rod onto the nut, measure from the same fixed point as before and make sure it measures the same. Take a couple of measurement.
- Also, make sure you do not twist the shaft that comes out of the steering rack. Doing so will change your alignment.
-
step 6 :Securing the New Tie Rod
- Once you have the measurement correct, then you can put the tie rod back into the steering knuckle and start the bolt on there
- The lock nut at the end of the tie rod is an 18 mm nut. Holding the stud of the tie rod with an 8 mm wrench, tighten up the nut with your 18 mm wrench
- Once the 18 mm wrench is tight, grab another wrench and hook it on there for leverage. Give it another pull just for good measure
- Torque it to 65 foot pounds
- Put your wrench onto the inner tie rod to get this locking nut back out against the outer tie rod. Tighten
-
step 7 :Replacing the Wheel
- Turn the wheels straight, and put your wheel and tire back on
- Start the lug nuts by hand at first to primarily tighten them.
- Lower the car back onto the ground
- Set your torque wrench to 90 - 95 foot pounds and tighten your lug nuts in a star pattern
Tools needed
-
Adjustable Wrench
A Piece of Pipe (for leverage)
Hammer
Torque Wrench
Tie Rod Fork
Jack Stands
18mm Socket
19mm Socket
Floor Jack
Brought to you by 1AAuto.com your source for quality replacement parts and the best service on the internet.
Hi. I'm Mike form 1A Auto, and I hope this How-To video help you out. The next time you need parts for your vehicle, think of 1AAuto.com.
To test your tie rod, what you'd want to do is lift one of your front wheels up and grab it by the sides of the tire there and kind of move it back and forth. If you feel play more than just the steering rack moving back and forth, then that's usually your tie rod is bad.
Tools you'll need are jack and jack stands, 18mm and 19mm sockets, a ratchet with a pipe or a breaker bar for some extra leverage, two large adjustable wrenches, 8mm and 18mm wrenches, tie rod fork, and a torque wrench, as well as a large hammer.
Start out by removing the front wheel, and if you don't have air tools like I do you'll want to loosen the lug nuts with the wheel on the ground, then raise your vehicle with a jack, support it with a jack stand and take the wheel off the rest of the way. Turn the wheel to make it easier to access the tie rod. Okay. So before you disassemble the tie rod, what you want to do is you want to measure from a fixed point, which I'll choose the end of the boot right here, then you want to measure to the middle of the tie rod. Okay. So, again, you're measuring from a fixed point on the rack itself, which is this clip here, to the middle of the tie rod. And you're going to set your new tie rod up that same length.
So here I just take a couple of measurements to make sure. Mine are measuring eleven and three-eighths, but it's obviously going to be different for each vehicle. Okay. Now, the tie rod is held in. There's a lock nut here. You need to grab that with a large adjustable wrench, then hold onto the tie rod itself in that slot and loosen that lock nut. Then there is a little nut here that holds the stud on, and then you need to separate the tie rod from the steering.
You put one arm through the nut here, this bolts onto the tie rod. Turn that nut about a quarter of a turn. This bolt is 18 millimeters. Take an easy way out ... so if you don't have an impact wrench you'll want to use a breaker bar or a ratchet with a piece of pipe to give you some extra leverage. Now, here, you can use either a tie rod tool only because there is limited clearance between the tie rod and the vacuum plate here. I'm actually going to use a fork. You just basically drive this fork right in that separates the tie rod and the steering knuckle.
Once you get the tie rod separated from the steering knuckle, you just turn it counter clockwise and get it off of the steering rack. Okay. The new tie rod from 1A Auto comes with a bolt, take the bolt off, and you put it back on.
Okay. It is kind of a reverse procedure. You thread the tie rod in, measure from the same point, from the end, I chose the end of the boot on the rack, make sure it measures the same distance. I take a couple of measurements. Make sure you do not twist the shaft that comes out of the steering rack because that also will change your alignment.
Speaking of alignments, we do recommend that you have an alignment performed after you do a replacement like this. Once you have the measurement correct, then you can put the tie rod back into the steering knuckle and start the bolt on there.
Okay. Now, that nut is a lock nut, so what you will want to do, or what I'm doing here, is holding the stud of the tie rod with a 8-millimeter wrench, and then using an 18-millimeter wrench to tighten up the nut.
Okay. So once I've gotten the 18-millimeter wrench tight, I grab another wrench, hook it on there, and just give it another good pull, tighten it up more before I torque it.
When I torque it to 65-foot pounds. Now, you want to put your wrench on the inner tire rod and get this locking nut back out against the outer tie rod, and then lock onto the outer tie rod and tighten so it will lock up against it.
Okay. Now, you can turn your wheels back straight, and then put your wheel and tire back on, start the lug nuts by hand first, then just preliminarily tighten them. Okay. With the car back on the ground, set your torque wrench to 90- to 95-foot pound and tighten your lug nuts using a star pattern as your guide.
We hope this helps you out. Brought to you by www.1AAuto.com, your source for quality replacement parts and the best service on the internet. Please feel free to call us toll free, 888-844-3393. We're the company that serves you on the internet and in person.
Shop Products


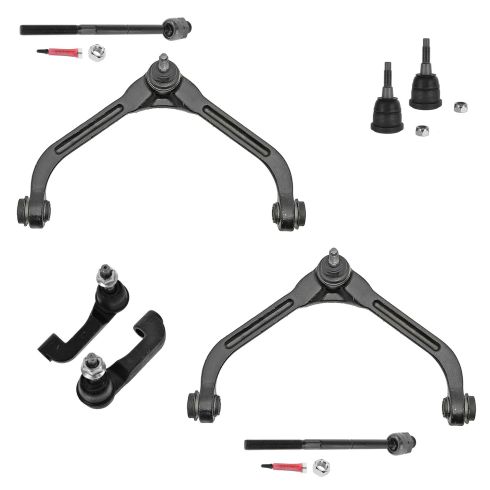
2005 Jeep Liberty Front 8 Piece Steering & Suspension Kit TRQ PSA85427
- (2) Front Lower Ball Joints
- (2) Front Outer Tie Rods
- (2) Front Upper Control Arms with Ball Joints
- (2) Front Inner Tie Rods
- 8 Piece

How to Replace Outer Tie Rod 1995-2008 Nissan Maxima
Learn how to replace an outer tie rod on your 95-08 Nissan Maxima with this helpful video from 1A Auto.

