How to Replace Roofrail Weatherstrip Seal 1971-76 Pontiac Grandville
Created on: 2010-02-24
Watch this instructional video on how to repair and replace the weatherstrip seal on a 71-76 Pontiac Grandville.
-
step 1 :Remove the old weather seal
- Remove the two Phillips screw, one on either side.
- Pull the weather seal off.
- Use a pair of needle nose pliers to pull out the pins.
- Scrape up the residue and clean the area up with mineral spirits.
-
step 2 :Install the new weather seal
- Follow the adhesive instructions and apply the adhesive.
- Evenly line the weather seal up and start clipping down the weather seal.
- Secure the ends with the two screws.
-
step 3 :Remove the side roof rail seals
- Remove the five screws, making sure not to drop them down into the quarter panel.
-
step 4 :install the new side roof rail seals
- Transfer the clip that protects the seal from the cable running across the top.
- Secure the seals with your Phillips screwdriver.
Tools needed
-
Flat Blade Screwdriver
Phillips Head Screwdriver
Paper Towels
Needle nose pliers
Brought to you by 1AAuto.com. Your source for quality replacement parts and the best service on the Internet. Hi, I'm Mike Green. I'm one of the owners of 1A Auto. I want to help you save time and money repairing and maintaining your vehicle. I'm going to use my twenty-plus years' experience restoring and repairing cars and trucks like this to show you the correct way to install parts from 1AAuto.com. The right parts, installed correctly. That's going to save you time and money. Thank you and enjoy the video.
In this video we're going to replace the convertible top weather-strip on a 71-76 GM B Body. You'll need a Phillips screwdriver, clip removal tool or needle nose pliers, screwdriver, cleaning solution like mineral spirits and paper towels. All right, so we're replacing a header bow seal on a convertible top. This here is a '74 Grand Ville Convertible. The same as any '71 to '76 Catalina, Bonneville, Caprice, El Dorado- What else? Buick, Oldsmobile. Buick, Wildcats, Centurion. Oldsmobile '88, '98. So what we've done- Where's the old seal, old guy? Hold on, we'll be back with you in a second. All right. So it's a pretty easy process. There are two screws on each side. One screw on each side. One screw on each side. Sorry, you're correct. Thank you, father.
Pull out the screw. Then what we did is just kind of pulled it up and then we ripped it off. Okay, you can see it's held in by all these pins. We just pulled the old one off and then used our pin tool. So you can either use a pin tool, which obviously you put right underneath and pry it right up. Or get your set of needle nose pliers and get on there and get underneath them. Pull them right out. I'll probably just need a screwdriver, too. But these you're not too worried about because when you weather-strip you'll have new ones. Now what we're doing is in order for the new weather-strip to stick on here you want to get as much of this old junk off as possible. We're just scraping it with some screwdrivers, and then we'll clean it with some solution. Then go to glue on and put on new weather-stripping. All right, so we just spent the last ten or fifteen minutes really cleaning up where the weather-strip is going to glue in here. We used the screwdrivers to scrape it away, and then some paint thinner, mineral spirits to wipe it down. This is where a little extra time will save you in the long run.
Getting it really nice and clean. That way your new weather-stripping will stick in there well. One issue we did find on these cars; this one has the same problem. It's rotted out there. Unfortunately, we just put a new top on this so we're going to have to rig it. But at some point we'll have to replace that bow. They do reproduce these bows. All right, so now we are following the directions on the weather-strip adhesive, which is basically you put a layer onto the car and then after this we'll actually put it directly onto the adhesive. You let it dry for a period of about thirty seconds and then put it on. Okay, so we've got our adhesive on the car; here's our bow and our weather-strip. We've got adhesive on the back side. Now, we're going to put it down, get centered. I'm going to pull- Here get that middle one done first. How far away are you from yours? This is supposed to be the middle clip. The middle clip first. Make sure it clicks in then work your way right out. Stretch, clicks in. Stretch, click, screw. Okay, what we'll do now is we'll take a three-eighths extension and hit each pin and just tap it down with a hammer. All right, so now we're just going to- All right. This one. Here's one right there. So we're going to just tap the clips a little bit. There's one. There's one. You just kind of pull up and if they're not in, you'll see them. But if they're in you really won't be able to see them anyways. So, that's it.
Now on these cars there are adjustments. So if you still have air coming through you might be able to cinch these hooks down some and pull your top closer. That's how you do it. Okay, now we'll go from the header seal to putting in the side roof rail seals. Okay so here we're in, close up. In order to find them you pull this back and you pull that up and then you can see the screw right there and there's five of those screws: roughly, front, here, one here where this metal tab is, and you want to transfer that onto your new weather-strip because it protects the weather-strip from this little cable here. Then there's going to be another one here and another one in the back. Same thing on this rear strip. One here- There's only three. One here, middle and down below. Rotate the top up a little bit more to get this lower one. Be careful when you're removing these not to drop them down into the quarter panel. When you're just removing them, keep your finger in there to make sure that you don't drop the screws. So I'll take all those screws out and go from there. Here we've got our old and our new. We're just going to take that metal clip off and put it on. There's the hole right there. Just got to make sure when we put the screw through, you put it through there and then put it on.
Okay, so now I'm going to start with this middle one; get a better view here. I'm going to put the screwdriver up in first; get it on the screw and there it is. So you've got your middle one in, and now we'll put the other four in. And we'll probably fast forward through that. Okay and then we repeat the same thing from the back. Put the screw into the rear weather-strip. Put the middle one in first. Get it going in and once that one's in put the other two in, and you're pretty much done. Okay, to sum up: the header seal, you just kind of take off two screws. One on each side and then pull it out, clean up the track, then glue it back in and pin it back in. Then the side roof seals; five screws on each side for the upper ones and three screws on each side for the lower ones. Check out our other videos, because I am going to post a video that shows you how to kind of take care of these. The reason these weather-strips need to be replaced a lot is because the windows don't get rolled up correctly and it's more due to the design of the car then anything. I'm just going to show you how to take care of your windows- Especially the first few times you roll them up. Just to help you save your weather-strips.
Brought to you by www.1AAuto.com. Your source for quality replacement parts and the best service on the Internet. Feel free to call us toll free: 888-844-3393. We're a company here for you on the Internet and in person. Thank you.
Shop Products
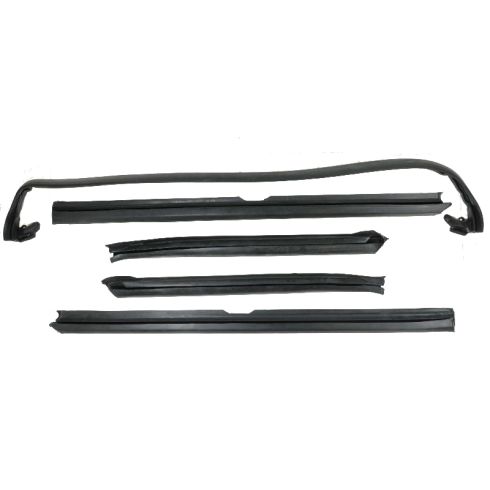
1971-76 Roofrail Weatherstrip Seal 5 Piece Set Metro Moulded Parts RR 1814
- 5 Piece Set

How to Replace Window Sweep 1995-2000 Chevy Tahoe
This video will show how to remove the door panel and side view mirror to replace the window sweep. Watch and learn the steps to DIY

