
How to Replace Rear Shock 2004-10 BMW X3
Created on: 2020-03-03
Watch this video to learn how to install new TRQ shock absorbers on your 2004-10 BMW X3.
Tools needed
-
13mm Socket
Torque Wrench
16mm Wrench
17mm Wrench
6mm Wrench
17mm Socket
Jack Stands
18mm Socket
Magnet - Extendable
Trim Tool Set
Pocket Screwdriver
5mm Hex Wrench
Locking Pliers
Flat Blade Screwdriver
Phillips Head Screwdriver
Push Pin Pliers
Drill
10mm Socket
Painter's Tape
Ratchet
T20 Socket
1/2 Inch Impact Gun
T25 Torx Driver
Remove the wheel. I'm going to use a 17-millimeter socket. When I go to remove the last lug bolt, I'm just going to support the wheel, keep it from falling. Take that out and grab the wheel, then take the wheel off. Now I'm going to support the rear suspension. I'm going to lower the vehicle onto this jack stand, the knuckle right there so that I can take that bolt out of the shock so that the suspension does not drop. Now I'm going to take this bolt out, just use an 18-millimeter socket. There we go. In the back, we have the seats already folded down, and I want to take this panel off. Just push this button right here. Grab the panel. Slide that out. There's a screw right here, and a screw right there. Use a Phillips head screwdriver. Take those screws out.
At the top part of the trim, there's a couple of push pins. I'm just going to use a trim tool and just try to pop these out, push clips, just like that, a couple of those in there, and just slide that up. You can disconnect this if you want to. A connector right here. Just grab the connector. Slide it out. There's another screw right here. Phillips head screwdriver, take that one out, and this one also right here. Now, this trim piece, use a trim tool. Get underneath here, just to pry it up. There is a clip right there and there's a couple of clips. This one has been taken out a couple of times, it's a little broken, but try to pull it straight up. This piece right here and just grab at the top, pull it towards the front of the vehicle, and then it slides up. It's clipped in right there and down there, and there's a screw right here. Use the same Phillips head screwdriver, and there's a push pin right there. Remove that. Use a trim tool and pull the center out, pull the pin out. Use a trim tool. Just try to pull this off, and then push it up. There's clips that slide in the bottom and some clips on top, and you should be able to fold that off, just like that. There's a 10-millimeter nut down here. Just take a 10-millimeter socket and get that nut off. There's a magnet.
This bracket needs to come out as well. I'm going to use a T25. There's two bolts that hold this down. All right. Take those out. Now, grab this panel, just slide it up. You should be able to slide this other piece out of the way, slide that up and out. You should be able to slide this panel up just enough so you can access the screw right here. Phillips head screw. We're going to take this panel off. I'm just going to use a pocket screwdriver. Just get underneath this little airbag cover, just like that. Take this screw out. Use a T20. I'm just going to use a trim tool and just grab the top of this, slide it out. And it is clipped in. This clip popped off, so I'll have to pop that back on. There's two screws, I'm going to get this screw out and this one. Use a Phillips head screwdriver, and you can slide this bracket out of the way, and then this will pull right up. I'm just going to take and push on the bottom of this panel and just slide it out. And it might get caught on the rug right there underneath, and it's not going to come out completely, but just slide it out a little bit. There is a connector behind this. Behind this outlet right here there is a connector, so just slide that off and you can just slide this out of the way a little bit. We just need to access right here. So, I just hold this panel out of the way, and right behind here there's some foam insulation, you might have to rip it a little bit just to gain access, and there's three nuts, two on the back side and then one on the front. Just use a 13-millimeter socket. Take those out.
Now, this rubber boot should hold the strut in or the shock in a little bit. You can pull that off, just watch your fingers. When you pull that off, the shock is actually going to fall down, just like that. All right. So, that fell down, so just watch your toes when you're pulling that out. I need to transfer over this mount to the new shock, and what you can try to do is take a 16-millimeter wrench and a 6-millimeter wrench, try to hold the shaft from spinning, try to loosen it up. If you struggle with that, this one is a little bit on the hard side. I'm just going to take a straight blade screwdriver, move this bumper down just so I can access the top part of the shock. Take some locking pliers. It's going to prevent the shaft from spinning, and take a 16-millimeter socket, take the nut off. Take this washer off, the mount off, this washer, and take the bumper and the sleeve off.
All right. Now I'm going to take this bumper and dust boot, slide this over. Take the new washer it comes with, slide that over. Put the mount on. Take this other washer. Now, this washer is concave, so you're going to put the curved part down, just like that. And it comes with a new nut. Put the nut on. Now, I don't want to put this shock in the vise because I don't want to ruin the shock, then take a 17-millimeter wrench. I'm going to use a ratchet wrench to make it easier, and I'll use a 5-millimeter wrench to hold the shaft and tighten the nut down. Then once you get the nut tightened down, you can take a torque wrench and torque this nut to 10 foot-pounds. All right. Now, slide the bumper back into position. That's good. I'll just slide this in position. The single stud goes towards the front of the vehicle, the two studs goes towards the back. And then, if you can, get this bolt in down below here, get that started, and take the nuts. Get the nuts started. All right. Tighten these up. You can torque those nuts to 18 foot-pounds.
I'm going to put this cover back on. I'll just use a pick, slide it on, and then use the pick to try to put the rest of the cover on. All right, that looks good. Now, just put the insulation back the best you can. If you have to, you can use a little bit of fabric tape or some duct tape to hold it down. Now we're just going to get this ready to go back in. Make sure you take this connector that connects to this outlet, plug that in, and just push that down. All right, while we have this panel out, I'm going to put this screw back in and snug that down. Now we can take these two pieces, take this, just slide this here, take this panel, and just slide this in position. And that's good right there. Take this bracket and slide this in position. Put the push pin in, lock it in place. Get the screw started right here, and tighten it down. That's good. And then put a screw here and right there, this one. All right. I want to put this nut back on. It's kind of hard to get on that stud, so I'll just take a little piece of tape over the socket, and then push the nut into the socket. That's going to hold it, and just slide it in position, then we can get it started. Snug it up. Put these screws back in, and tighten those down. I'll just use a push pin removal tool, take that off. Reinstall this on the back of here, just like that, and take the cover, and line it up. Just going to have to move the weatherstripping, take a screw, put that back in there, and tighten that down. Put this little cover on. Take this panel and slide it in position. Make sure it looks good down below, and line that up. Lock it in place. That's good. Take this cover, slide this in position. That's good. All right. Slide this cover on. You're going to fold this door down, so this goes over here, and then you want to slide the tabs down first.
You can try to close that door a little bit. Slide those bottom tabs first, and lock it in place. Take this connector, put the connector back in the light, and then we'll slide this in down below here first. It's going to go behind the weatherstripping, and pop it in place. Put the screw in right here. And there's three more. This one right here, right there, and the last one right here. And take this panel, slide it in position right there, and lock it in place, and tighten up the lower shock bolt. Then we'll torque this to 74 foot-pounds. Raise the vehicle and put the tire on. Take the tire, slide the tire in position, put the lug bolt in, lug studs. Torque these lug bolts to 110 foot-pounds in a star pattern so that it tightens the wheel down evenly. And I'm just going to go around again, just to double-check.
Shop Products


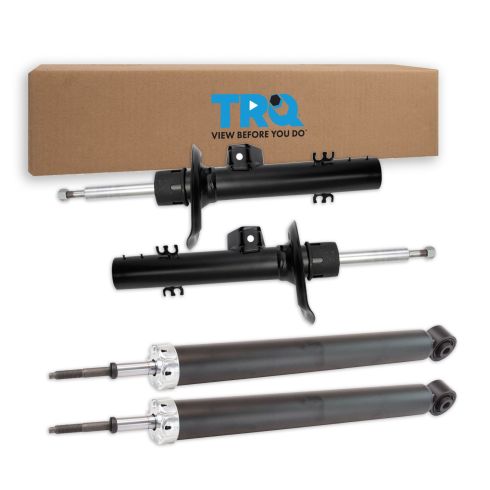
2004-10 BMW X3 Front & Rear 4 Piece Shock & Strut Kit TRQ SKA53578
- 4 Piece
- (2) Front Strut Assemblies
- (2) Rear Shock Absorbers

How to Replace Strut Assembly 2000-05 Chevy Cavalier
Watch this video to learn how to replace the front strut assembly on your 00-05 Chevy Cavalier.

