How to Replace Rear Drum Brakes 2012-19 Nissan Versa
Created on: 2018-09-19
Rear Drum Brake Shoes - How to repair, install, fix, change or replace your own worn, squeaky, fading old brakes on 2012, 2013, 2015, 2016, 2017, 2018, 2019 Nissan Versa.
Tools needed
-
Socket Extensions
Torque Wrench
14mm Socket
Pry Bar
18mm Socket
Brake Parts Cleaner
21mm Socket
White Grease
30mm Socket
Brake Grease
Ratchet
Wire Brush
Needle nose pliers
Hi, I'm Mike from 1A Auto. We've been selling auto parts for over 30 years.
In this video, I'm going to show you how to remove and reinstall these rear shoes. The reason why we're reusing them, there's still a lot of life left on these shoes. If your shoes were a whole lot thinner and they needed to be replaced, the procedure is going to be the same.
All right. We're going to take this hub cap off. We're going to use a pry bar to get in behind it. You can grab it with your fingers. That'll work, but just pry it out a little bit, pull it off. We're going to use the 21 millimeter socket breaker bar. We're going to crack these lug nuts free. Just get them a little bit loose. We don't want to take them off completely.
There we go. Now, we're going to raise and support the vehicle. You want to keep in mind when doing this job, you don't want to have the parking brake on. So, it's a good idea to chock the front wheels.
Now, we'll take these lug nuts off. Now, we'll take the wheel off. Now, we have to remove this cover. We're going to use a scraper. You could use a chisel or a real thin screwdriver and a hammer. I'm just going to tap it right here. Might be a little easier if we go from this direction. That's just separating, the cover, right there. We'll just move over a little bit and tap it from here. Pop it right off. Now, we're going to remove this barring nut with 30 millimeter socket and a breaker bar.
Now that I got it a little bit loose, we're going to use a ratchet. Pull that nut off. Now, we're going to pull with both hands and just slide this out just like that. I'm going to take some pliers like these that have a little hook on them and they're going to take these springs off. Start with the bottom one. You could use needle nose, but the ones with the hook is a little bit safer because then it hooks on to the spring. Set that aside. It's always a good idea to do one side at a time, so that in the case when you take it apart and you don't know where something goes, you can always reference the other side.
Next, we'll take this spring off. Going to grab it right here. Do similar. Just going to push it, pull it off just like that. Set it aside. Next, we need to take these two clips off. These can be a little tricky. If you have a trim tool, you can get in there. Just be careful because the spring can go flying, the spring clip. I'm going to take some needle nose pliers and just compress this spring clip, pull it off just like that. I can take this adjuster. Remember how it goes in, so when you set it aside, set it aside so that you remember which way it goes.
Next, we'll take this spring clip off. Use a needle nose again. It's a good idea to wear safety glasses too when you're doing this in case it goes flying. Squeeze it and then pull it off. This shoe will just come off like that. This shoe is attached. This is what activates your parking brake. This is the parking brake cable. To pull this off, you're going to pull this spring back. It's going to be a little bit tricky, and then pull that off, and then watch your fingers. Let that go. The new shoes should have this attached to it.
While this is all apart, I can take some brake parts cleaner and clean it off. Make sure not to breathe in any of the brake dust. We could've did this before we took the brake shoes off as well. These were really not that dirty, but just going to let that dry.
We want to take a wire brush and clean these contact areas where the shoes actually contact the backing plate. You could use some sandpaper or some emery cloth to clean those up. Those six areas right there. Wipe them down with a rag. I'll take a little bit of brake caliper grease and just put just a little bit on. You don't want to put too much on. Just coat it just like that.
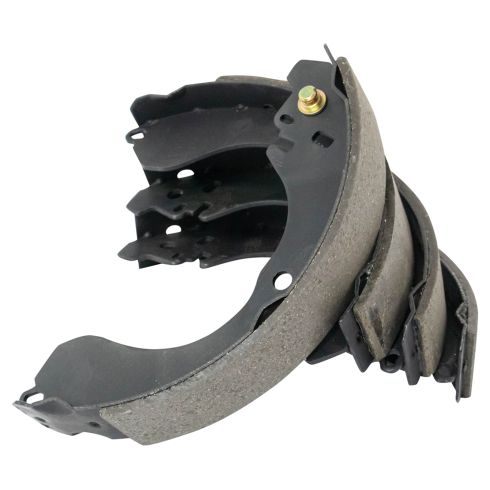
These are the two shoes. This one with this lever on it is always going to be the back shoe. Another thing you can tell is the primary shoe or the first shoe is going to be the smaller one. The secondary shoe is the bigger one. So, this will go on the back. This one will go on the front.
We'll start with the secondary shoe. The way this lever is going to hook up to this parking brake cable, it's going to go that direction. We're going to push back on the spring and slide this through like that. That's going to go just like that and we can line this brake pin up. This is what's going to secure the pad on, the shoe on. Slide that through there like that.
You can take this clip, you can try to push it on, get it on like that or we can take our needle nose pliers and crush this down and slide it over. Slide it over the pin and lock it in. Pull this shoe up just like that. So, that's in position. This little area of the shoe goes into where the wheel cylinder is. This is the wheel cylinder. That's what actually pushes the shoes out when you step on the brake peddle.
Now, we'll install this front shoe or the primary shoe. Get that in position there. With the clip, try to push it on. Just use the needle nose. It's a lot easier. Squeeze this. Push it on like that, and then we'll get it in position just like that.
All right. Now, we're going to reinstall the self-adjuster. If you're replacing the shoes, you're going to want to screw this in so that the shoes are in the proper position so that when you put the drum on, they slide on easier. How this works is when the brakes are released, it actually moves this spring and it'll adjust it out.
We're going to slide this over here and this is going to slide over here. Bring the shoe out just like that. I'm going to install the spring. We're going to slide one end with the hook into the primary shoe, the front shoe. Then, the back end, I'm going to use the needle nose pliers. Going to grab the hook like that. Just be careful when doing this. Just slide it and get it in the hole. Just push the spring in. It's almost there. It's right on the corner.
All right. We got the top spring in. Now, we're going to install the lower spring. Ones going to go in the secondary shoe right here. Clip that in there, and then we use our needle nose pliers get it on here and pry it over, slip it right into that hole, and it's all set.
Now, we're going to take the shoes make sure they're centered. We're going to have to go up a little bit, make sure it's in the middle of where the wheel cylinder is. This sides down a little bit. Just tap it up a little bit. That should be good. When we put our drum on, if the drum slides on easily or too easily, we can adjust the adjuster. If it's sliding properly, then we're good to go.
Next, we're going to install the drum. Slide this on. Make sure it spins pretty good. This drum spins a little bit easy and it's not touching the brake shoes at all, so I'm just going to pull it off. I'm just going to adjust the adjuster out a little bit.
To adjust it out a little bit, I'm just going to slide this down. I'll just use the screwdriver. I'm going to slide this adjuster down. That's going to push the shoes out a little bit. All right. That's pretty good. And, if it was too tight, you would turn the adjuster the other way. And, that's pretty good. We'll leave that like that.
Next, we're going to take the nut, install the nut. All right. I'm going to use a 30 millimeter socket and a ratchet. I'm going to snug up this bolt. Just going to spin the drum while I'm doing this. Next, I'm going to use a torque wrench. I'm going to torque it to a 177 foot pounds. Just going to spin the drum while I do that, so that the barrings seats pretty good. It's spinning good.
Next, we're going to install this dust shield. Just going to line it up. If you had a socket that fit around this, that would be good to use to hammer it on. I'm just going to tap it on lightly. Try not to mess anything up. I can take a screwdriver, tap it on, go all the way around. It's all set.
Now, we're going to install the wheel. Slide that on. Put the lug nuts on. I'll just snug them down with a 21 millimeter socket and a ratchet. Then, we'll lower the vehicle down and torque them.
Now, we're going to torque these lug nuts with a 21 millimeter socket and a torque wrench. We're going to torque them to 84 foot pounds in a star pattern or a cross pattern, so that the wheel gets tightened down evenly.
Now, we're going to install the hub cap. You want to find this groove, that's where the valve stem goes. Line that up with the valve stem, hold the hub cap on, just give it a little tap. You can use a rubber mallet or the palm of your hand.
Thanks for watching. Visit us at 1AAuto.com for quality auto parts, fast and free shipping, and the best customer service in the industry.
Shop Products

How to Replace Rear Parking Brake Shoes 2000-13 GMC Yukon
Watch this video to learn how to install new parking brake shoes on your 2000-06 GMC Yukon.

