
How to Replace Rear Brakes 2007-09 Audi A4
Created on: 2016-05-04
Find out how to remove and install new rear brake pads and brake rotors with this how-to on the 07-09 Audi A4
-
step 1 :Removing the Wheel
- This step is optional to make the repair a bit easier
- Pry off the center cap with the Audi pick removal tool
- Loosen the 17mm lug nuts with the vehicle on the ground
- Raise the vehicle with a floor jack
- Secure the vehicle on jack stands
- Remove the lug nuts
- Pull off the wheel
-
step 2 :Inspecting the Brakes
- Turn the rotor by hand or turn the steering wheel to turn the rotor
- Check the thickness of the brake pads
- Check the brake pad wear indicator
- Check for gouges on both sides of the rotor
-
step 3 :Removing the Brake Pads
- Remove the top 13mm bolt from the brake caliper and loosen the bottom
- Hold the hex side with a 15mm wrench if it starts to spin
- Pry the caliper back with a pry bar
- Pry the brake pads off
- Turn the caliper piston clockwise with needle nose pliers
-
step 4 :Removing the Brake Rotor
- Remove the upper M8 Allen bolt from the brake caliper bracket
- Jack up underneath the control arm to support the suspension
- Place a 21mm wrench onto the backside nut of the shock
- Remove the 21mm bolt from the bottom of the shock
- Pry the shock from the control arm
- Lower the jack
- Move the shock
- Remove the lower M8 Allen bolt from the brake caliper bracket
- Remove the 13mm bolt from the caliper bracket
- Remove the caliper bracket
- Tie the caliper to prevent hose stress
- Remove the T25 screw from the rotor
- Pull the rotor off
- If the rotor will not come off, thread a lug nut and strike the hub area of the rotor with the ball end of a ball peen hammer
- Rub anti-seize around the hub
-
step 5 :Installing the New Brake Rotor
- Slide the rotor on
- Thread on one lug nut to hold the rotor in place
- Insert the T25 Torx screw into place
- Clean the brake pad slides with a wire brush
- Put the bracket back into place
- Start the bolts by hand
-
step 6 :Installing the New Brake Pads
- Apply grease to the brake pad tabs
- Install the new brake pads into the bracket
- Put the caliper on
- Thread bolts by hand
- Tighten 13mm bolts to 30 Newton Meters or 26 foot-pounds
- Tighten the M8 Allen bolts to 70 Newton Meters or 52 foot-pounds
- Jack up underneath the control arm so the shock bolt hole lines up
- Insert the bolt, washer, and nut into place
- Jack up underneath the control arm so the car is in the right position
- Torque the bolt to 110 foot-pounds and one quarter turn
- Lower the jack
- Clean off the rotor
-
step 7 :Reattaching the Wheel
- Slide the wheel into place
- Start the lug nuts by hand
- Tighten the lug nuts preliminarily
- Lower the vehicle to the ground
- Tighten the lug nuts to 90 foot-pounds in a crossing or star pattern
- Reattach the center cap
-
step 8 :Testing the Brakes
- Pump your brakes repeatedly until they feel firm
- Test your brakes at 5 miles per hour and then 10 miles per hour
- Road test the vehicle
Tools needed
-
13mm Socket
Socket Extensions
Torque Wrench
Hammer
15mm Socket
17mm Socket
Jack Stands
Brake Caliper Piston Rewind Cube Tool
Brake Parts Cleaner
21mm Socket
Audi Wheel Cap Removal Tool
8mm Allen Wrench
M8 Bolt
Ratchet
Wire Brush
Floor Jack
Needle nose pliers
1/2 Inch Breaker Bar
T25 Torx Driver
Brought to you by 1AAuto.com, your source for quality replacement parts and the best service on the Internet.
Hi, I'm Mike from 1A Auto. I hope this how-to video helps you out, and next time you need parts for your vehicle, think of 1AAuto.com. Thanks.
In this video, we're going show you a rear brake job on this 2007 Audi A4, same for 2006 to 2009 A4, as well as other Audi models. We show you on the driver side. The passenger side is the same procedure. We recommend you always do this in pairs. Items you'll need include new brake pads and rotors from 1AAuto.com, center cap removal tool, 13mm to 21mm sockets with ratchets and extensions, a spiral caliper reset tool, or you'll see how I use large needle nose pliers, breaker bar, or tire iron, T25 Torx, an M8 Allen bit, torque wrench, hammer, brake grease, and brake cleaner, and jack and jack stands.
Start by removing the wheel. Remove the center cap. This vehicle, you need the special tool, which we sell under VWXXX00001. You could also, if you have one in your tool box, use a pick tool. Remove the cap and remove your five 17mm lug bolts. If you don't have the benefit of air tools, loosen the lug bolts on the ground, with your tire iron, or a 17mm socket with a breaker bar, then raise and support the vehicle. Remove the lug bolts the rest of the way and remove the wheel and tire.
Once you have your wheel off, you can check the condition of your brakes. You can check your rotors by running a fingernail up and down them, feeling for any deep groves. This has some pretty decent ridges on the edges, as well as a few deep grooves in it. You can look in and see your brake pads. You can see the other brake pad through here. The brake pads on this still have some life left, but are a little thin, so we're going to end up replacing the brakes on this.
If you're just looking to change your pads, you can remove this 13mm bolt using either a socket and ratchet or an open end wrench. You'll want to loosen up this 13mm bolt down here; you'll need an open end wrench for that. When you remove this one, you'll also want to hold this hex side with a 15mm wrench if it starts spinning. With that bolt on the top removed, and this one loosened, your caliper should pivot down.
Ours is being a little bit ornery here, so we'll use a pry bar and pivot it out of the way. At this point, you can pull your outer pad out and your inner pad out. To force the piston back into the caliper, there's a couple notches. There's actually a tool you can use that you can put on the end of a 3/8"� drive extension and use to turn it. If your calipers are compliant, you can also just take a set of pliers, turn it clockwise, and it will go back down into place.
Once you get the piston back in, you could just put your new pads on if you're just looking to do pads. We're also going to replace the rotor, so we're going to remove this T25 screw here, and we're going to remove the two M8 Allen bits that hold the caliper bracket. The lower one will help if you remove the bottom of the shock, which we'll show you.
We're going to disconnect the bottom of the shock, so we're just going to jack it up a little bit and support the suspension. Make sure the shock isn't holding it up. 21mm wrench: feed it in and put it on the back side nut on the shock. With our 21mm wrench in place, 21mm socket, breaker bar, and remove this. Once it comes loose, it gets pretty easy, but we're going to change over to air tools. Pry the shock from the control arm, and then you can slowly let your suspension down the rest of the way. Now you can move that shock out of the way.
Basically, remove anything you can to try and drive this bit in as far as you can so you don't end up stripping the head of the bolt. We're going to remove this bottom bolt the rest of the way so we can separate the caliper.
Take the bolt out and remove the caliper bracket. I'll just use a bungee, or some wire ties, or even string a rope and just bungee the caliper up and out of the way so there's no stress on the hose. Remove this bolt that holds the rotor with a T30 Torx driver. All right, if your disc isn't coming off, you can put a lug nut on. That way, when you hit it, it will not just fly off.
You want to put some anti-seize around the hub, and then the new rotor from 1A Auto goes right up and in. I'm just going to put a lug bolt on just to hold it for right now. Put your T30 Torx screw in place.
All right, check out your caliper bracket. You want to make sure these are nice and free, and if they move freely don't do a thing to them. Just leave them be and then put, if your pads come with new slides, put the slides or clean up your old slides. You just want to make sure that you center them, press them on. Just put the caliper bracket back in place and push your bolts back in. Put this down just to get it out of my way so I can get to this top one, and then I'll re-support this.
Here are the old pads from the vehicle, new ones from 1A Auto. Actually, the old pads are still in okay shape, but the new ones from 1A Auto, if your pads are worn down, they're an excellent replacement. They're going to fit just like the original.
Put a little brake grease on the ends of the tabs here where they're going to contact the slides and over here, and then on the back. We'll put this one in the front and just repeat the same thing for the other pad. That brake pad's in place, and put your caliper in place and bolt it. These can be tightened up to 30 newton meters, or 26 foot-pounds. Make sure that the guide bolt's not spinning.
Tighten these hex bolts to 52 foot-pounds or 70 newton meters. Use some brake cleaner and clean off the rotors. Make sure there's no residue on them. Just tighten them preliminarily. Torque your lug nuts to 90 foot-pounds using a star pattern. Find the largest area to work between the slots and the largest area between the tabs.
Whenever you do work on brakes, make sure you pump your brakes. Get a nice firm pedal and do test stops from 5 and 10 miles an hour before road testing your vehicle.
Thanks for tuning in. We hope this video helped you out. Next time you need parts for your car, please visit 1AAuto.com. Also check out our other helpful how-to and diagnosis videos.
Shop Products

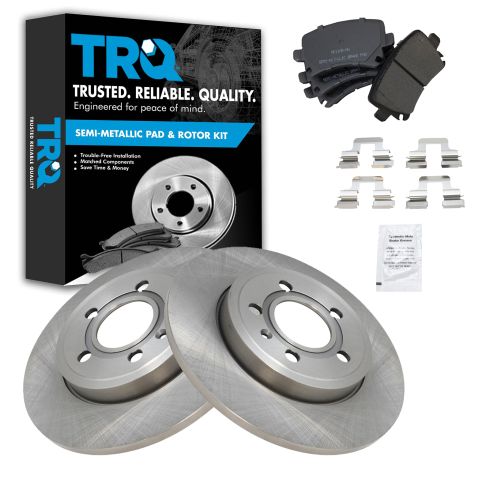
Audi A4 A4 Quattro Rear Semi-Metallic Brake Pad & Rotor Kit TRQ BKA11614
- Semi-Metallic
- Solid
- 11.34 in. (288mm)
- 5 Lug
- (1) Rear Semi-Metallic Brake Pad Set with Contact Point Grease & Hardware
- (2) Rear Brake Rotors

How to Replace Rear Brakes 2013-17 Honda Accord
Watch this video to learn how to install new engineered to fit TRQ rear brake rotors and pads on your 2013-17 Honda Accord.

