
How to Replace Rear Brake Pads and Rotor 2003-11 Ford Crown Victoria
Created on: 2011-02-28
Watch this video to learn how to replace the rear brake pads and rotors on your 03-11 Ford Crown Victoria, or Mercury Grand Marquis
-
step 1 :Remove the wheel
- Loosen the lug nuts with your lug wrench or 13/16 inch socket and ratchet
- Raise and secure the vehicle
- Remove the lug nuts and wheel
-
step 2 :Remove the brakes
- Unbolt the two 10 mm caliper bolts
- Use a flat blade screwdriver to compress the caliper pistons to get the caliper off the rotor
- Pry out the brake pads with your flat blade screwdriver.
- Remove the rubber plug behind the hub to loosen the emergency break with a screwdriver.
- There is a star shaped gear that you turn with the flat blade screwdriver to loosen it.
- Use a pry bar to apply outward pressure to the rotor and a hammer to break the rotor loose.
- Clean up the emergency break adjustor with a bit of penetrating oil.
-
step 3 :Install the new brakes
- Put the rotor back on, cleaning the rotor with brake cleaner before hand.
- Tighten the emergency break with a flat blade screwdriver
- Install new brake pads into the brake caliper.
- Apply a small about of anti-seize grease to the edges of the pads to get them into the caliper
- Work the caliper back onto the rotor.
- Bolt the two 10 mm bolts on the caliper and torque to 20 ft lbs.
-
step 4 :Put the wheel back on
- Put the wheel on and hand tighten the lug nuts
- Lower the car and torque the lug nuts to 100 ft lbs
- Pump the brakes a few times to recompress the caliper pistons.
- Do a couple 5 to 10 mile an hour stops in the drive way to make sure your brakes are working properly before you road test it.
Tools needed
-
Hammer
Flat Blade Screwdriver
Torque Wrench
Rust Penetrant
Pry Bar
Jack Stands
Anti-Seize Grease
10mm Socket
Lug Wrench
Ratchet
Floor Jack
Brought to you by www.1AAuto.com. Your source for quality replacement parts and the best service on the internet.
Hi I am Mike Green. I am one of the owners of 1A Auto. I want to help you save time and money repairing or maintaining your vehicle. I am going to use my 20 plus years experience restoring and repairing cars and trucks like this, to show you the correct way to install parts from 1aauto.com. The right parts installed correctly; that's going to save you time and money. Thank you and enjoy the video.
In this video we are going to show you a rear brake pad and rotor removal and replace on this 2004 Crown Victoria; basically the same as most of this generation vehicle with the rear disc brakes. Tools you will need are a large flat blade screwdriver, a 13/16 inch socket and ratchet or tire iron, jack and jack stands, 10mm socket and ratchet, brake spoon, and a pry bar and hammer if your rotors are frozen to the axle.
First you want to pop your center cap. Then you want to unscrew these caps. You may need to use a wrench to loosen them up first. If you are using hand tools, you want to have the vehicle on the ground. Loosen up your lugs nuts and then jack up the vehicle, secure it, and remove the lug nuts. I'm using an air wrench. There's two 10mm bolts in behind. One right here and one right here. Now what you want to do is take a large screwdriver and you got to put it right in here. You can kind of pry the caliper out like that. What that does is it actually pushes the piston back in to the caliper, which you need to do before you put new brake pads on.
The caliper should be nice and loose. There is a little bracket here, you push down, and pull your caliper up and off. Then your brake pads, the inside one should just pull right out. Use the screwdriver and you pry these little indentations right here, and your outer one comes right out. You can lay your caliper back there. As you can see, our rotors have already been resurfaced so we're not going to replace them. If you did need to take your rotors off or replace them, what you would want to do first is come back here and remove this little rubber plug, which you can usually do with your finger or a screwdriver. Then you are going to loosen up your emergency brake. I am going to show you this with the rotor off because it is just easier to understand.
There is where that hole comes through. You can see there is a little adjuster here. To loosen your brakes up, you want to get your screwdriver in there and you want to grab hold of that adjusting star and then go towards the rear end with your screwdriver. That's the same for both sides. On this side, this is the passenger side, the star is up here. On the driver side all they do is flip this adjuster around and the star is down lower. To loosen the E-brake shoes, you want to grab hold the star and push towards your axle and loosen it up quite a bit.
The proper tool to do this is a brake spoon because it has the correct angle to it. You can also use just a regular screwdriver. Basically you want to look inside there, on the passenger side it's up high. You just want to get in there with a screwdriver and loosen it right up. You got to feed it in there, grab the tooth, and pull it. You basically just do it one tooth at a time. When we took this car apart, we actually ran into an issue where the rotors were basically frozen on to the axle. First part of that is making sure you loosen up your emergency brake. The next part what you want to do is probably have two people, have a helper, large crowbar, feed right in here, and obviously this is going to come off easy because we've already had it apart.
What you would do is put a lot of outward pressure here and then use your hammer to bang really hard on the rotor. What that does is it vibrates it and it frees it up. Eventually you can pry it right off. Like I said, I've already had this vehicle apart so my rotor comes off. While you have the rotor off what you'll may want to do is clean up that adjuster for the emergency brake. Put a little bit of oil on it so it moves freely. Obviously putting it back on, put the rotor on, make sure you get it all the way on. Tighten that E-brake back up. I'm going to use my spoon because it's a little easier. Tightening is grabbing the star and moving it back. Basically I want to tighten this up until I can't move it very easily. I can feel some friction so it's pretty well adjusted. Don't forget to put your little plug back in for the emergency brake adjuster.
Now I put it back together. New pads from 1AAuto just like the old pads. The inside has a little clip on it. You just put it in the caliper and force it in. This locking bracket you want on top. For your outers there is a left and a right side. It just kind of goes in, push the inside down. Once you've got the pads on, before you put it together you want to make sure these slides are sliding back and forth nice and easy. You will probably want to press them out a little bit to get it on. One of the pads has kind of teeth so you want to get the bottom down on first. Make sure it's all the way in. Pull this slide out, and I'm pulling on the top here as I'm pushing it down in. now it's locked into place. Now my two bolts. Basically put them in; you may need to shake it around a little bit. They should go right in.
Now I am going to tighten these up to 20 foot pounds. I know that doesn't sound like a lot and it really isn't. These bolts just hold the caliper in place. This big heavy bracket here is what really takes the braking pressure. You only take them up to about 20 foot pounds. Now we're ready to put our wheel and tire back on. We'll fast forward through putting the tire back on. Put the tire on then thread the lug nuts on by hand first. Tighten them up preliminarily then lower the car down. You want to torque the lug nuts to 100 foot pounds. Then put the wheel cover on. Very important, whenever you do brakes before you drive the car anywhere, pump the brakes a bunch of times and then make sure that the brakes hold the car when you put it in drive or reverse. Do a stop from five miles an hour and ten miles an hour just to make sure the brakes are all reseated before you take it out and road test it. Put the cap back on and put the center cap back on.
We hope this helps you out. Brought to you by www.1AAuto.com. Your source for quality replacement parts and the best service on the internet. Please feel free to call us toll free 888-844-3393. We're the company that is here for you on the internet and in person.
Shop Products


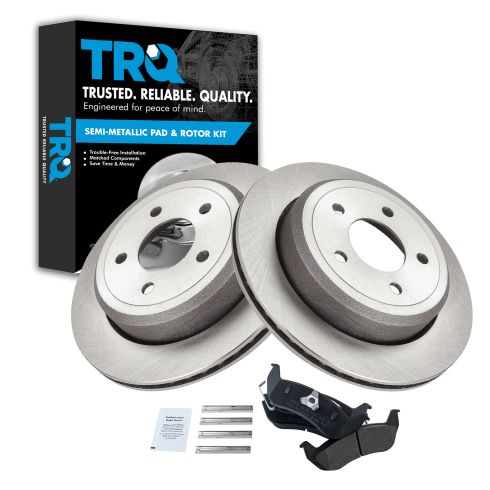
Ford Mercury Rear Semi-Metallic Brake Pad & Rotor Kit TRQ BKA10659
- Semi-Metallic
- Premium Posi
- (1) Rear Semi-Metallic Brake Pad Set with Contact Point Grease & Hardware
- (2) Rear Brake Rotors

How to Replace Rear Brake Backing Plates 2002-09 Chevy Trailblazer
Watch this video to learn how to replace the rear brake backing plates on your 02-09 Chevy Trailblazer or GMC Envoy.

