
How to Replace Passenger Side CV Axle 2006-11 Honda Civic
Created on: 2017-12-11
How to repair, install, fix, change or replace broken, worn, or vibrating CV axles on 2008 Honda Civic.
-
step 1 :Removing the Wheel
- Loosen the 19mm lug nuts with the vehicle on the ground
- Raise the vehicle with a floor jack
- Secure the vehicle on jack stands
- Remove the lug nuts
- Pull off the wheel
-
step 2 :Removing the Axle Nut
- Insert a punch into the divet
- Tap the punch with a hammer
- Have an assistant hold the brakes
- OR Remove the center cap
- Replace the wheel
- Thread the lug nuts on
- Lower the vehicle to the ground
- Loosen the axle nut with a 32mm socket and breaker bar
- Raise the vehicle with a floor jack
- Secure the vehicle on jack stands
- Thread the nut on a few turns
-
step 3 :Removing the Axle
- Remove the 17mm bolts from the control arm
- Separate the lower ball joint from the control arm with a pry bar
- Tap the end of the axle with a hammer
- Remove the axle from the knuckle
- Have a drain pan ready
- Pry the axle out of the transmission
-
step 4 :Installing the Axle
- Insert the axle shaft into the transmission
- Tap the axle in with a dead blow hammer
- Insert the axle into the knuckle
- Tighten the axle nut by hand
- Insert the ball joint into the knuckle
- Tighten the 17mm bolts to the control arm
- Torque the nuts to 43 foot-pounds
- Tighten the axle nut with a ratchet
-
step 5 :Reattaching the Wheel
- Slide the wheel into place
- Start the lug nuts by hand
- Tighten the lug nuts preliminarily
- Lower the vehicle to the ground
- Tighten the lug nuts to 80 foot-pounds in a crossing or star pattern
- Tighten the hub nut to 134 foot-pounds
- Reattach the center cap
Tools needed
-
32mm Socket
Hammer
Dead Blow Hammer
Torque Wrench
Pry Bar
17mm Socket
Center Punch
19mm Socket
Ratchet
1/2 Inch Breaker Bar
Hi, I’m Mike from 1A Auto. We’ve been selling auto parts for over 30 years!
Use a 19 millimeter socket and a breaker bar to loosen the lug nuts while the vehicle's on the ground. Raise and support the vehicle. These lug nuts loose, I can take just a socket and remove them all. I'll put the wheel and tire aside. We need to unstick the axle nut. So I can actually turn the whole assembly up this way.
Take a screwdriver that fits in here, or a punch. This is an old screwdriver. Just going to pump it in here. Just pry it up a little bit—it doesn't take much. You just need to make it so that this will now turn. Looks like somebody's punched it down here. It shouldn't be too much of a problem though.
Going to reinstall the wheel and then lower the vehicle to the ground to loosen the axle nut. If you've got somebody to help you, you can have them put their foot on the brake and keep this from turning while you try to remove the axle nut. Or, if you're working by yourself, you can do this with the wheel. So just flip it around, take the end of a hammer or a screwdriver, and just pop out this cap. We'll put that aside and put the wheel back on. Just got to thread the lug nuts back on. They don't have to be super tight. We’re just going to lower it back down to the ground so the wheel is going to hold the axle for us. And then we can loosen the nut.
We're going to lower the vehicle back down to the ground. Take a 32 millimeter socket and a large breaker bar and free up this axle nut. Now we can put it back up in the air and take the wheel off. Just going to remove the wheel again. Take some rust penetrant, just spray these before I remove them. Just using the towel so it doesn't drip all over the floor, spray the top of that bolt. There's two nuts and a bolt that needs to be removed. Using a breaker bar and a 17 millimeter socket, loosen these nuts and the bolt. These are on there pretty tight, so I switched to a bigger breaker bar for more leverage. That's all it needed. I just switched to a ratchet to make removing these quicker.
Need to separate this lower ball joint from the control arm. Put a pry bar in here, and pry it up through here. There you go. Actually easier to push it towards the back of the car. Let's see. Put the pry bar in here. I'm struggling a bit to get this out of here because the axle shaft hasn't been pushed out of the hub yet, so I'm just going to thread out the nut a bit. If you get a punch, you can hit it right in this little center hole. If not, just thread the nut out and use a dead blow hammer. That should start to move.
You don't want to hit directly on the end of the axle shaft in case you mushroom it out, and then it won't come out of the hub. That's why you want to hit on the nut. I'm going to take the nut out now. That seems like that's going to move. Go back to our pry bar and the lower control arm. Pry this down and pull the suspension assembly out. Grab on the axle shaft here, push out, rip it out like that, and we'll just let that sit just like that.
A drain pan ready for any transmission fluid that might drip out when we remove the axle from the transmission. So goes into the transmission up here. Going to use this pry bar and slide it underneath the edge of this. Going to pop it out. Just kind of pry it out. Free from the transmission, you want to pull it straight out. This is kind of in the way. It's pushing on it, so you got to push that up, kind of lift this out. You might have to reach in under here and grab the axle shaft with the other hand and just guide it out. You want to come out as straight as possible as to not damage the seal on the transmission. And just guide this out from underneath the car. It's really big.
Here's our original axle shaft, and our brand new one from 1AAuto.com. There's no core charge to this. A similar design, has the same splines and circle clip. Follow it out, the outer part is the same on both, comes with a new axle nut, which should fit in the vehicle and work great for you.
Going to guide the axle shaft into the engine compartment, being careful not to rip the boot. Have to reach in with your hands and guide it in. I'm going to go underneath here and look at the transmission opening and the seal. I want to guide it in nice and straight so I don't damage the seal. I'm happy that those splines are lined up in the transmission. Going to take our axle shaft and a dead blow mallet with a nut on the end. If I can see where it's going on the transmission, I'll give it some taps to seat it. And there it is. Seated in place. Take the axle nut off, put this aside.
Put the CV axle into the hub. Just going to pull it out with my arm and might have to bend this a bit, like that. And then take a little bit of pushing and strength. Just going to line this up. Might have to spin this a little bit. It's lined up nicely. Actually, pull it out a little bit. And now I want to spin this this way because I need to lower this.
I'm going to use the pry bar and lower the pry bar and push down on the lower control arm, and spin this up, get it kind of lined up. See if we can tap it up a little bit. Let's see. There you go. I'm just going to capture the new axle nut on here so the axle doesn't back out of the hub. Install the bolt. Install which ever one's easier.
If it's easier to install these nuts first and pull the ball joint down; if it's easier to afterwards install this bolt, either way will work. Just going to spin them down. Just going to use the ratchet to snug these down. With these snugged down, I can torque them to 43 foot-pounds. I'm going to start with the front nut, the rear nut, and then the bolt. I'm just going to use the socket with the axle nut, and just snug this down with the ratchet.
Going to reinstall the wheel, still with our center cap removed, because with the wheel and tire on the ground, we'll torque the axle nut and then stake it in place. Torque the lug nuts in a cross pattern to 80 foot-pounds. Now I'll torque the axle nut to 134 foot-pounds. Now we need to punch the nut down into this opening in the axle that will lock it and keep it from spinning off. That's better. That's where I wanted it. Finally, reinstall your center cap, just pops into place.
Thanks for watching. Visit us at 1AAuto.com for quality auto parts, fast and free shipping, and the best customer service in the industry.
Shop Products


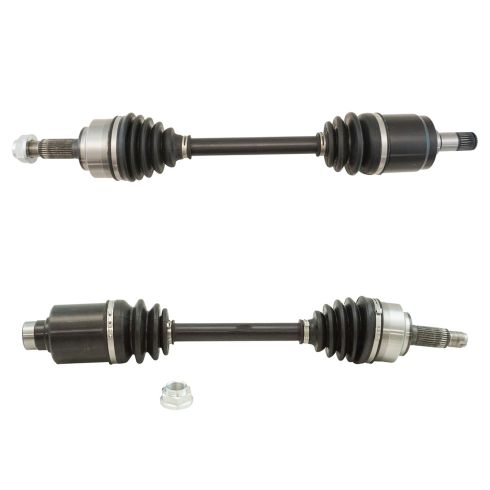
2006-11 Honda Civic SI L4 2.0L Front Driver & Passenger Side 2 Piece CV Axle Assembly Set TRQ CSA70757
- 2 Piece
- (1) Front Driver Side CV Axle Assembly
- (1) Front Passenger Side CV Axle Assembly

How to Replace Front Passenger CV Axle 2011-14 Hyundai Sonata
New CV Axle Shaft from 1AAuto.com. How to replace the front passenger CV Axle on the 11-14 Hyundai Sonata.

